Exploded View
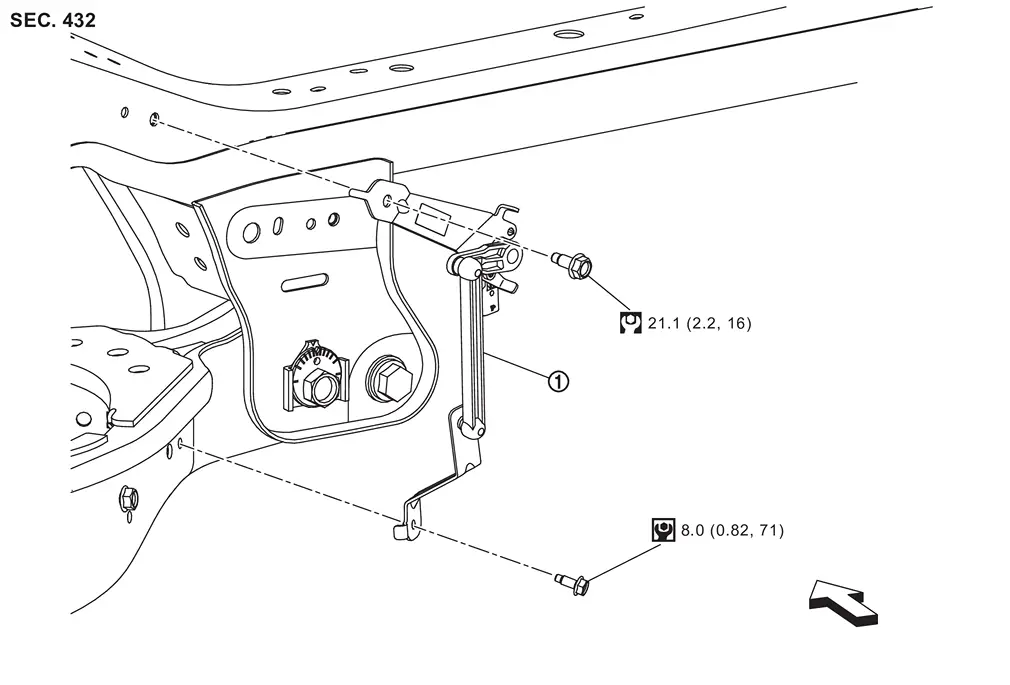
 |
Rear height sensor | ||||
| :vehicle front | |||||
 |
:N·m (kg-m, ft-lb) | ||||
 |
:N·m (kg-m, in-lb) | ||||
Removal and Installation
REMOVAL
WARNING:
-
When removing the air suspension component parts, always follow the removing procedure since the vehicle height may accidentally drop and it can lead to personal injury.
CAUTION:
-
Never disassemble the rear height sensor.
Start engine.
Turn auto height mode control switch to ON, shift the shift position to N and set to normal height.
Turn OFF the electronic air suspension function. Refer to Operation.
Stop engine.
Lift up the vehicle.
Disconnect rear height sensor harness connector.
Remove rear height sensor.
INSTALLATION
Note the following, and install in the reverse order of the removal.
-
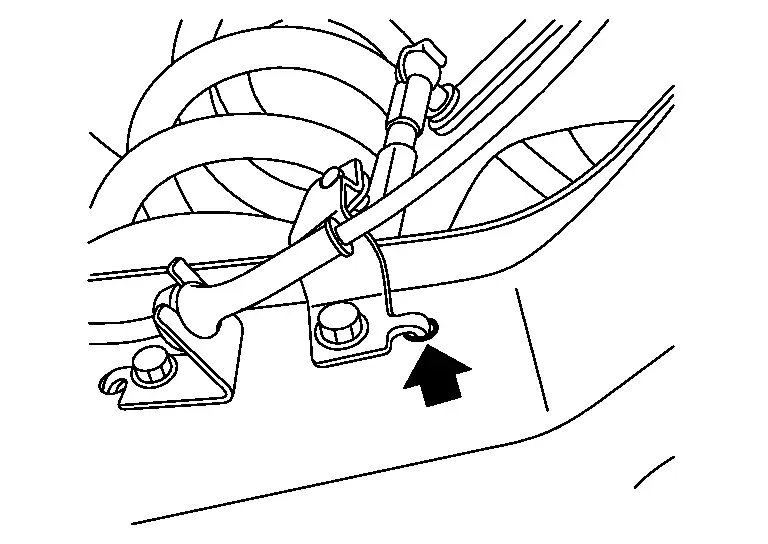
Completely engage hooks on frame when installing rear height sensor.
-
Perform inspection after installation. Refer to Inspection.
-
Perform adjustment after installation. Refer to Adjustment.
Inspection
INSPECTION AFTER INSTALLATION
-
Make sure the electronic air suspension function is turn ON. Refer to Operation.
-
Confirm that no warning message is displayed on the information display. Refer to Air suspension warning.
-
Perform the self-diagnosis using CONSULT. Check if any DTC is detected. Refer to CONSULT Function.
-
Confirm to close the hood.
Adjustment
ADJUSTMENT AFTER INSTALLATION
Perform the height sensor calibration. Refer to Work Support.
Other materials
Precautions
Precaution for Supplemental Restraint System (SRS) "AIR BAG" and "SEAT BELT PRE-TENSIONER"
The Supplemental Restraint System such as “AIR BAG” and “SEAT BELT PRE-TENSIONER”, used along with a front seat belt, helps to reduce the risk or severity of injury to the driver and front passenger fo ...
Aeb Off Warning Lamp Is Blinking
Symptom Description
Without ProPILOT Assist 2.1The AEB OFF warning lamp is blinking. Refer to Diagnosis Procedure.NOTE:
When any of the following conditions, the AEB OFF warning lamp blinks:
The distance sensor area of the front of the vehicle is covered with dirt or is obstructed
The interior t ...
Drain Assembly
Exploded View
Refer to Exploded View.
Removal and Installation
REMOVALRemove glass lid. Refer to Removal and Installation.
Tilt glass lid down.
Remove fixing screws , and then remove drain assembly.
INSTALLATIONInstall in the reverse order of removal. ...