Exploded View
Refer to Exploded View.
Removal and Installation
REMOVAL
Remove rear moonroof glass. Refer to Removal and Installation.
Disengage sunshade stay  using a remover tool (B) from sunshade slider
  as shown by the arrow in the figure.
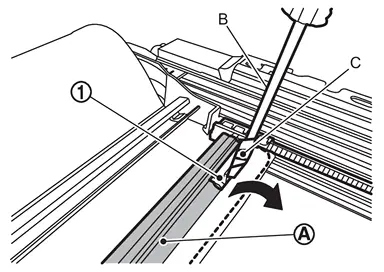
CAUTION:
Apply protective tape (C) on remover tool to protect parts from damage.
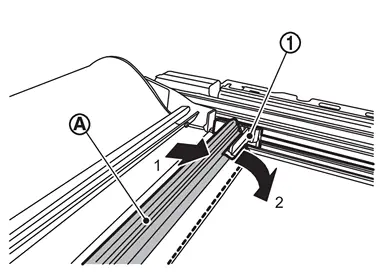
Push sunshade stay according to numerical order 1→2 indicated by arrows as shown in the figure, and then remove sunshade stay from sunshade slider .
Remove sunshade base fixing screws .
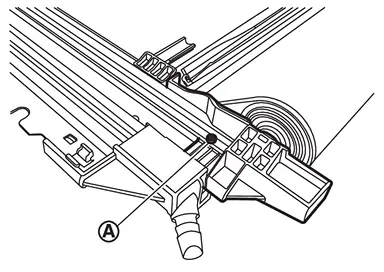
Remove sunshade base (LH and RH), rollshade stay, and sunshade as a unit.
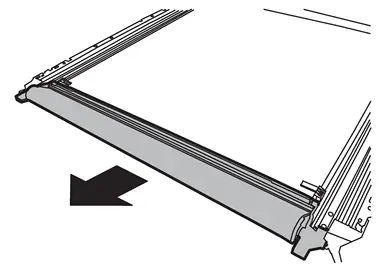
CAUTION:
When removing, insert a pin etc. (A) into the hole  to lock spring stopper for sunshade.
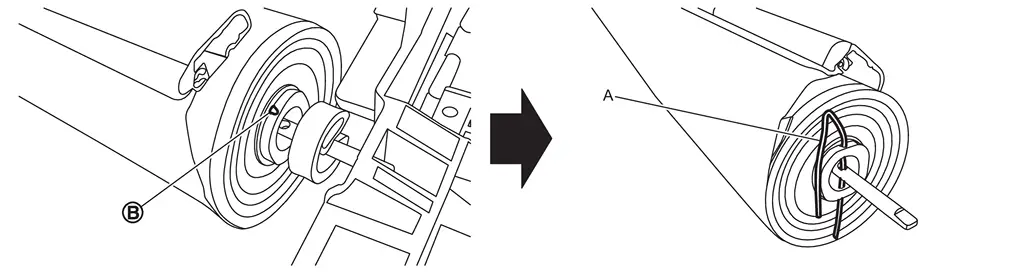
Remove rollshade stay from sunshade base (LH and RH).
Remove sunshade base (LH and RH) from sunshade.
INSTALLATION
Install rollshade stay to sunshade base (LH and RH).
Install sunshade to sunshade base (LH and RH).
CAUTION:
-
Before installing, check sunshade spacer
is installed.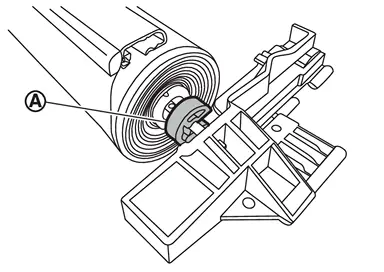
-
Before installing, check sunshade tension guide
is installed to sunshade base (LH and RH) as shown in figure.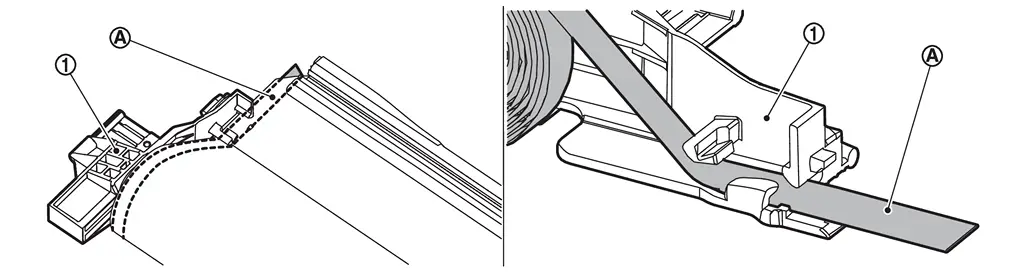
-
If spring tension of spring stopper for sunshade becomes loose, turn spring stopper about 18.5 times while using sunshade base RH as an intermediary, and then install.
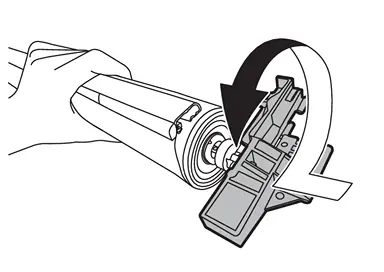
Install sunshade base (LH and RH), rollshade stay, and sunshade as a unit to moonroof frame assembly.
CAUTION:
-
Before installing, remove a pin etc. to unlock spring stopper for sunshade.
-
Before installing, check sunshade tension guide
is installed to moonroof frame assembly as shown in figure.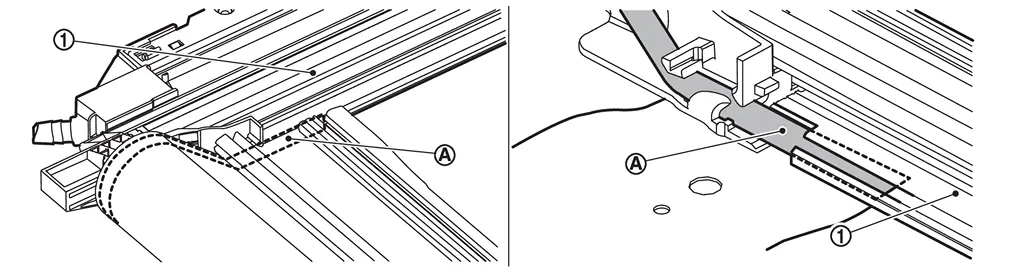
Install sunshade stay to sunshade slider.
Install rear moonroof glass. Refer to Removal and Installation.
CAUTION:
After installing sunshade assembly, perform additional service. Refer to Description.
Other materials
Camshaft
Exploded View
Camshaft bracket (No. 1) (bank 1)
Camshaft (EXH) (bank 1)
Camshaft (INT) (bank 1)
Camshaft bracket
Dowel pin
Plug
Gasket
Camshaft signal plate (EXH)
Camshaft signal plate (INT)
Cylinder head (bank 1)
Exhaust camshaft sprocket (bank 1)
Intake camsha ...
Starter Motor. Vr35ddtt
Vr35ddtt
Exploded View
Transmission housing
Starter motor cover 1
Starter motor cover 2
“B� terminal harness
Starter motor harness connector
Starter motor
: vehicle front
: N·m (kg-m, in-lb)
: N·m (kg-m, ft-lb)
: Indicates that the part is connected at points w ...
Bcm
Removal and Installation
CAUTION:
When replacing the BCM, always replace it with a new one. The functions controlled by the BCM does not operate properly in case of reuse of the BCM from another vehicle.
Be sure to perform the following items must be performed when replacing BCM.
Writing vehic ...