
Nissan Armada 2025-2026 Service and Repair Manual: Removal and Installation
WARNING:
REMOVAL
Remove air breather hose A  from transfer assembly.
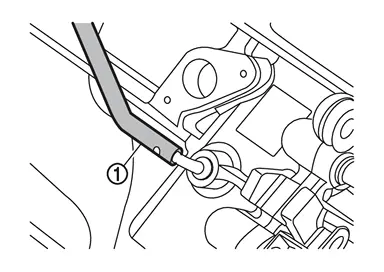
Remove clip A .
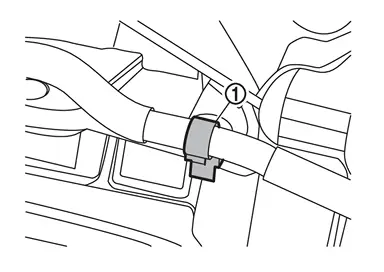
Remove clip B .
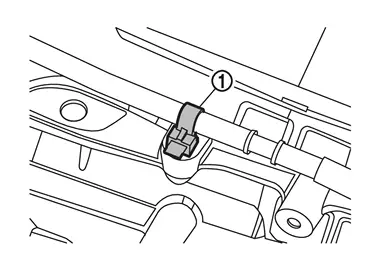
Remove A/T air breather hose. Refer to Removal and Installation.
Release clip C and remove air breather hose assembly  from bracket.
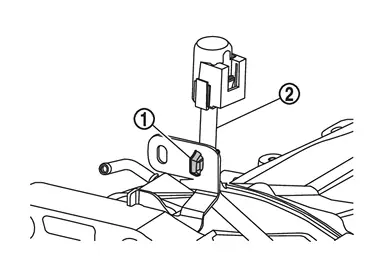
Separate each component part.
INSTALLATION
Note the following, and install in the reverse order of removal.
For non-reusable parts, refer to Exploded View.
Align rib
 of the air breather with the paint mark
  on the air breather hose, and install air breather hose so that the paint mark faced backward of the vehicle.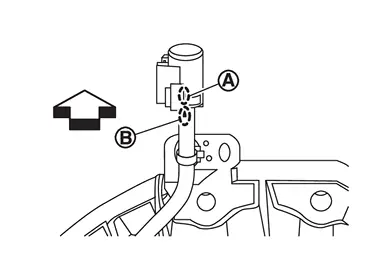

: Vehicle front Install air breather hose A with the paint mark
facing leftward.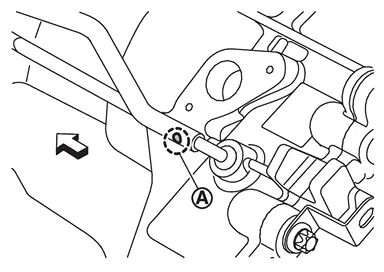
: Vehicle front Be sure to insert air breather hose to air breather tube until hose end reaches the end of tube.
When inserting air breather hose A and air breather hose B to hose connector
, be sure to insert it fully until its reaches the stop.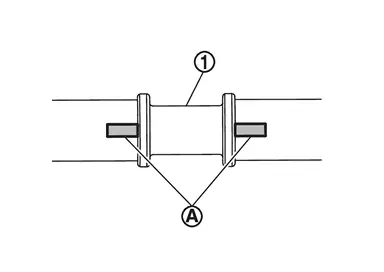
CAUTION:
Install each air breather hose with the painted mark
facing towards the top of the vehicle.
 Exploded View
Transfer assembly Air breather hose A Clip A Hose connector Clip B Air breather hose B Clip C Air breather : Always replace after every disassembly. ...

Other materials:
Work Procedure
INSPECTION START
Check service records for any recent repairs that may indicate a related malfunction, or a current need for scheduled maintenance.
Open engine hood and check the following:
Harness connectors for improper connections
Wiring harness for improper connections, pinches and cut
Vacuum h ...
RADIATOR : Inspection
Check radiator for mud or clogging. If necessary, clean radiator as per the following:
Be careful not to bend or damage radiator fins.
When radiator is cleaned without removal, remove all surrounding parts such as radiator cooling fan assembly and horns. Then tape harness and connectors to prevent w ...
LiquidGasket
LIQUID GASKET APPLICATION PROCEDURE
Remove old liquid gasket adhering to the liquid gasket application surface and the mating surface.
Remove liquid gasket completely from the liquid gasket application surface, mounting bolts, and bolt holes.
Wipe the liquid gasket application surface and the matin ...

0.0062