
Nissan Armada 2025-2026 Service and Repair Manual: Removal and Installation
WARNING:
REMOVAL
Drain transfer fluid. Refer to Draining.
Remove transfer assembly from vehicle. Refer to Removal and Installation.
Remove the rear companion flange  and remove the o-ring.
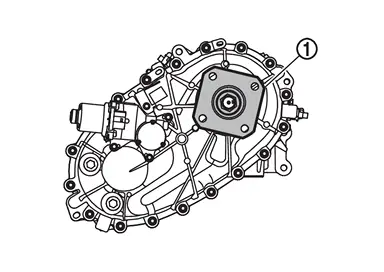
Remove the rear case mounting bolts  .
.
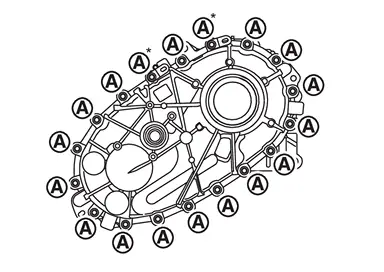
| * | : Tighten together with the bracket. |
Remove the rear case .
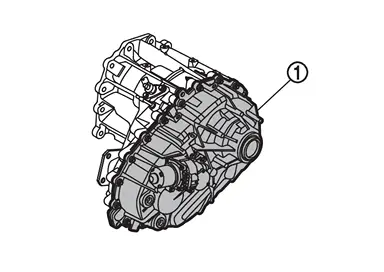
Remove the rear output shaft snap ring .
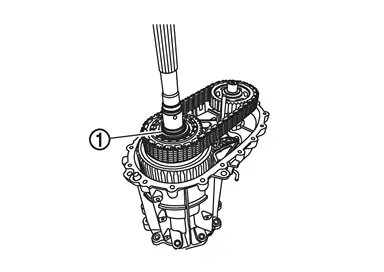
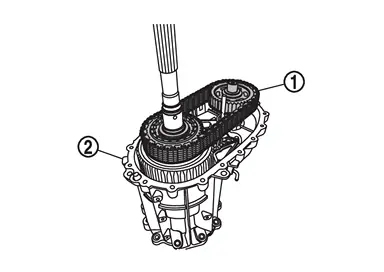
Remove the sprockets with chain from front case  .
.
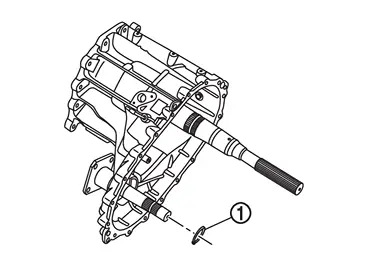
Remove the front output shaft snap ring .
Remove the front output shaft from front case .
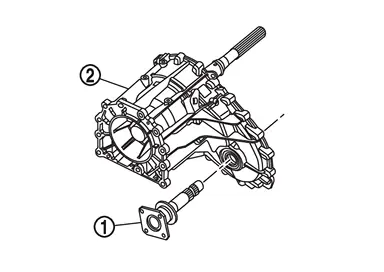
CAUTION:
Never damage the output shaft.
Remove the front oil seal form front case .
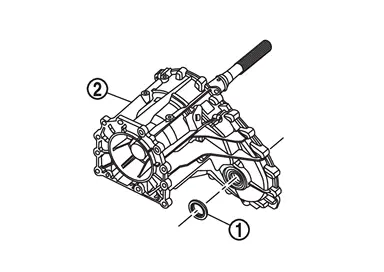
CAUTION:
Never damage the front case.
INSTALLATION
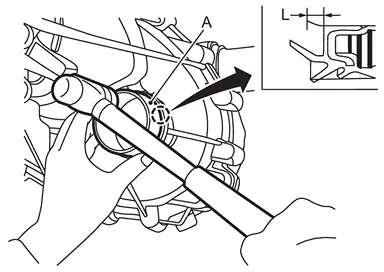
| L | : 1.7 – 2.3 mm (0.067 – 0.091 in) |
CAUTION:
Never reuse front oil seal.
Apply transfer fluid onto circumference of oil seal.
When installing, never incline front oil seal.
Never handle the oil seal inner periphery and oil seal lip.
Install the front output shaft to front case .
CAUTION:
Never damage the front oil seal lip.
Install the front output shaft snap ring .
Install the sprockets with chain to front case .
Install the rear output shaft snap ring .
Apply sealant to mating surface of rear case.
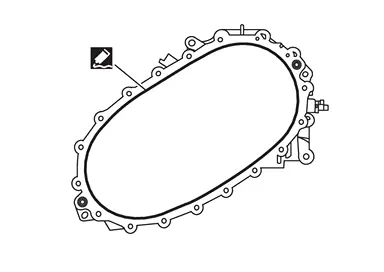
For applying sealant, refer to Exploded View.
Install the rear case .
| * | : Tightening the bolt with bracket. |
Install the o-ring and install the rear companion flange .
Install transfer assembly. Refer to Removal and Installation.
Fill with new transfer fluid. Refer to Refilling.
 Exploded View
Front output shaft Front oil seal Front case Snap ring Sprockets with chain Snap ring Rear case Rear companion flange O-ring : Always replace after every disassembly. : N·m (kg-m, ft-lb) ...
 Inspection
INSPECTION AFTER INSTALLATION
Check fluid leakage and the fluid level. Refer to Inspection.
ADJUSTMENT AFTER INSTALLATION ...
Other materials:
Shrinking Methods
(1) ELECTRIC WELDING MACHINE
The body panel is connected to the negative power supply terminal and the tip is connected to the positive terminal. Then, an electric current is supplied to heat the panel. The shrinking principle is the same as that of gas welding. This method features no hammering and ...
Removal and Installation
REMOVAL
Remove front door outside molding. Refer to Removal and Installation.
Remove front door glass run of upper side. Refer to Removal and Installation.
Remove front door weather-strip of upper side. Refer to Removal and Installation.
Apply protective tapes (A) on the part to protect it from dama ...
Work Procedure
STEP 1
Fully close the back door manually.
>>
GO TO 2.
STEP 2
Operate back door opener switch and perform automatic back door open operation.
>>
GO TO 3.
STEP 3
The back door fully opens.
Check that automatic back door warning buzzer sounds normally.
Does automatic back door warning ...

0.0054