
Nissan Armada 2025-2026 Service and Repair Manual: Removal and Installation
WARNING:
REMOVAL
Remove tires. Refer to ROAD WHEEL TIRE : Removal & Installation.
Remove brake hose bracket. Refer to Removal and Installation.
Remove brake caliper assembly. Hang brake caliper assembly in a place where it will not interfere with work. Refer to FRONT BRAKE CALIPER ASSEMBLY : Removal & Installation.
CAUTION:
Never depress brake pedal while brake caliper is removed.
Remove disc rotor.
CAUTION:
Put matching marks
 on the wheel hub assembly and the disc rotor before removing the disc rotor.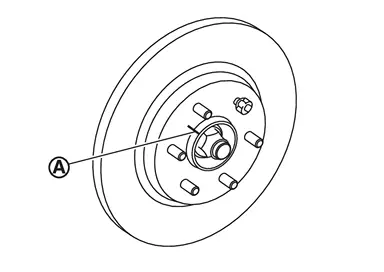
Never drop disc rotor.
Remove wheel sensor harness. Refer to Removal and Installation.
Remove steering outer socket. Refer to Removal and Installation.
Set suitable jack under lower link.
Remove shock absorber mounting bolt from lower link. Refer to Removal and Installation.
Remove wheel hub and bearing assembly, and then remove splash guard and baffle.
Separate upper link from steering knuckle, using the ball joint remover (commercial service tool), and remove upper link.
CAUTION:
Temporarily tighten the nut to prevent damage to threads and to prevent the ball joint remover from suddenly coming off.
Never damage ball joint boot.
Remove lower link from steering knuckle.
CAUTION:
Never damage ball joint boot.
Remove steering knuckle.
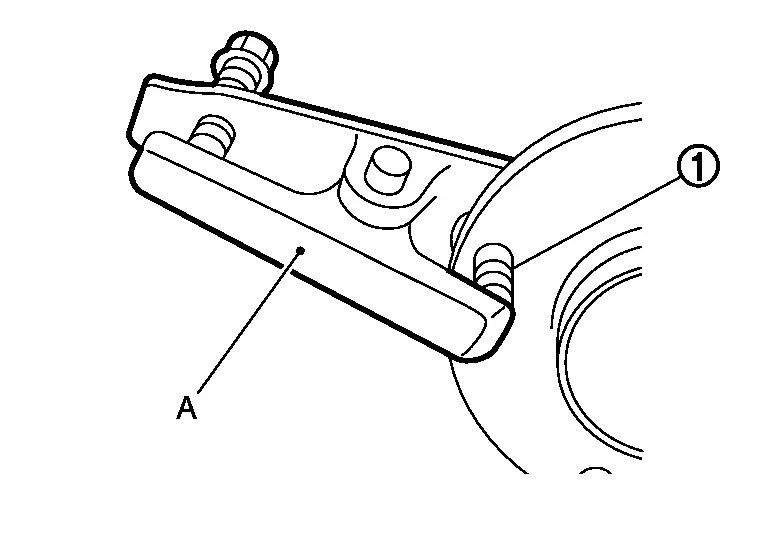
Remove hub bolts  from wheel hub assembly, using the ball joint remover (commercial service tool) (A).
CAUTION:
Only remove the hub bolt when it is necessary to do so.
Tap the hub bolt with a hammer or other means, without exerting any impact on the wheel hub assembly.
Remove the hub bolt perpendicularly from the wheel hub assembly.
Perform inspection after removal. Refer to Inspection.
INSTALLATION
Note the following, and install in the reverse order of the removal.
Hub Bolts
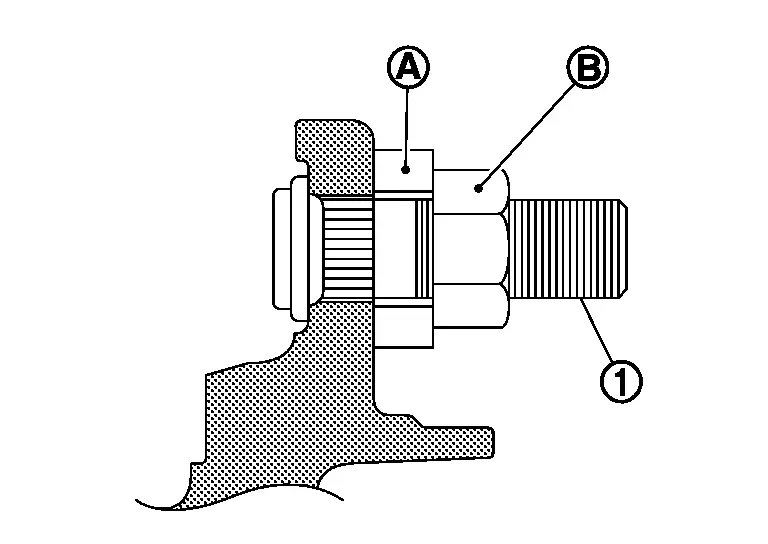
Place a suitable washer as shown in the figure to install the hub bolts by using the tightening force of the nut  .
.
CAUTION:
Check that there is no clearance between wheel hub, and hub bolt.
Never reuse hub bolt.
Disc rotor
CAUTION:
Align the matching marks
made during removal when reusing the disc rotor.Never drop disc rotor.
 Exploded View
Upper ball seat Steering knuckle Baffle Splash guard Wheel hub and bearing assembly Disc rotor Hub bolt Cotter pin Lower ball seat : Vehicle front : N·m (kg-m, in-lb) : N·m (kg-m, ft-lb ...
 Inspection
INSPECTION AFTER REMOVAL
Check the following items, and replace the part if necessary.
Ball Joint Inspection
Check boots of upper link, lower link and steering outer socket ball joint for breakage, ax ...
Other materials:
Removal and Installation
REMOVAL
Disengage hood lock control handle fixing pawl, and then remove hood lock control handle.
: Pawl
INSTALLATION
Note the following items, and then install in the reverse order of removal.
CAUTION:
After installation, perform hood lock control inspection. Refer to Inspection.
After installa ...
Work Flow
CUSTOMER INTERVIEW
Squeak – (Like tennis shoes on a clean floor)
Squeak characteristics include the light contact/fast movement/brought on by road conditions/hard surfaces = high-pitched noise/softer surfaces = low-pitched noises/edge to surface = chirping.
Creak – (Like walking on an old woode ...
Basic information
Example
The vehicle information display in the Nissan Armada is centrally positioned
within the instrument cluster and serves as a key interface for driver information
and system notifications. It provides real-time data and customizable settings for
enhanced driving awareness.
The Nissa ...

0.0079