
Nissan Armada 2025-2026 Service and Repair Manual: Removal and Installation
WARNING:
REMOVAL
CAUTION:
Wipe off immediately when attaching brake fluid with disc rotor and caliper assembly.
Remove tires. Refer to ROAD WHEEL TIRE : Removal & Installation.
Drain brake fluid. Refer to Draining.
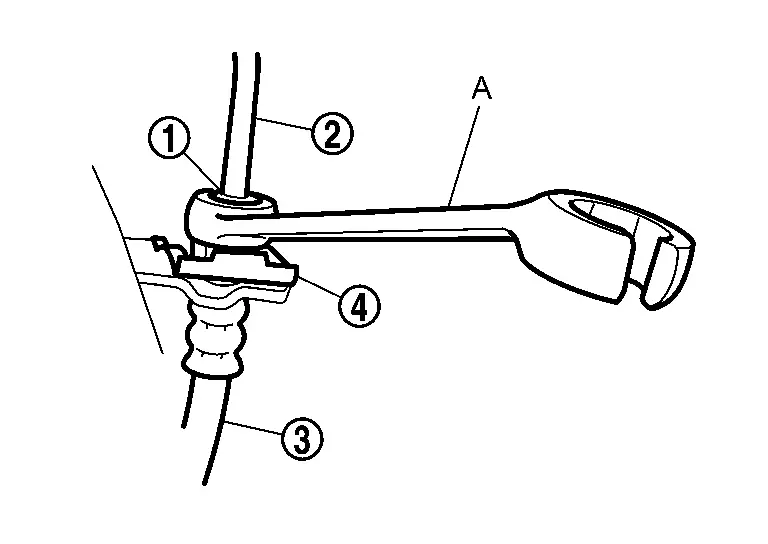
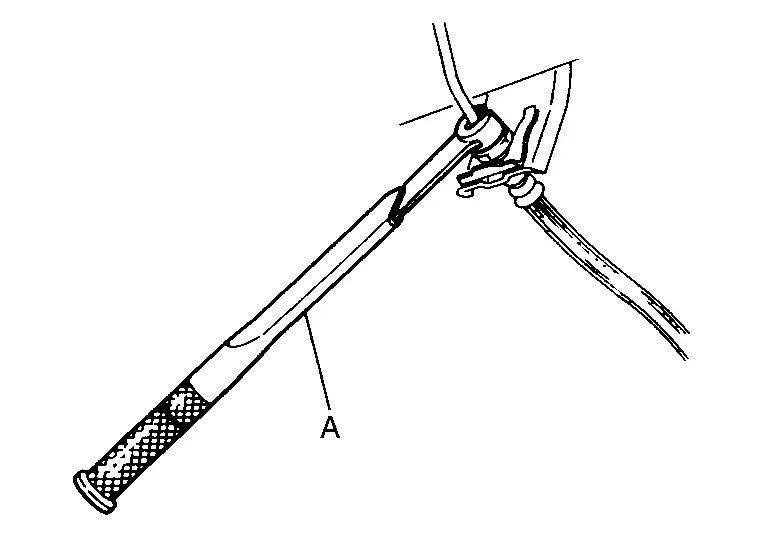
Loosen the flare nut  with a flare nut wrench (A) and separate the brake tube
  from the brake hose
  . And then remove the lock plate
  .
.
CAUTION:
Never scratch the flare nut and the brake tube.
Never bend sharply, twist or strongly pull out the brake hoses and tubes.
Cover open end of brake tubes and brake hoses when disconnecting to prevent entrance of dirt.
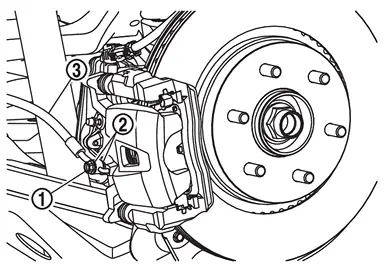
Remove the union bolt and copper washers , and remove the brake hose from the brake caliper assembly.
INSTALLATION
CAUTION:
Wipe off immediately when attaching brake fluid with disc rotor and caliper assembly.
Assemble the union bolt and the copper washers to the brake hose .
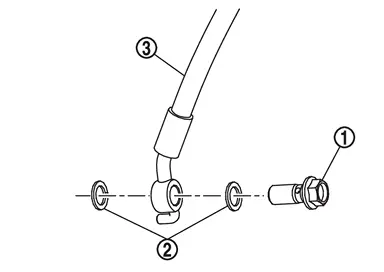
CAUTION:
Never reuse the copper washer.
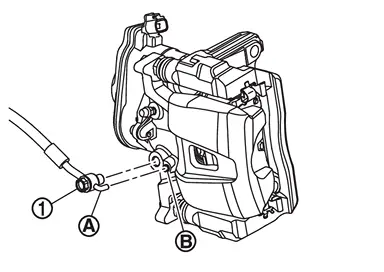
Align the brake hose L-pin  with the brake caliper assembly hole
  , and tighten the union bolt to the specified torque. Refer to Exploded View.
Install the brake hose to the brake tube, temporarily tighten the flare nut by hand until it does not rotate further, and fix the brake hose to the brake hose bracket with the lock plate.
CAUTION:
Check that all brake hoses and brake tubes are not twisted and bent.
CAUTION:
Never scratch the flare nut and the brake tube.
Install the brake tube to the brake hose, temporarily tighten the flare nut by hand until it does not rotate further, and fix the brake hose to brake hose brackets with the lock plate.
CAUTION:
Check that all brake hoses and brake tubes are not twisted and bent.
CAUTION:
Never scratch the flare nut and the brake tube.
Install the brake hose to the brake tube, temporarily tighten the flare nut by hand until it does not rotate further, and fix the brake hose with the lock plate.
CAUTION:
Check that all brake hoses and brake tubes are not twisted and bent.
CAUTION:
Never scratch the flare nut and the brake tube.
CAUTION:
Never reuse drained brake fluid.
Install tires. Refer to ROAD WHEEL TIRE : Removal & Installation.
Perform inspection after installation. Refer to Inspection.
 Hydraulic Piping
Front disc brake Connector ABS actuator and electric unit (control unit) Electrical brake control unit Rear disc brake Brake hose Brake tube : Flare nut : Union bolt ...
 Inspection
INSPECTION AFTER INSTALLATION
Check the brake hoses and tubes for the following: no scratches; no twist and deformation; no looseness at connections.
CAUTION:
Clearance with brake hose and each parts ...
Other materials:
Removal and Installation
REMOVAL
Pull up and remove engagement with body from the seam of back door weather-strip.
CAUTION:
Never pull strongly on back door weather-strip.
When removing back door weather-strip, pull it away from the vehicle by holding back door weather-strip by the base part , and not the upper part, for pr ...
Removal and Installation
REMOVAL
WARNING:
CAUTION:
Never disassemble the rear height sensor.
Start engine.
Turn OFF the electronic air suspension function. Refer to Operation.
Stop engine.
Lift up the vehicle.
Disconnect rear height sensor harness connector.
Remove rear height sensor.
INSTALLATION
Note the following, and ...
Special Service Tools
Tool number
(TechMate No.)
Tool name Description KV10122000
(NI-53383)
Side oil seal puller
Removing side oil seal KV10123000
(NI-53384)
Side oil seal installer
Installing side oil seal ...

0.0054