
Nissan Armada 2025-2026 Service and Repair Manual: Removal and Installation
WARNING:
- Jacking up or lifting up the vehicle may the vehicle height to go down which cause a personal injury and/or damage to the air suspension component parts. Refer to Precaution for when Jacking and Lifting Up the Vehicle with Electronic Air Suspension System (With electronic air suspension).
- When checking under the vehicle or inside wheel house, always turn OFF the electronic air suspension function with the vehicle unladen and normal height, since the suspension may accidentally move and it can lead to personal injury. Refer to Precaution for Electronic Air Suspension System (With electronic air suspension).
REMOVAL
CAUTION:
Perform lubricant return operation before each refrigeration system disassembly. However, if a large amount of refrigerant or lubricant leak is detected, never perform lubricant return operation. Refer to Perform Lubricant Return Operation.
When disconnect the A/C piping related parts, cap or wrap the joint of those parts with suitable material such as vinyl tape to avoid the entry of air.
Use a refrigerant collecting equipment (for HFO-1234yf) to discharge the refrigerant. Refer to Recycle Refrigerant.
Remove engine under cover front. Refer to Removal and Installation.
Remove drive belt. Refer to Removal & Installation.
Disconnect harness connector  from A/C compressor.
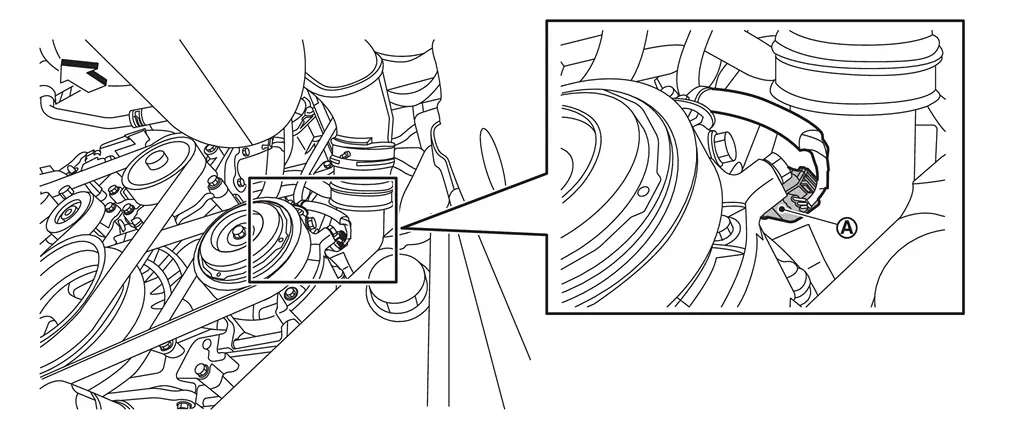
 | : Vehicle front |
Disengage harness fixing clip from A/C compressor.
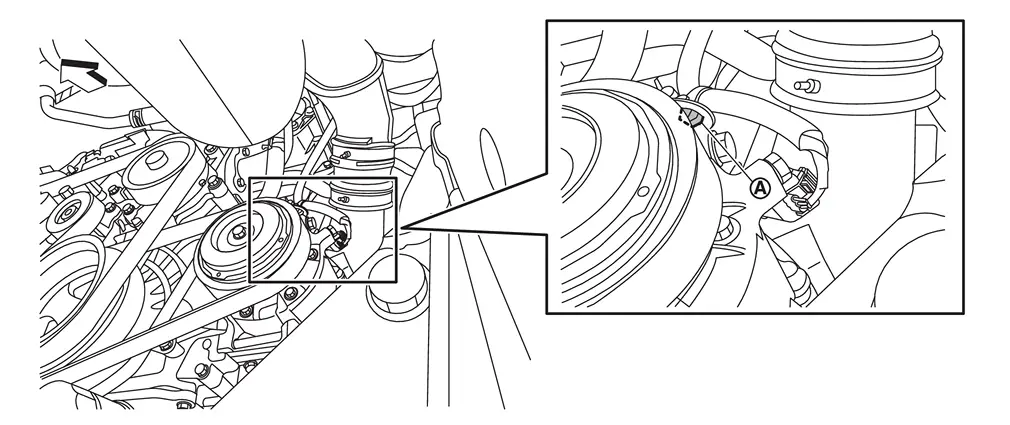
| : Vehicle front |
Disconnect high-pressure flexible hose from A/C compressor. Refer to Removal and Installation.
Disconnect low-pressure flexible hose from A/C compressor. Refer to Removal and Installation.
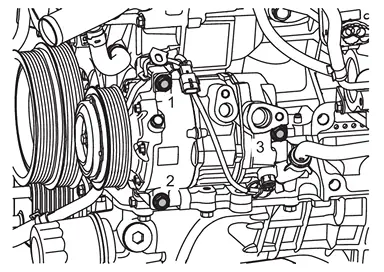
Remove A/C compressor mounting bolts .
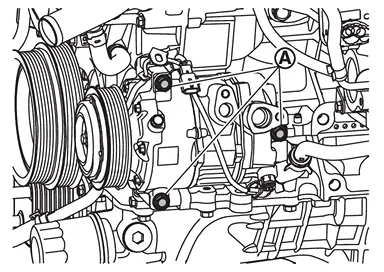
Remove A/C compressor from vehicle.
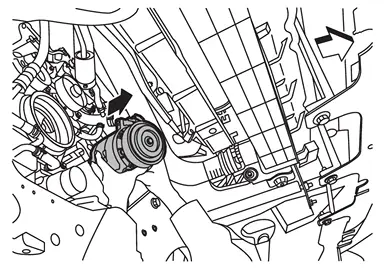
| : Vehicle front |
INSTALLATION
Note the following items, and then install in the reverse order of removal.
CAUTION:
Perform compressor lubricant adjusting procedure before installing new A/C compressor. Refer to Lubricant Adjusting Procedure for A/C compressor Replacement.
For A/C compressor installed, temporarily tighten mounting bolts, and then tighten mounting bolts to specified torque according to numerical order 1→3.
Use a refrigerant collecting equipment (for HFO-1234yf) to charge the refrigerant. Refer to Charge Refrigerant.
Perform a check for refrigerant leakage when charging with refrigerant. Refer to Leak Test.
Check tension of the drive belt after installing A/C compressor. Refer to Inspection.
 Exploded View
A/C compressor: N·m (kg-m, ft-lb) ...

Other materials:
Removal and Installation
CAUTION:
REMOVAL
Remove instrument pad B. Refer to Removal and Installation.
Disconnect harness connector.
Remove indirect light RH fixing screws , and then remove indirect light RH.
Disengage advanced ambient light (instrument panel passenger side) fixing pawls using a remover tool (A), and then ...
Steps and Process
Each step and process should be described in detail. See below the steps:
DetailsRepair preparation Repair method confirmation Check the contents of the repair sheet and the work procedure. Preparation of tools and equipment Prepare the necessary tools and equipment. Associated and ancillary wo ...
Removal and Installation
REMOVAL
Remove radiator air guide upper. Refer to Removal and Installation.
Remove front combination lamp. Refer to Removal and Installation.
Remove active grille shutter upper side mounting bolts. Refer to Removal and Installation.
Remove hood lock assembly. Refer to Removal and Installation.
Disen ...

0.0078