
Nissan Armada 2025-2026 Service and Repair Manual: Removal and Installation
REMOVAL
CAUTION:
Remove air cleaner body. Refer to Removal and Installation.
Remove mounting bolt  , and then disconnect high-pressure flexible hose from condenser inlet pipe.
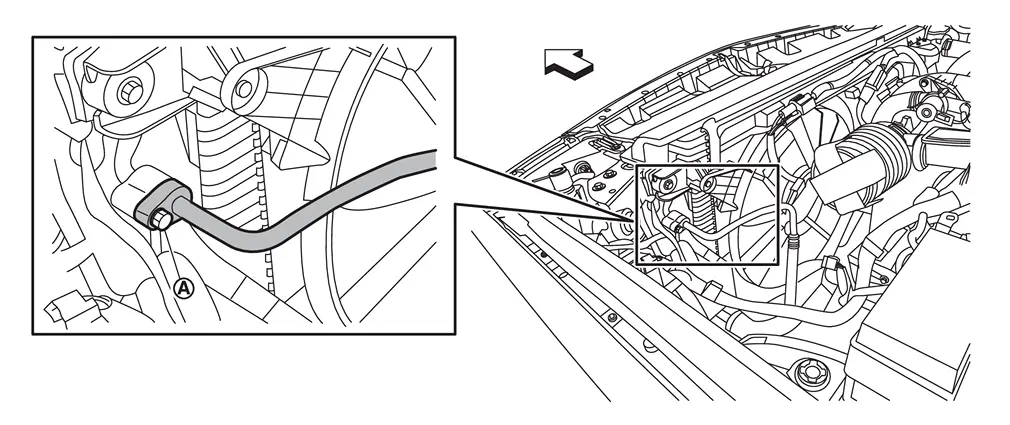
 | : Vehicle front |
Remove mounting bolt , and then disconnect high-pressure flexible hose from A/C compressor.
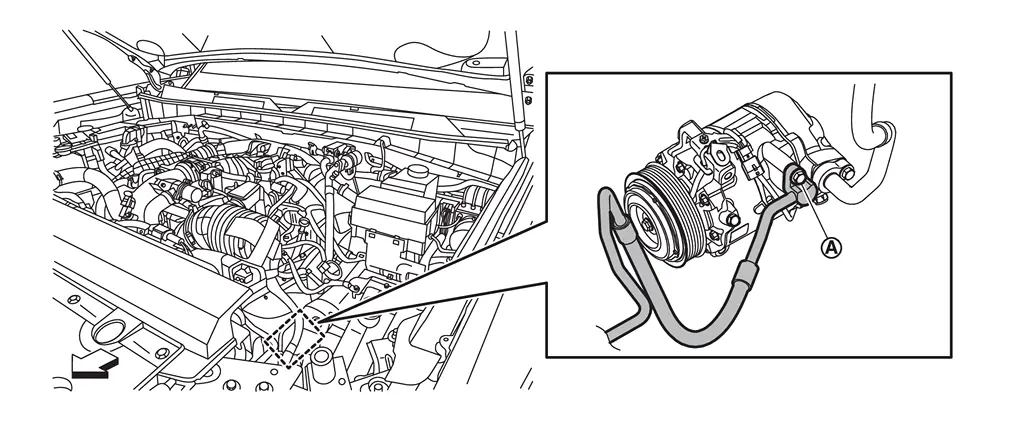
| : Vehicle front |
Remove high-pressure flexible hose from vehicle.
INSTALLATION
Note the following items, and then install in the reverse order of removal.
CAUTION:
To prevent leakage of refrigerant, replace the O-ring and washer seal with a new one. Apply a coat of compressor oil to the O-ring prior to installation.


Other materials:
Removal and Installation
REMOVAL
Using a suitable tool, release clips , and remove cover .
Disconnect inside camera (driving video recorder) harness connector.
Remove mounting screws , and remove inside camera (driving video recorder) from inside camera bracket.
Remove mounting screws , and remove inside camera bracket ...
System Initialization
If any of the following operations are performed, the initialization is necessary for normal operation of power window system. Refer to Work Procedure.
When each power window motor replaced.
Power supply to the each power window motor is not cut off properly.
Removal and installation of regulator as ...
NVH Troubleshooting Chart
Possible cause and SUSPECTED PARTS Symptom Reference Vibration Shake Noise Uneven rotating torque × × Inspection Center bearing improper installation × × × Exploded View Excessive center bearing axial end play × × Inspection Center bearing mounting (insulator) cracks, dama ...

0.0065