
Nissan Armada 2025-2026 Service and Repair Manual: Removal and Installation
REMOVAL
Disconnect hood lock control cable assembly from hood lock assembly. Refer to Removal and Installation.
Disengage hood lock control cable assembly fixing clips.
Remove hood lock control handle. Refer to Removal and Installation.
Remove dash side finisher LH. Refer to Removal and Installation.
Remove hood lock control cable assembly mounting bolt.
Remove grommet of the lower dash, and pull the hood lock control cable assembly toward inside vehicle.
CAUTION:
While pulling, never damage (peeling) the outside of hood lock control cable assembly.
Pull out the hood lock control cable assembly while turning over the insulator around the grommet part of hood lock control cable assembly.
INSTALLATION
Note the following items, and then install in the reverse order of removal.
CAUTION:
Never bend cable too much, keeping the radius 100 mm (3.94 in) or more.
Install grommet in the panel hole surely.
Check that cable is not offset from the positioning grommet, and apply the sealant to the grommet
 properly.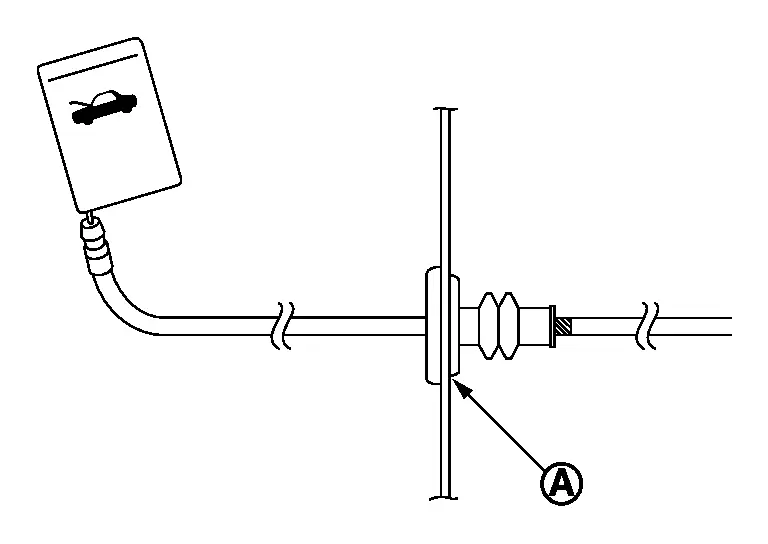
After installation, perform hood lock control inspection. Refer to Inspection.

 Front Door Lock
...
Other materials:
Flushing
WARNING:
Install reservoir tank if removed, and radiator drain plug.
CAUTION:
Be sure to clean drain plug and install with new O-ring.
Tightening torque Refer to RADIATOR : Exploded View.
If water drain plug on cylinder block is removed, close and tighten it. Refer to Setting.
Fill radiator and ...
Removal and Installation
REMOVAL
CAUTION:
Remove air cleaner body. Refer to Removal and Installation.
Remove mounting bolt , and then disconnect low-pressure flexible hose from low-pressure pipe.
: Vehicle front
Remove mounting bolt , and then remove low-pressure flexible hose from A/C compressor.
: Vehicle front
...
NVH Troubleshooting Chart
2WD MODELS
Possible cause and SUSPECTED PARTS Symptom Reference Steering Noise Shake Vibration Shimmy Judder Outer/ inner socket ball joint swinging force × — — — — Inspection Outer/ inner socket ball joint rotating torque × — — — — Inspection Outer/ inner so ...

0.0087