
Nissan Armada 2025-2026 Service and Repair Manual: Removal and Installation
REMOVAL
Remove rear moonroof glass. Refer to Removal and Installation.
Disengage sunshade stay  using a remover tool (B) from sunshade slider
  as shown by the arrow in the figure.
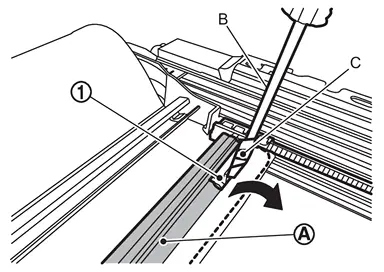
CAUTION:
Apply protective tape (C) on remover tool to protect parts from damage.
Push sunshade stay according to numerical order 1→2 indicated by arrows as shown in the figure, and then remove sunshade stay from sunshade slider .
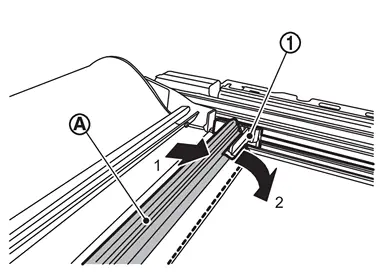
Remove sunshade base fixing screws .
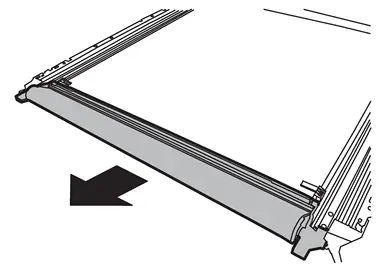
Remove sunshade base (LH and RH), rollshade stay, and sunshade as a unit.
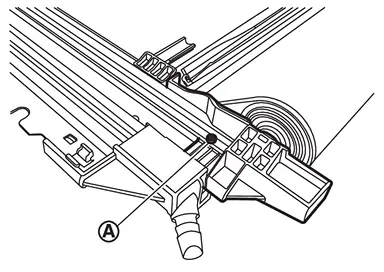
CAUTION:
When removing, insert a pin etc. (A) into the hole  to lock spring stopper for sunshade.
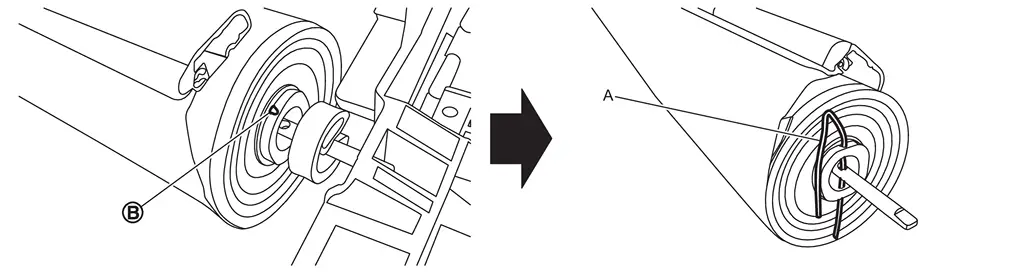
Remove rollshade stay from sunshade base (LH and RH).
Remove sunshade base (LH and RH) from sunshade.
INSTALLATION
Install rollshade stay to sunshade base (LH and RH).
Install sunshade to sunshade base (LH and RH).
CAUTION:
Before installing, check sunshade spacer
is installed.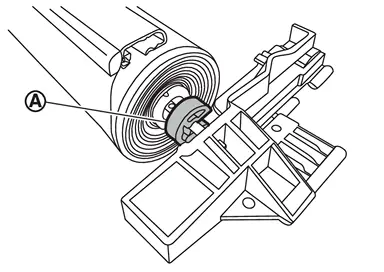
Before installing, check sunshade tension guide
is installed to sunshade base (LH and RH) as shown in figure.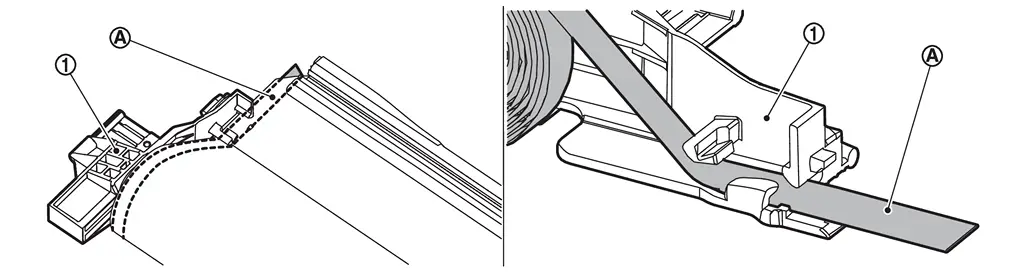
If spring tension of spring stopper for sunshade becomes loose, turn spring stopper about 18.5 times while using sunshade base RH as an intermediary, and then install.
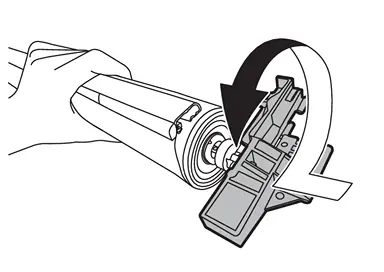
Install sunshade base (LH and RH), rollshade stay, and sunshade as a unit to moonroof frame assembly.
CAUTION:
Before installing, remove a pin etc. to unlock spring stopper for sunshade.
Before installing, check sunshade tension guide
is installed to moonroof frame assembly as shown in figure.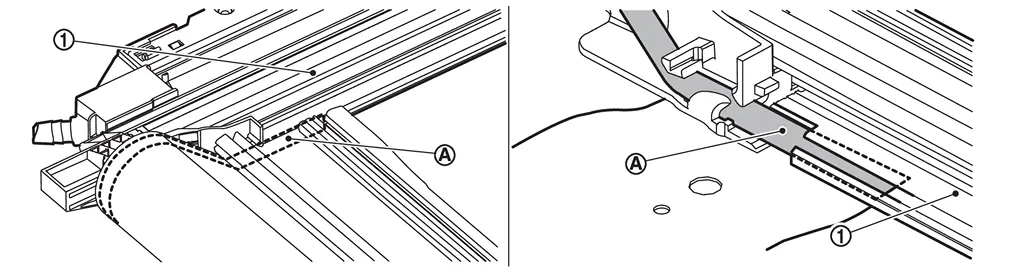
Install sunshade stay to sunshade slider.
Install rear moonroof glass. Refer to Removal and Installation.
CAUTION:
After installing sunshade assembly, perform additional service. Refer to Description.
 Exploded View
Refer to Exploded View. ...
 Drain Assembly
...
Other materials:
Exploded View
Anchor bolt Retaining washer Seat belt adjuster LH Seat belt adjuster RH Shoulder anchor LH Shoulder anchor RH Spacer Seat belt pre-tensioner retractor LH Seat belt pre-tensioner retractor RH Lap pre-tensioner LH Lap pre-tensioner RH Seat belt buckle RH Seat belt buckle LH : N·m (kg- ...
Removal and Installation
WARNING:
REMOVAL
Remove air breather hose A from transfer assembly.
Remove clip A .
Remove clip B .
Remove A/T air breather hose. Refer to Removal and Installation.
Release clip C and remove air breather hose assembly from bracket.
Separate each component part.
INSTALLATION
Note the follo ...
Precautions for Removing Battery Terminal
NOTE:
NOTE:
NOTE:
The removal of 12V battery may cause a DTC detection error.
HOW TO DISCONNECT 12V BATTERY TERMINAL
Disconnect 12V battery terminal according to instruction described below.
Open the hood.
Turn ignition switch to the ON position.
Turn ignition switch to the OFF position with the d ...

0.0053