
Nissan Armada 2025-2026 Service and Repair Manual: Removal and Installation
WARNING:
REMOVAL
Disconnect battery cable from negative terminal. Refer to Removal and Installation.
Remove drive belt. Refer to Removal & Installation.
Remove inlet air duct 2. Refer to Removal and Installation.
Disconnect alternator harness connector  .
.
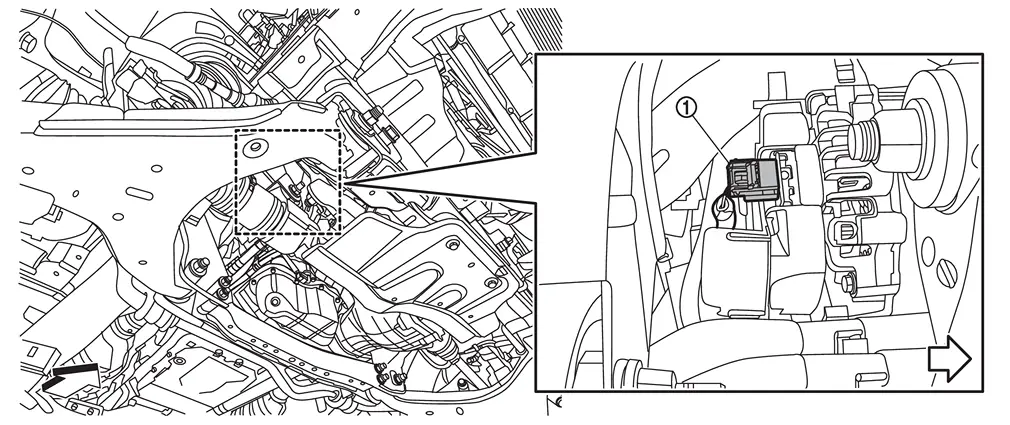
 | : Vehicle front |
Remove “B� terminal harness mounting nut  , and then disconnect “B� terminal harness .
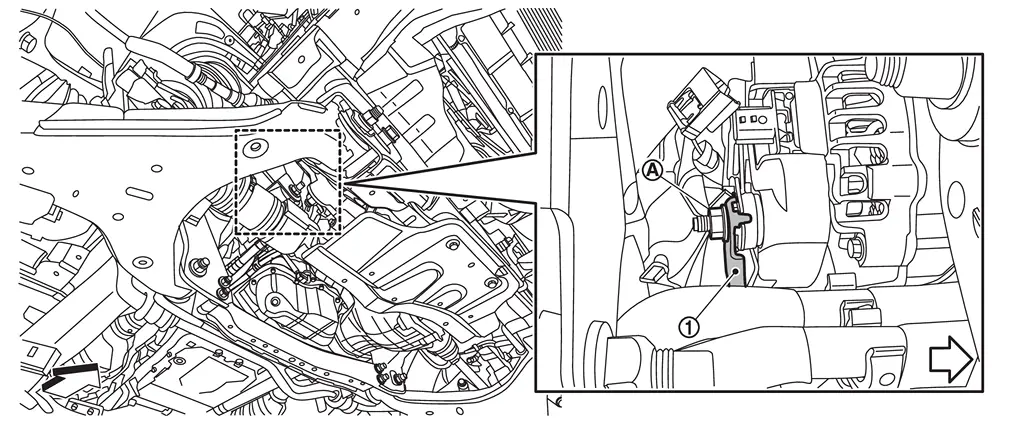
| : Vehicle front |
Remove alternator mounting bolts .
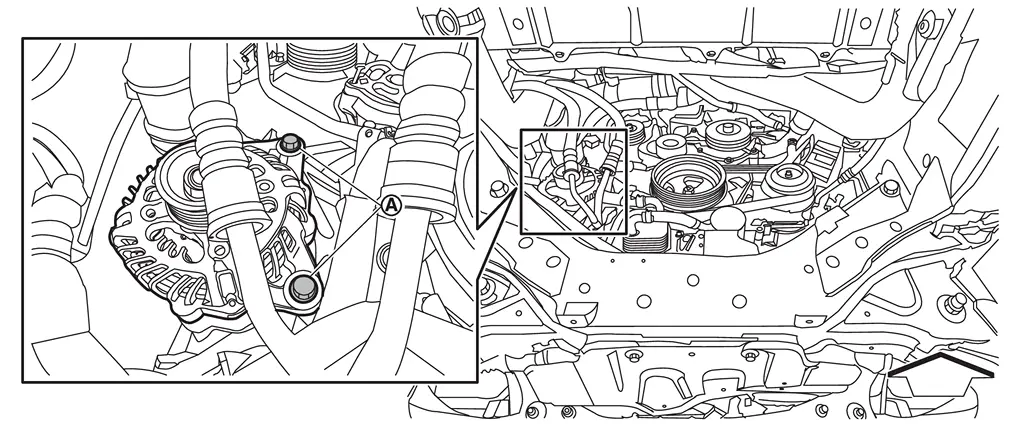
| : Vehicle front |
Remove alternator from vehicle.
CAUTION:
Never damage around parts.
INSTALLATION
Note the following items, and then install in the reverse order of removal.
CAUTION:
Temporarily tighten alternator bolts in order from the lower side to the upper side, and then tighten them in order from the upper side to the lower side.
For alternator, the front side (pulley side) surface is the reference surface. Fit the reference surface to alternator mounting part, and then tighten bolts.
Be careful to tighten “B� terminal nut to the specified torque. Refer to Exploded View.
Install alternator, and check tension of drive belt. Refer to Inspection.
For this model (with 12V battery current sensor models), energy management system that controls power generation voltage of alternator has been adopted. Therefore, energy management system operation inspection should be performed after replacing alternator, and then make sure that the system operates normally. Refer to Work Flow (With EXP-800 NI or GR8-1200 NI) or Work Flow (Without EXP-800 NI and GR8-1200 NI).
12V Battery current sensor is installed to 12V battery cable at negative terminal.
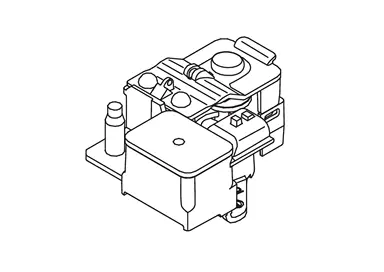
 Exploded View
Engine assembly Alternator “B� terminal harness Alternator harness connector : Vehicle front : N·m (kg-m, ft-lb) , , , : Indicates that the part is connected at points with same symbol in ...

Other materials:
Special Service Tool
The actual shape of the tools may differ from those illustrated here.Tool number
(TechMate No.)
Tool name Description KV10115801
(NI-38956)
Oil filter wrench
Removing and installing oil filter
a: 64.3 mm (2.531 in)—
(NI-52972–2)
OFT position change wrench
Removing and installing drain plug
Ch ...
Diagnostic Work Sheet
Description
INTERVIEW SHEET SAMPLE
Interview sheet Customer name MR/MS Registration number Initial year registration Vehicle type VIN Storage date Engine / Traction motor Mileage km ( Mile) Symptom □ Does not operate ( ) function □ Warning lamp for ( ) turns ON. □ Noise    ...
Removal and Installation
WARNING:
REMOVAL
Shift transmission to the neutral position, and then release parking brake.
Remove engine under cover. Refer to Exploded View.
Put matching marks on propeller shaft flange yoke and transfer companion flange.
CAUTION:
For matching mark, use paint. Never damage propeller shaft flan ...

0.0062