
Nissan Armada 2025-2026 Service and Repair Manual: Removal and Installation
REMOVAL
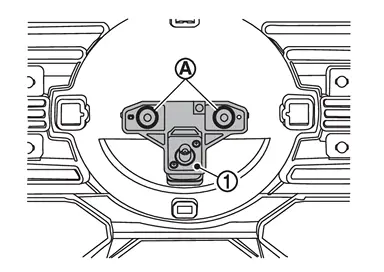
Remove the front grille. Refer to Removal and Installation.
Remove the front camera mounting screws  , then remove the front camera
  .
.
INSTALLATION
Install in the reverse order of removal.
Perform parameter writing. (With ProPILOT Assist 2.1) Refer to Work Procedure.
Perform camera image calibration. Refer to Work Procedure.
CAUTION:
Perform the calibration and perform the writing to the around view monitor control unit when removing and replacing each camera, removing the camera mounting parts (front grille, door mirror, etc.) and replacing the around view monitor control unit.
 Front Camera
...
 Rear Camera
...
Other materials:
NVH Troubleshooting Chart
Use chart below to help you find the cause of the symptom. If necessary, repair or replace these parts.
Possible cause and SUSPECTED PARTS Symptom Reference TIRES ROAD WHEEL Noise Shake Vibration Shimmy Judder Poor quality ride or handling Noise Shake Shimmy,
Judder Poor quality ride o ...
Inspection and Adjustment
INSPECTION AFTER REMOVAL
Check foreign materials in oil pan to help determine causes of malfunction. If the A/T fluid is very dark, smells burned, or contains foreign particles, the frictional material (clutches) may need replacement. A tacky film that will not wipe clean indicates varnish build up. ...
Intelligent Key operation
Example
Example
The Nissan Armada Intelligent Key system allows seamless locking and unlocking
of doors without removing the key from your pocket or bag, enhancing both convenience
and everyday usability.
When carrying the Nissan Armada Intelligent Key within the operating range, you ...

0.0063