
Nissan Armada 2025-2026 Service and Repair Manual: Removal and Installation
REMOVAL
Remove luggage side lower finisher LH. Refer to Removal and Installation.
Disconnect front camera unit  harness connectors
  .
.
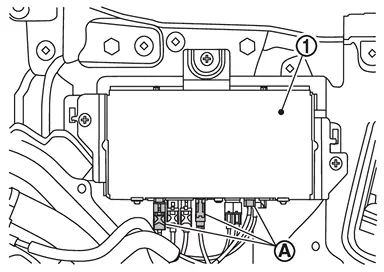
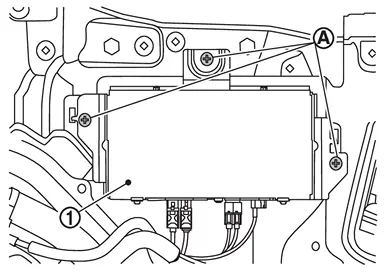
Remove mounting bolts , and remove front camera unit  .
.
INSTALLATION
Installation is in the reverse order of removal.
CAUTION:
Do not touch or shock the front camera unit lens area or drop the front camera unit.
To operate the system normally, perform the following operations when the front camera unit is replaced.
Be sure to perform "ADDITIONAL SERVICE WHEN REPLACING FRONT CAMERA UNIT" when replacing front camera unit. Refer to Work Procedure.
 Exploded View
Front camera unit ...

Other materials:
Work Flow
OVERALL SEQUENCE
DETAILED FLOW
INTERVIEW FOR MALFUNCTION
NOTE:
>>
GO TO 2.
SELF-DIAGNOSIS WITH CONSULT
With CONSULT
Perform self-diagnosis of “Wireless charger� using CONSULT. Refer to CONSULT Function.
NOTE:
Skip to step 4 of the diagnosis procedure if “Wireless charger� is not di ...
Features of Spot Welding
Short welding time and high efficiency compared to other welding processes
Minimum thermal strain due to partial heating
No need to finish the welded surface
Less rust formation compared to other welding processes due to application of conductive sealer
Great welding skill is not needed. Uniform wel ...
Basic information
Drive Mode Selector (example)
Vehicle information display (example)
The Nissan Armada features a versatile Drive Mode Selector system that allows
the driver to tailor vehicle performance to different driving conditions. By rotating
the selector dial to the left or right, you can quickl ...

0.0055