
Nissan Armada 2025-2026 Service and Repair Manual: Removal and Installation
REMOVAL
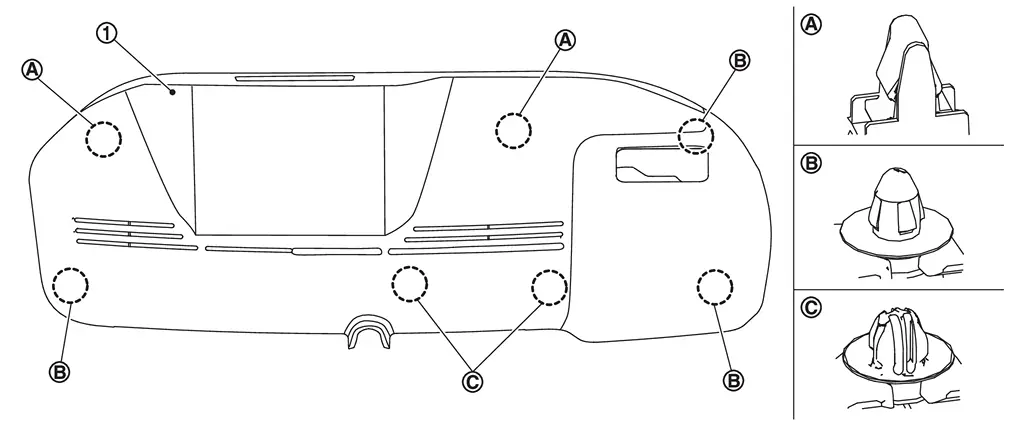
Using a suitable tool, release clips  , and remove cover
  .
.
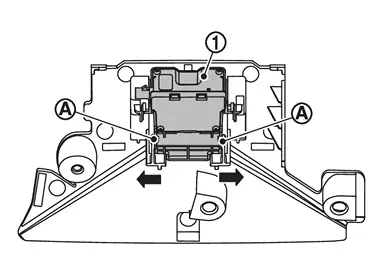
Disconnect front camera unit harness connector.
Release pawls  of bracket, and remove front camera unit from bracket.
INSTALLATION
Installation is in the reverse order of removal.
CAUTION:
Do not touch or shock the driver assistance camera lens area or drop the driver assistance camera.
Make sure that the driver assistance camera harness is not twisted after installation.
Perform camera aiming every time the driver assistance camera is removed and installed. Refer to Work Procedure.
 Exploded View
Bracket Driver assistance camera Cover ...
 Distance Sensor
...
Other materials:
Work Procedure
Always perform the distance sensor configuration after replacing the distance sensor.
Always perform the radar alignment after removing and installing or replacing the distance sensor.
CAUTION:
The system does not operate normally unless the distance sensor configuration and the radar alignment are ...
Removal and Installation
REMOVAL
Remove front center console rear finisher assembly. Refer to Removal and Installation.
Press the USB power socket fixing pawl from the back of the front center console rear finisher assembly to remove the USB power socket.
: Pawl
INSTALLATION
Note the following, and install in the rever ...
Removal and Installation
CAUTION:
Never bend the fixing pawl of front armrest RH.
REMOVAL
Remove front door finisher RH. Refer to Removal and Installation.
Disconnect front power window switch (passenger side) harness connector and door lock and unlock switch harness connector.
Remove front door squawker RH from front door ...

0.0061