Disassembly and Assembly
CAUTION:
When disassemble, always use a remover tool that is made of plastic to prevent damage.
OUTSIDE SEAT CUSHION FINISHER OUTER
Disassembly
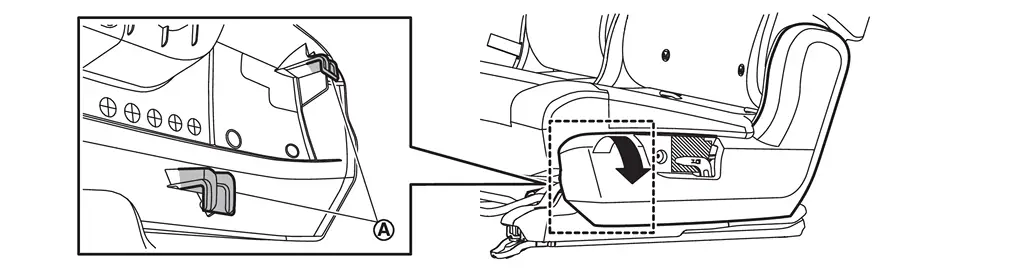
Disengage fixing pawls, and then remove reclining knob cap.
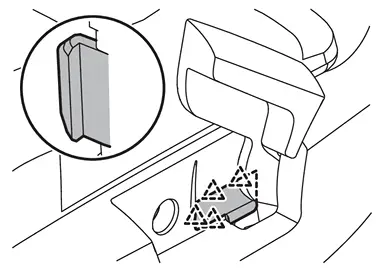
 |
: Pawl |
Disengage fixing portion  using a remover tool (A) according to numerical order 1→2 indicated by arrows as shown in the figure, and then remove reclining knob.
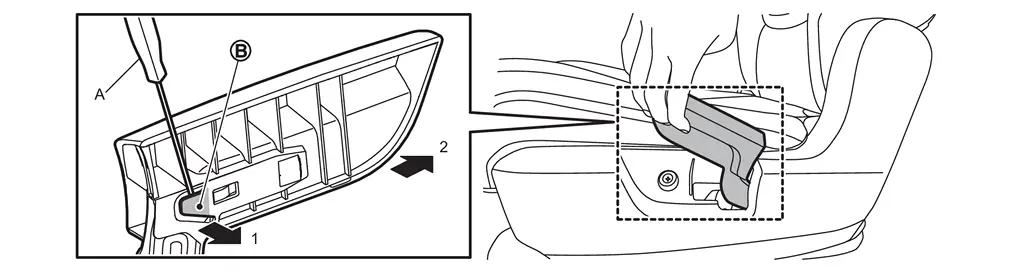
Remove outside seat cushion finisher outer.Remove outside seat cushion finisher outer fixing screw  .
.
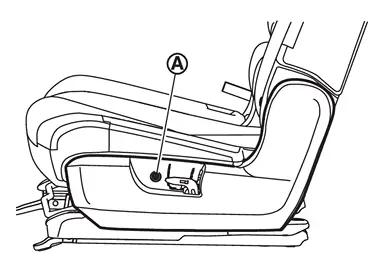
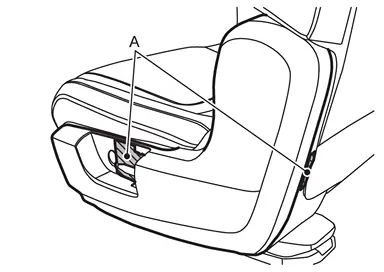
.
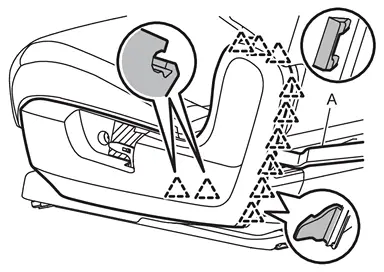
|
: Pawl |
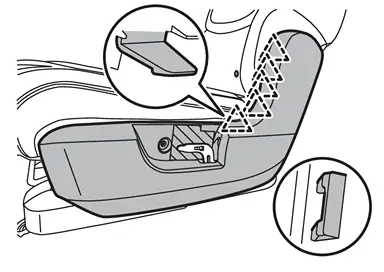
|
: Pawl |
Assembly
Assemble in the reverse order of disassembly.
INSIDE SEAT CUSHION FINISHER OUTER
Disassembly
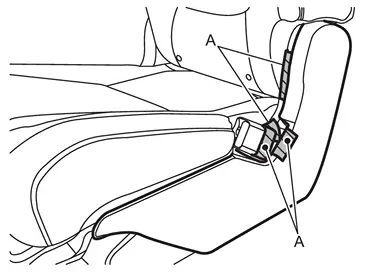
Apply protective tapes (A) to prevent damage.
-
LH seat
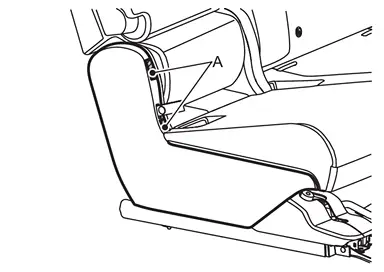
-
RH seat
Disengage fixing portion and clip.
-
LH seat
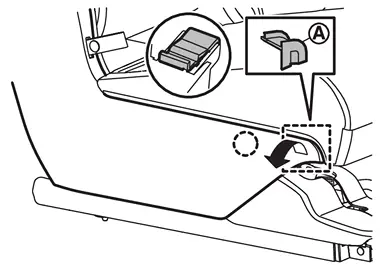

: Clip -
RH seat
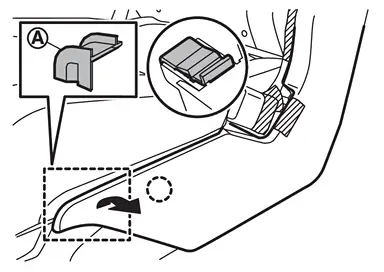
: Clip
Disengage fixing pawls and clip (LH seat) using a remover tool (A).
-
LH seat
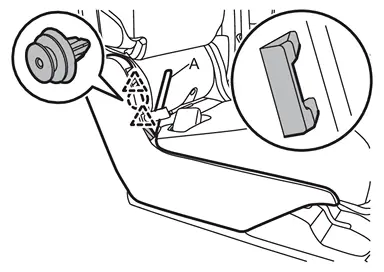
: Clip : Pawl -
RH seat
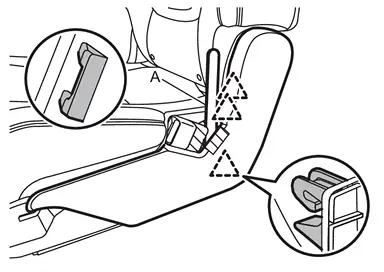
: Pawl
Disengage fixing pawls using a remover tool (A).
-
LH seat
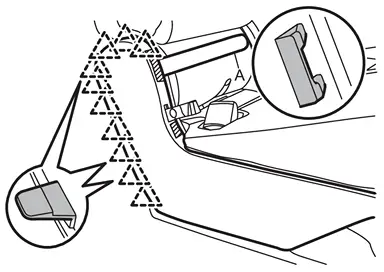
: Pawl -
RH seat
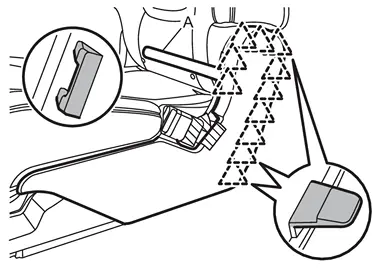
: Pawl
Disengage fixing portion and pawl(s), and then remove inside seat cushion finisher outer.
-
LH seat
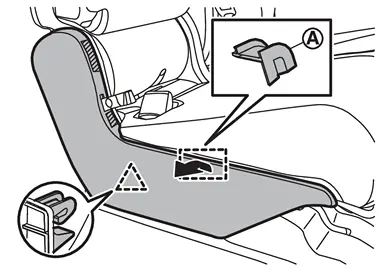
: Pawl -
RH seat
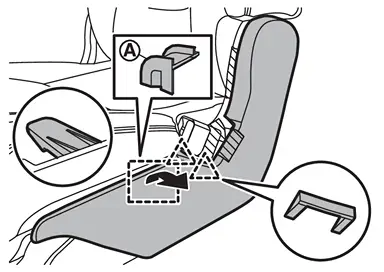
: Pawl
Assembly
Assemble in the reverse order of disassembly.
INSIDE / OUTSIDE SEAT CUSHION FINISHER INNER
Disassembly
Remove seat cushion trim and pad. Refer to Disassembly and Assembly.
Remove fixing screw , and then remove reclining strap (LH seat).
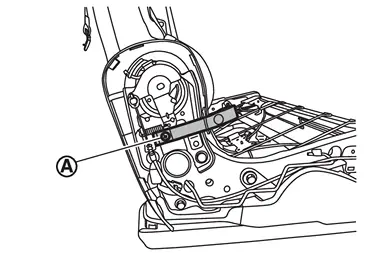
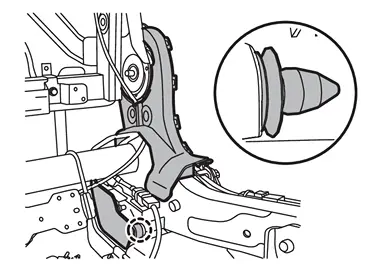
Disengage fixing clip, and then remove inside and outside seat cushion finisher inner.
|
: Clip |
Assembly
Assemble in the reverse order of disassembly.
OUTSIDE SEAT CUSHION LOWER COVER OUTER
Disassembly
Remove outside striker cover.
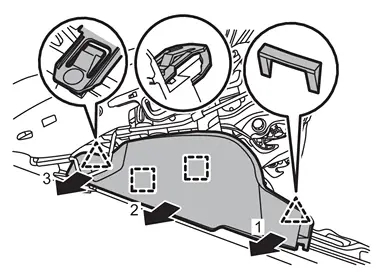
Disengage fixing pawls and metal clips according to numerical order 1→3 indicated by arrows as shown in the figure, and then remove outside seat cushion lower cover outer.
|
: Pawl |
 |
: Metal clip |
Assembly
Assemble in the reverse order of disassembly.
INSIDE SEAT CUSHION LOWER COVER OUTER
Disassembly
Remove inside striker cover.
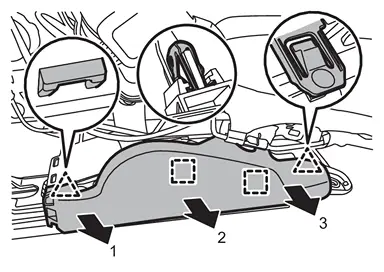
Disengage fixing pawls and metal clips according to numerical order 1→3 indicated by arrows as shown in the figure, and then remove inside seat cushion lower cover outer.
|
: Pawl |
|
: Metal clip |
Assembly
Assemble in the reverse order of disassembly.
OUTSIDE SEAT CUSHION LOWER COVER INNER
Disassembly
Remove outside seat cushion lower cover outer.
Disengage harness fixing clip from outside seat cushion lower cover inner.
CAUTION:
Before performing removal operation, check the installation position of harness fixing clip.
Disengage fixing metal clips, and then remove outside seat cushion lower cover inner.
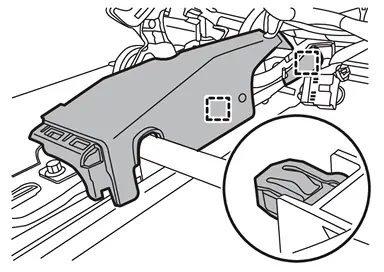
|
: Metal clip |
Assembly
Assemble in the reverse order of disassembly.
INSIDE SEAT CUSHION LOWER COVER INNER
Disassembly
Remove inside seat cushion lower cover outer.
Disengage harness fixing clip from inside seat cushion lower cover inner.
CAUTION:
Before performing removal operation, check the installation position of harness fixing clip.
Disengage fixing metal clips, and then remove inside seat cushion lower cover inner.
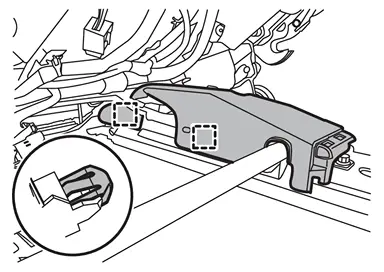
|
: Metal clip |
Assembly
Assemble in the reverse order of disassembly.
INSIDE / OUTSIDE SLIDE FINISHER
Disassembly
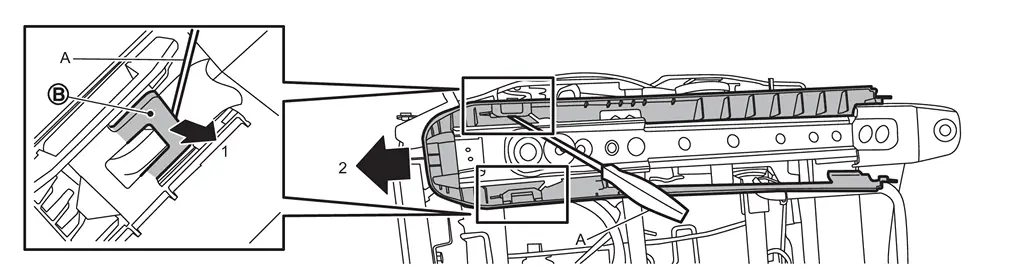
Remove fixing clips using a remover tool (A).
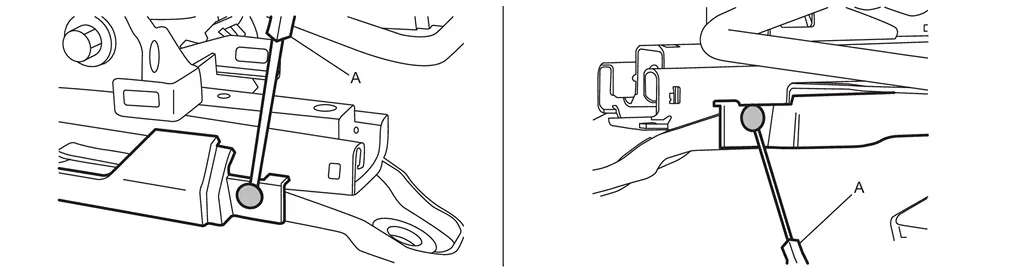
Disengage fixing portion using a remover tool (A) according to numerical order 1→2 indicated by arrows as shown in the figure, and then remove inside and outside slide finisher.
Assembly
Assemble in the reverse order of disassembly.
INSIDE / OUTSIDE STRIKER COVER
Disassembly
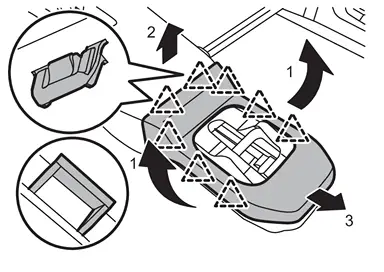
Disengage fixing pawls according to numerical order 1→3 indicated by arrows as shown in the figure, and then remove inside and outside striker cover.
|
: Pawl |
Assembly
Assemble in the reverse order of disassembly.
Other materials
Exterior rear
Example
The rear exterior section of the Nissan Armada includes advanced safety sensors,
lighting systems, and cargo access features that enhance usability and safety during
reversing, towing, and everyday driving scenarios.
Fuel-filler door
Fuel information
Antenna**
Re ...
Oil Filter
Removal and Installation
WARNING:
Jacking up or lift up the vehicle may the vehicle height to go down which cause a personal injury and/or damage to the air suspension component parts. Refer to Precaution for when Jacking and Lifting Up the vehicle with Electronic Air Suspension System.
REMOVA ...
Front Combination Lamp
Exploded View
Radiator core support
Front combination lamp
Front fender assembly
: N·m (kg-m, in-lb)
Removal and Installation
CAUTION:
Disconnect the battery negative terminal or remove power circuit fuse when performing the operation for preventing electric leakage. Refer to Precaut ...