Disassembly and Assembly
CAUTION:
When disassemble, always use a remover tool that is made of plastic to prevent damage.
DISASSEMBLY
Remove armrest.Disengage fixing pawls using a remover tool (A), and then remove armrest cover.
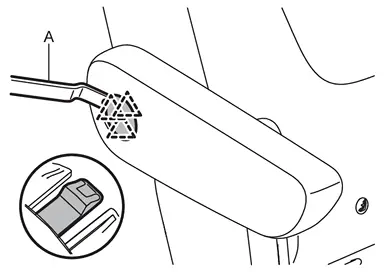
 |
: Pawl |
Remove inside and outside seat cushion finisher outer. Refer to Disassembly and Assembly.
Disengage fixing pawls using a remover tool (A), and then remove tether anchor finisher.
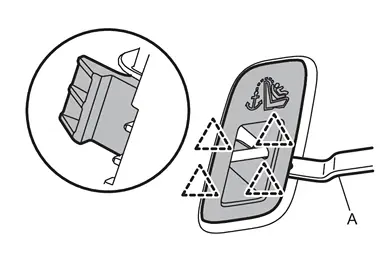
|
: Pawl |
Disengage seatback trim fixing retainer  .
.
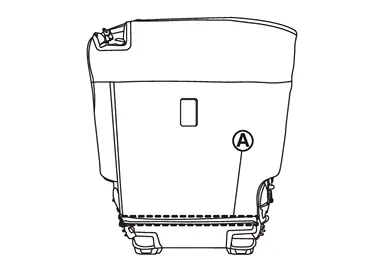
Remove seatback lever unit.Apply protective tape (A) to prevent damage.
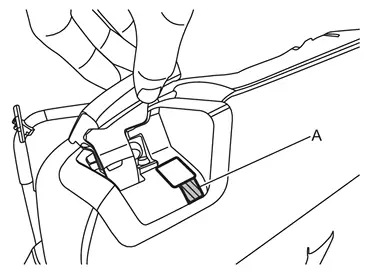
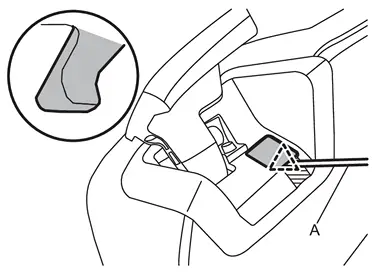
|
: Pawl |
.
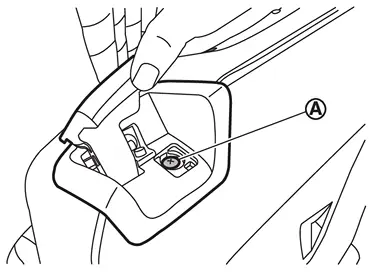
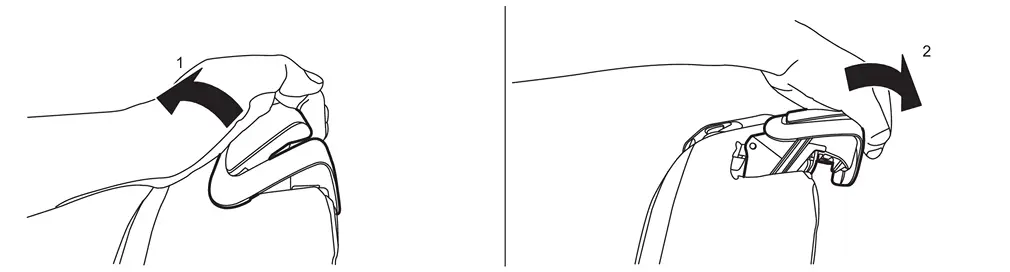
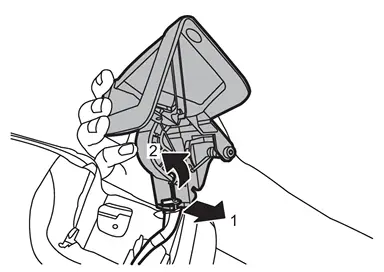
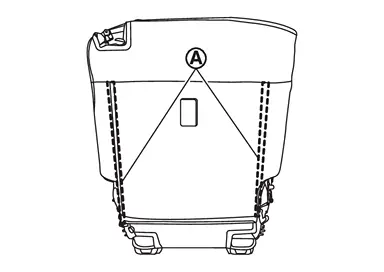
Open seatback trim fixing fasteners .
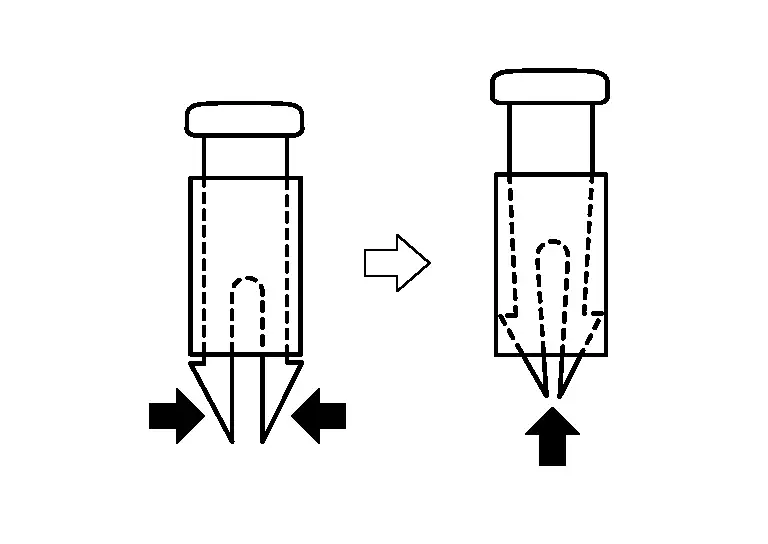
Remove headrest holders by raising it while pinching pawls from the bottom of headrest holders.
CAUTION:
Before removing headrest holders, check its orientation because it has installation direction (front/rear, left and right).
Disengage harness fixing clip of seatback, and then disconnect harness connector.
CAUTION:
Before performing removal operation, check the installation position of harness connector and harness fixing clip.
Remove seatback trim and pad as a set from seat frame assembly.
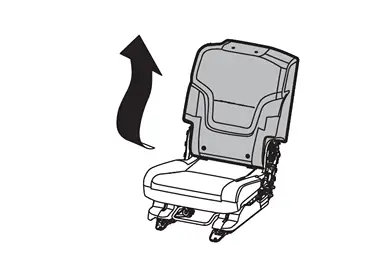
Remove hog rings, and then separate seatback trim and pad.
CAUTION:
-
Before removing hog rings, check its position because it should be installation in position.
-
Never disassemble seatback pad and seatback heater (if equipped).
Remove seatback lever unit escutcheon.
ASSEMBLY
Note the following items, and then assemble in the reverse order of disassembly.
CAUTION:
-
Never reuse hog ring after disassembly, using new hog ring.
-
Always install hog ring in position.
-
Use new hog ring if removed or crimped unsuccessfully.
-
Before installing headrest holders, check its orientation because it has installation direction (front/rear, left and right).
-
Be installed harnesses and harness fixing clips in position.
-
If harnesses clip be broken, replace with new clip and it install in position where marked before removing clip.
Other materials
ProPILOT Assist Systems Overview
The Nissan Armada ProPILOT Assist suite is engineered to provide advanced driver
support by combining multiple intelligent technologies that enhance safety, comfort,
and driving confidence. Each feature within the Nissan Armada ProPILOT Assist system
is specifically designed to assist the driv ...
Brake Caliper Assembly
Exploded View
REMOVAL
Brake caliper assembly
: N·m (kg-m, ft-lb)
DISASSEMBLY
Cap
Bleeder valve
Cylinder body
Sliding pin
Sliding pin boot
Bushing
Torque member
: vehicle front
: ...
Diagnosis and Repair Work Flow
Work Flow
OVERALL SEQUENCE
Reference 1··· CONSULT Function.
Reference 2··· DTC Index (6 Speaker Models).
Reference 3··· Symptom Table.
DETAILED FLOWINTERVIEW AND SYMPTOM CONFIRMATION
Check the malfunction symptoms by performing the following items.
Interview the customer to obtain ...