Exploded View
With ProPILOT Assist 2.1 models 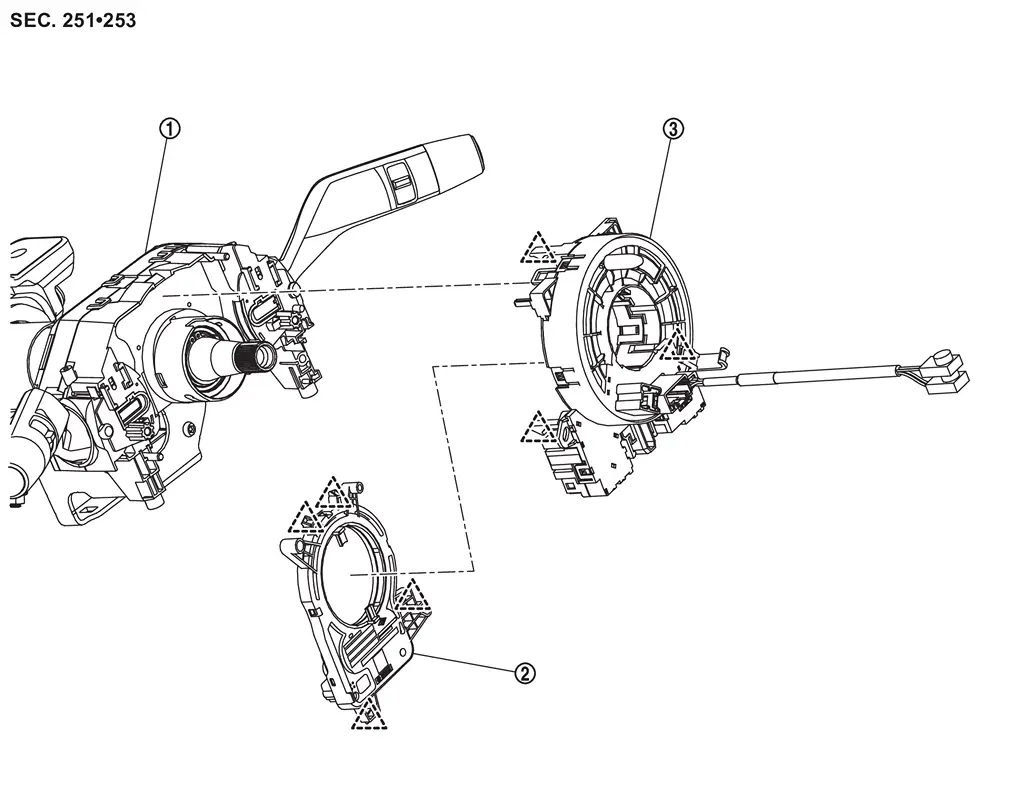
 |
Combination switch |  |
Steering angle sensor |  |
Spiral cable |
 |
: Pawl | ||||
Without ProPILOT Assist 2.1 models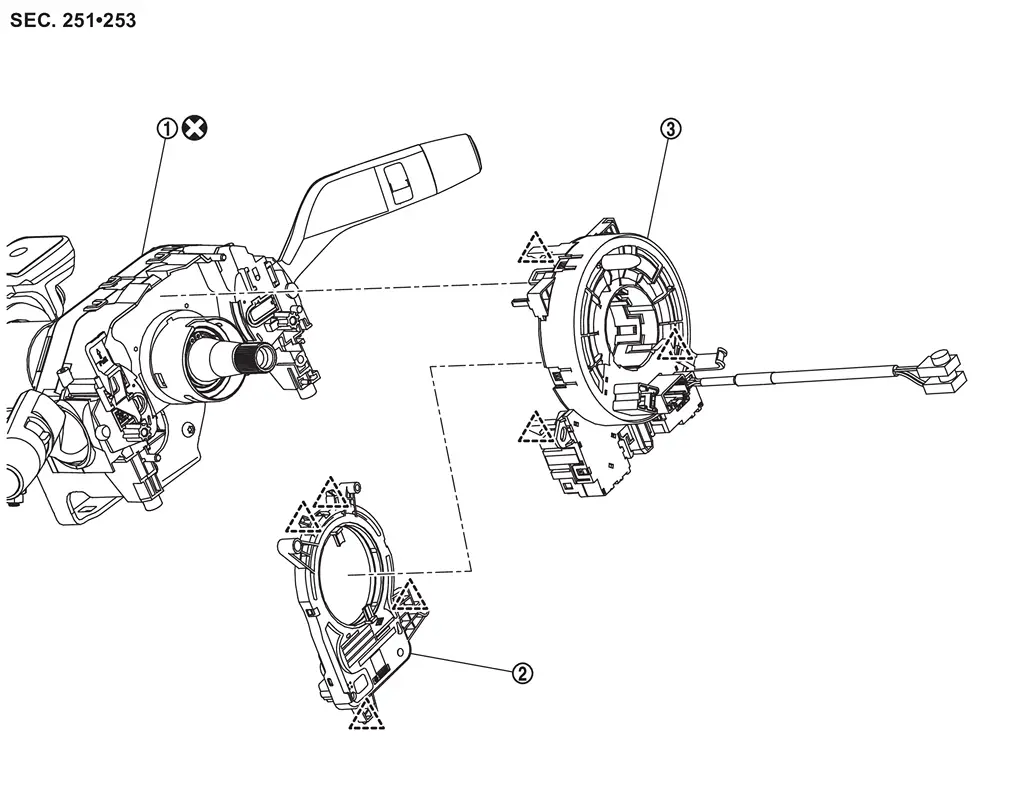
|
Combination switch | |
Steering angle sensor | |
Spiral cable |
|
: Pawl | ||||
 |
: Always replace after every disassembly. | ||||
Removal and Installation
REMOVAL
Remove driver air bag module. Refer to Removal & Installation.
Remove steering wheel. Refer to Removal and Installation.
Remove steering column cover upper and lower. Refer to Removal and Installation.
Disconnect spiral cable body side harness connectors  .
.
-
Left side
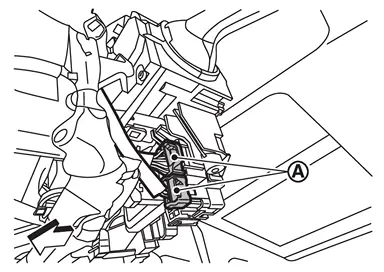
: vehicle front -
Right side
(with steering heater models)
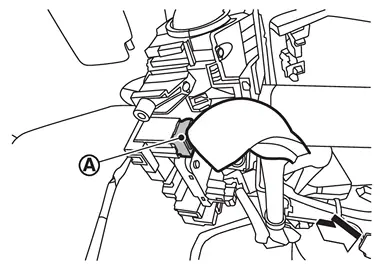
: vehicle front
Disconnect steering angle sensor body side harness connector .
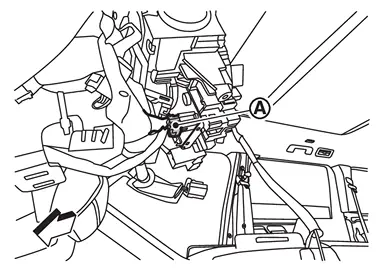
| : vehicle front |
Disengage spiral cable fixing pawls, and then remove spiral cable with steering angle sensor.
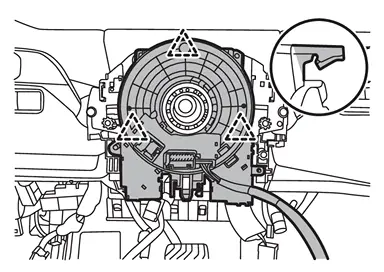
|
: Pawl |
Remove steering angle sensor. Refer to Removal and Installation.
CAUTION:
-
To prevent damage to the parts, never impact the spiral cable.
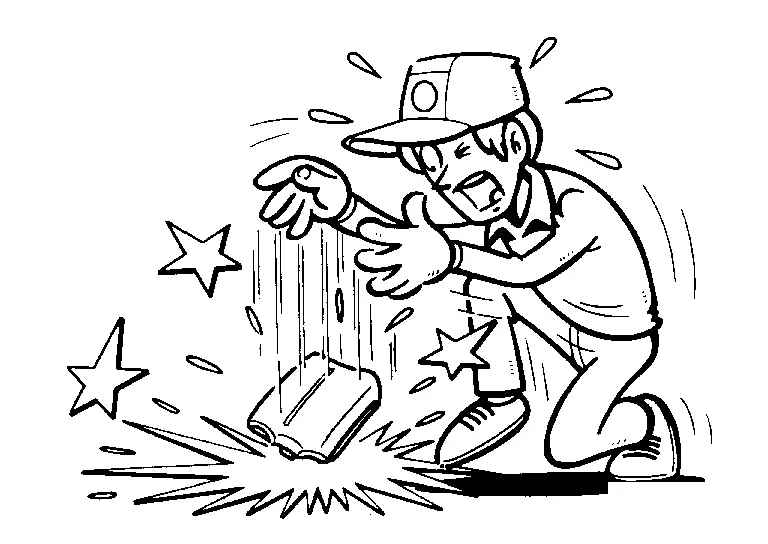
-
Replace spiral cable if it is dropped or sustains an impact.
-
To prevent damage to the parts, never disassemble the spiral cable.
-
To prevent damage to the parts, never apply lubricant to the spiral cable.
-
To prevent damage to the parts, never allow oil, grease, detergent, or water to come in contact with the spiral cable.
INSTALLATION
CAUTION:
-
Always replace combination switch with a new one when spiral cable is removed (without ProPILOT Assist 2.1 models). Refer to Removal and Installation.
-
The spiral cable may snap during steering operation if the cable is installed in an improper position.
 NOTE:
NOTE:
If you buy the new parts, no need to set the neutral position because its has been set the neutral position.
Set the neutral position.Carefully turn spiral cable clockwise to the end position.
CAUTION:
Never turn spiral cable powerfully where the end position.
Turn counterclockwise (about 2 and a half turns) and stop turning where the part of clear window appear yellow mark.
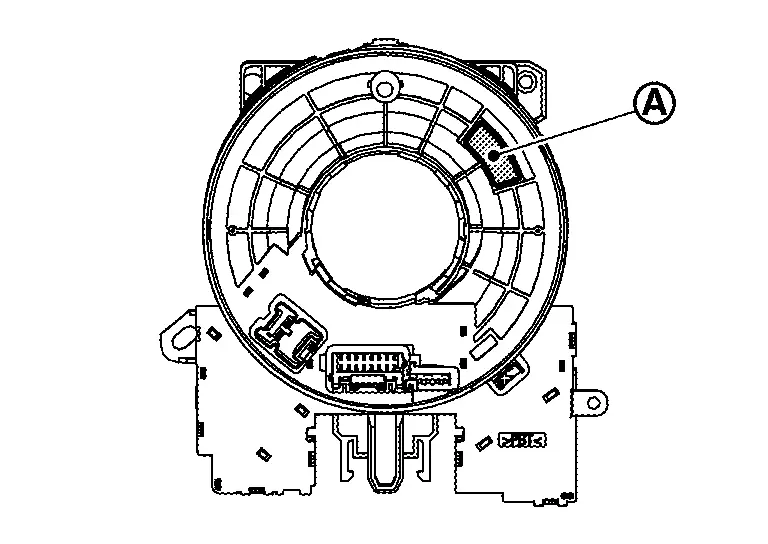
Install steering angle sensor to spiral cable. Refer to Removal and Installation.
CAUTION:
When installing, align of spiral cable and  of steering angle sensor.
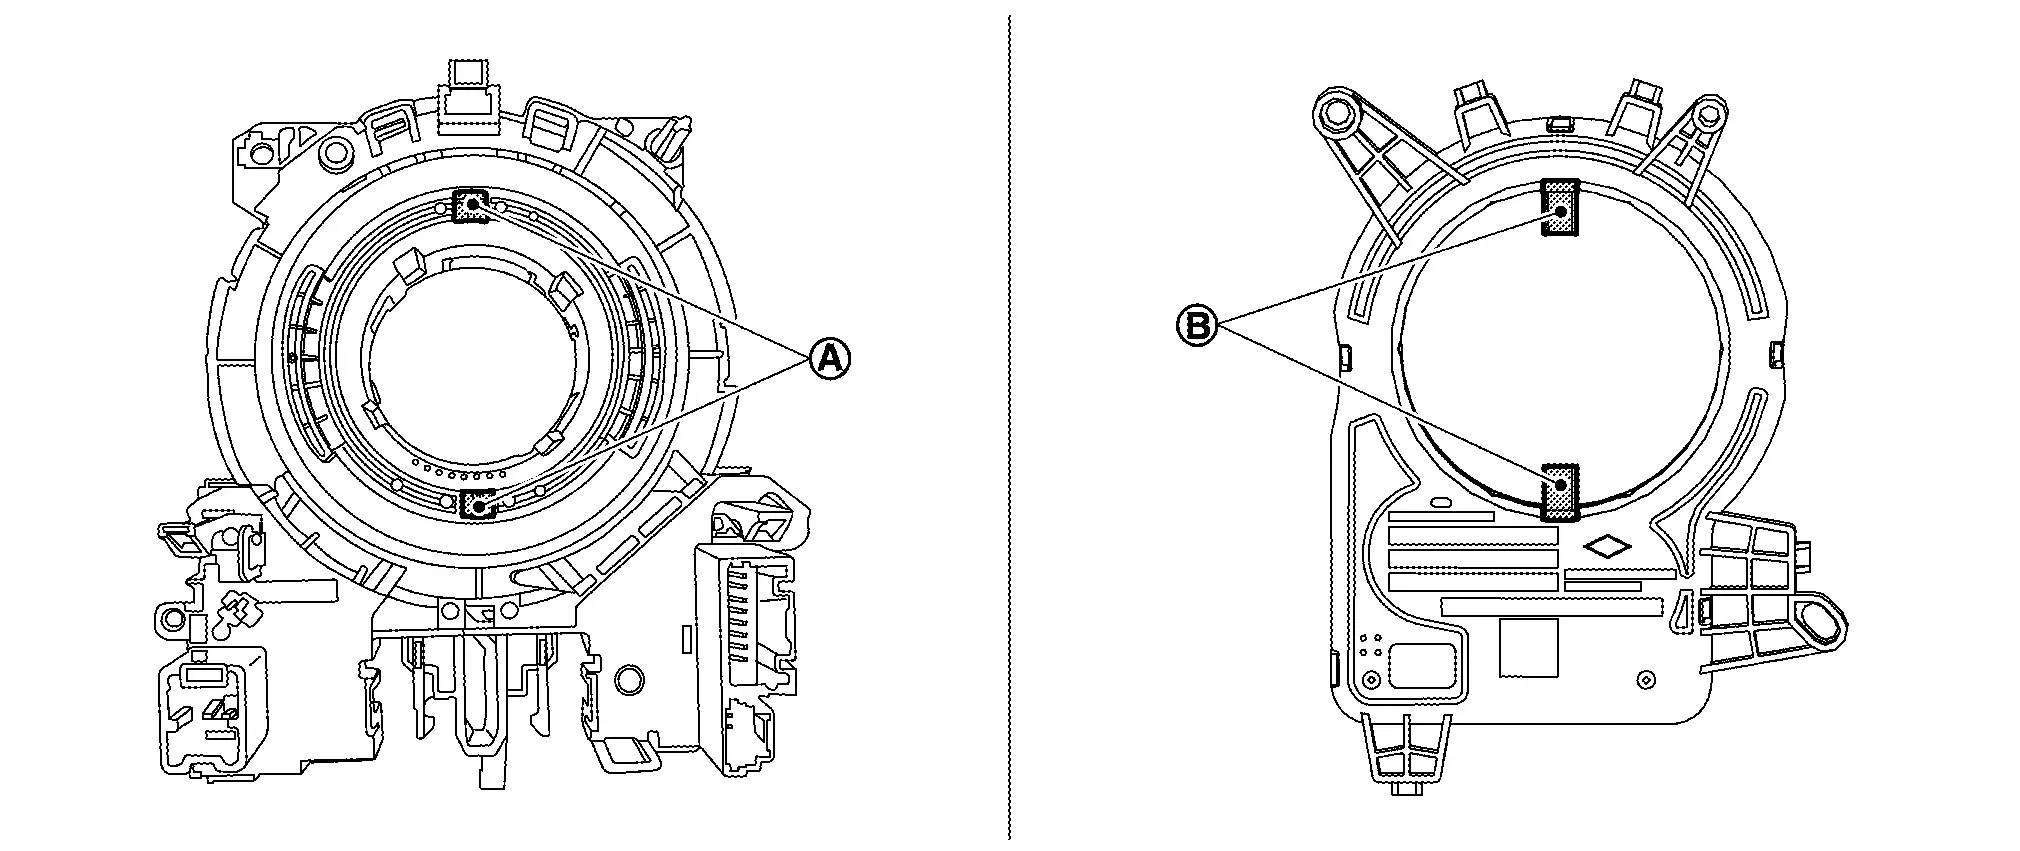
Install spiral cable into combination switch by fixing pawls.
Remove lock pin of combination switch according to numerical order 1→2 indicated by arrows as shown in figure (without ProPILOT Assist 2.1 models).
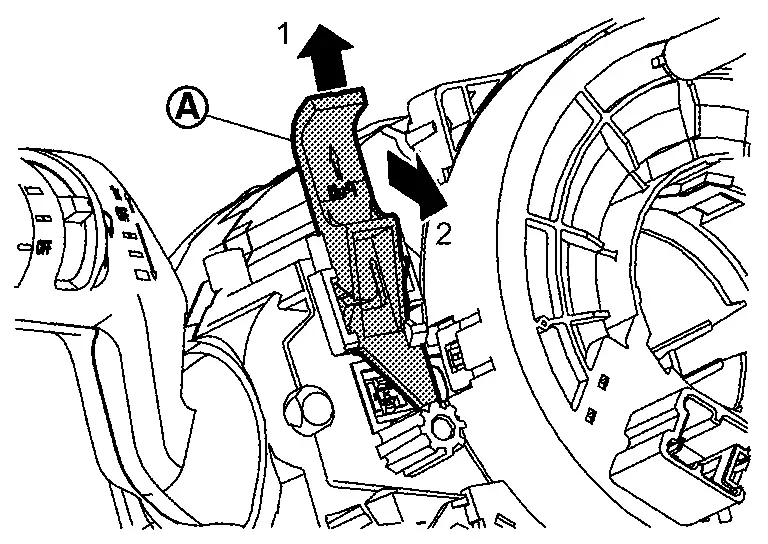
Connect body side harness connectors to spiral cable and steering angle sensor.
Install steering column cover upper and lower. Refer to Removal and Installation.
Install steering wheel. Refer to Removal and Installation.
CAUTION:
When install steering wheel, set locate pin of spiral cable and locate hole of steering wheel.
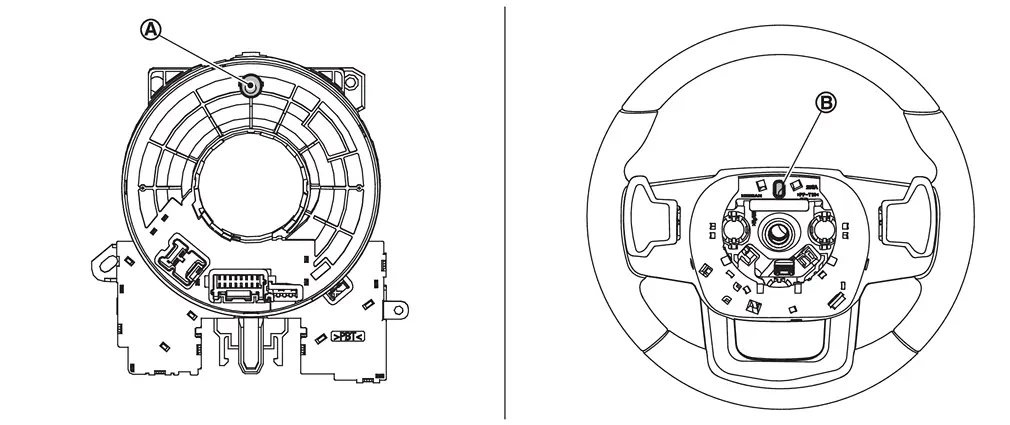
Install driver air bag module. Refer to Removal & Installation.
CAUTION:
-
After installation is completed, perform self-diagnosis using CONSULT and confirm if the system is normal. Refer to Work Flow.
-
After the work is completed, check that no system malfunction is detected by air bag warning lamp.
-
After installation is completed, perform steering torque calibration. Refer to Work Procedure.
Other materials
I-BSI system operation
Example
Side indicator light
I-BSI ON indicator (vehicle information display)
I-BSI indicator (vehicle information display)
ProPILOT Assist switch (design may vary depending on Nissan Armada model)
The Nissan Armada I-BSI system becomes active at speeds above approximately 37
MPH ...
Door Lock Operation Warning Does Not Operate
Diagnosis Procedure
CHECK DOOR LOCK FUNCTION
Check door lock using door request switch.
Does door lock with door request switch?
YES>>
GO TO 2.
NO>>
Refer to DTC Diagnosis Procedure.
CHECK INTELLIGENT KEY WARNING BUZZER
Check Intelligent Key warning buzzer.
Refer to Diagnosis Procedure ...
Diagnosis and Repair Work Flow
Work Flow
OVERALL SEQUENCEDETAILED FLOWGET INFORMATION FOR SYMPTOM
Get the detailed information about symptom from customer.
Check the drive mode indicator on the meter appeared.
Check the drive mode indicator on the meter changed when operates the drive mode selector switch.
>>
GO T ...