Description
After working the following, transfer unit parameter must be written to transfer control unit.
-
Transfer control unit replacing
-
Transfer assembly replacing
-
Transfer control actuator replacing
-
Transfer range position sensor replacing
-
Transfer cam position sensor replacing
-
Transfer case component parts disassembling
 NOTE:
NOTE:
Write charactereistic value in transfre control unit, if the above each parts is replaced.
For the work procedure, refer to Work Procedure.
Work Procedure
WARNING:
-
Jacking up or lift up the vehicle may the vehicle height to go down which cause a personal injury and/or damage to the air suspension component parts. Refer to Precaution for when Jacking and Lifting Up the vehicle with Electronic Air Suspension System.
UNIT CHARACTERISTIC VALUE CONFIRMATION
Confirm the 5-digit alphanumeric unit characteristic value written in the QR code pasted on the side or top of the transfer assembly.
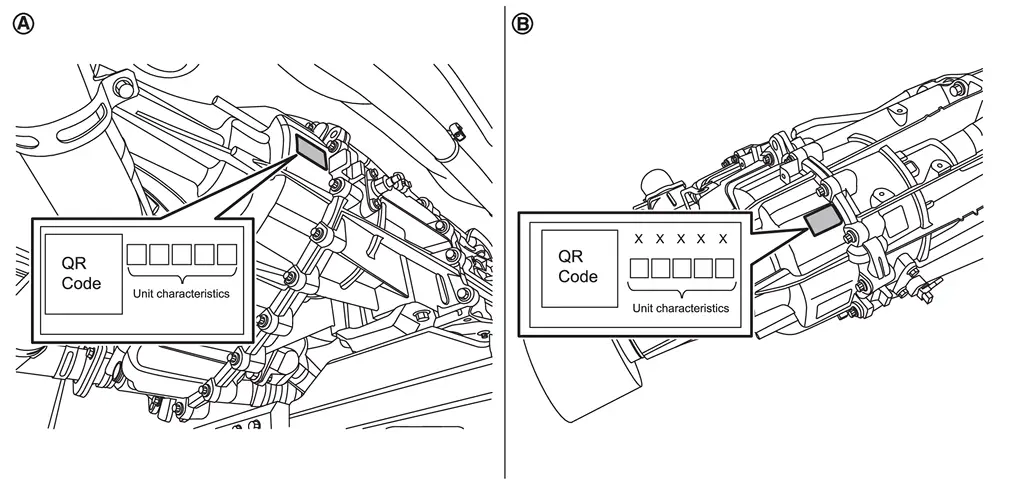
 |
: Side surface |
 |
: Top surface |
NOTE:
There is space on the top to check with the camera.
>>
GO TO 2.
WRITING UNIT PARAMETER
With CONSULT
-
Ignition switch ON.
-
Select “Work support” in “AWD/4WD”.
-
Perform “Unit parameter writing” to the CONSULT display.
>>
WORK END
Other materials
Roof Tools and Preparation
Special Service Tools
The actual shapes of TechMate tools may differ from those of special service tools illustrated here.
Tool number
(TechMate No.)
Tool name Description
(NI-39570)
Chassis ear
Locates the noise
(NI-50397)
NISSAN Squeak and Rattle Kit
Repairs the cause of noise
C ...
Horn
Exploded View
Horn low
Horn high
Radiator core support
: vehicle front
: N·m (kg-m, ft-lb)
Removal & Installation
REMOVAL Horn HighRemove front bumper fascia assembly. Refer to Removal and Installation.
Disconnect harness connector .
Remove mounting bolt , and then remove hor ...
Additional Service When Replacing Audio Amp.
Work Procedure
CAUTION:
When after replacing audio amp, Configuration must be performed. Or not doing so, audio amp. control function does not operate normally.REPLACE AUDIO AMP.
Replace audio amp. Refer to Removal & Installation.
>>
GO TO 2.
PERFORM AUDIO amp. CONFIGURATION
Perform aud ...