Exploded View
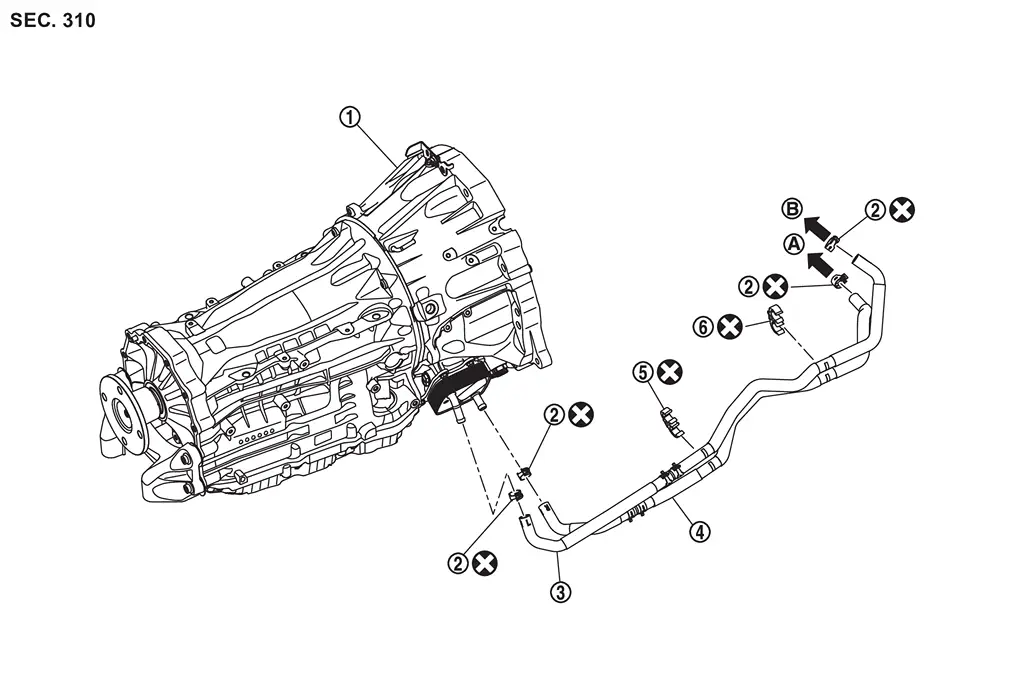
 |
A/T assembly |  |
Hose clamp |  |
A/T water hose A |
 |
A/T water hose B |  |
Clip A |  |
Clip B |
 |
To water pipe. Refer to Exploded View. |  |
To oil cooling exchanger. Refer to Exploded View. | ||
 |
: Always replace after every disassembly. | ||||
Removal and Installation
WARNING:
-
Jacking up or lift up the vehicle may the vehicle height to go down which cause a personal injury and/or damage to the air suspension component parts. Refer to Precaution for when Jacking and Lifting Up the vehicle with Electronic Air Suspension System.
REMOVAL
WARNING:
 NOTE:
NOTE:
When removing components such as hoses, tubes/lines, etc., cap or plug openings to prevent fluid from spilling.
CAUTION:
Perform this step when the engine is cold.
Remove front under cover. Refer to Removal and Installation.
Drain engine coolant. Refer to ENGINE COOLANT : Draining.
Remove hose clamps  , and remove A/T water hose A
  and A/T water hose B from A/T fluid warmer.
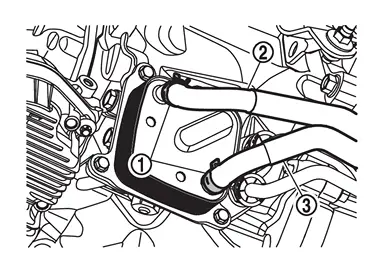
CAUTION:
Never reuse hose clamps.
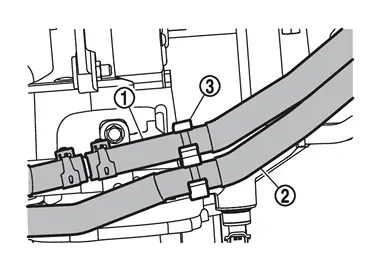
Remove A/T water hose A and A/T water hose B from clip A .
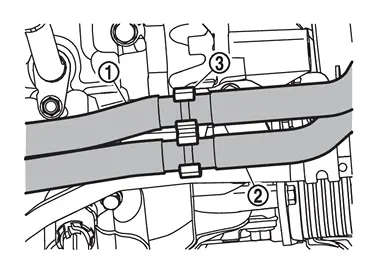
Remove A/T water hose A and A/T water hose B from clip B .
Remove hose clamp , and remove A/T water hose A from water pipe.
CAUTION:
Never reuse hose clamp.
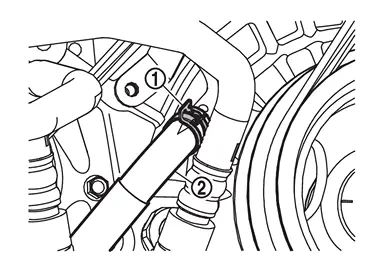
Remove hose clamp , and remove A/T water hose B from oil cooling exchanger.
CAUTION:
Never reuse hose clamp.
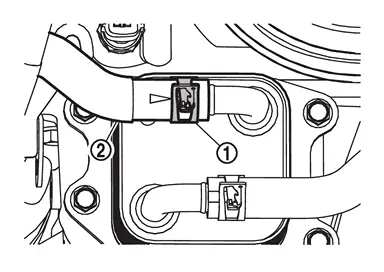
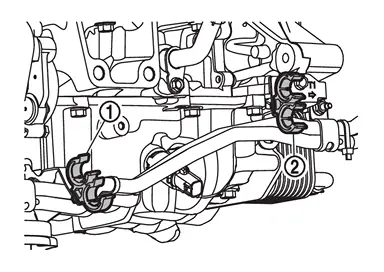
Remove clip A and clip B from bracket.
CAUTION:
Never reuse clips.
INSTALLATION
Note the following, and install in the reverse order of removal.
CAUTION:
-
Hose clamp should not interfere with the bulge of tube.
-
Securely install the water hose clip to the bracket hole.
-
Refer to the following when installing A/T water hose.
Water hose Installation side tube Direction of paint mark Hose insertion depth (L) A/T Water hose A Water pipe Align with the paint mark on water pipe End reaches the 2-stage bulge. A/T fluid warmer Align with the paint mark on the A/T fluid warmer A/T Water hose B A/T fluid warmer Align with the paint mark on the A/T fluid warmer oil cooling exchanger Frontward 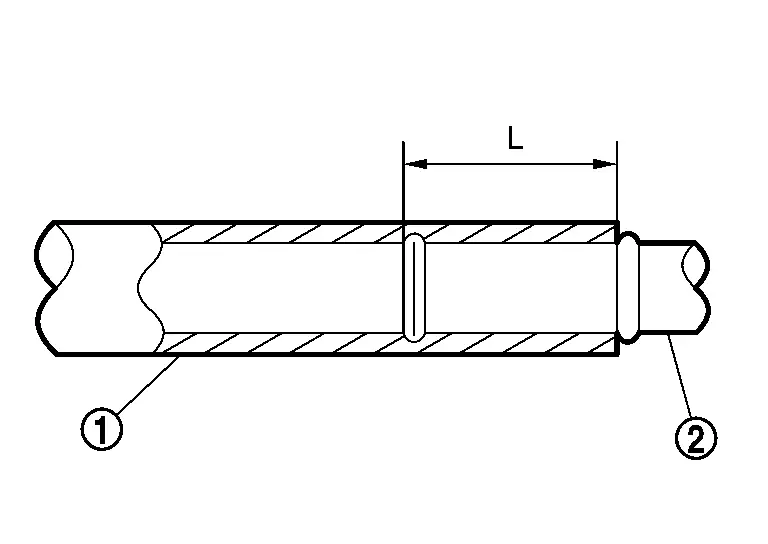
-
Refer to the following when installing hose clamps.
Water hose Installation side tube Hose clamp 
Direction of tab Clamping position Water hose A Water pipe Frontward 3 - 7 mm (0.12 - 0.28 in) (A) from hose end. A/T fluid warmer Upward Water hose B A/T fluid warmer Upward oil cooling exchanger Frontward 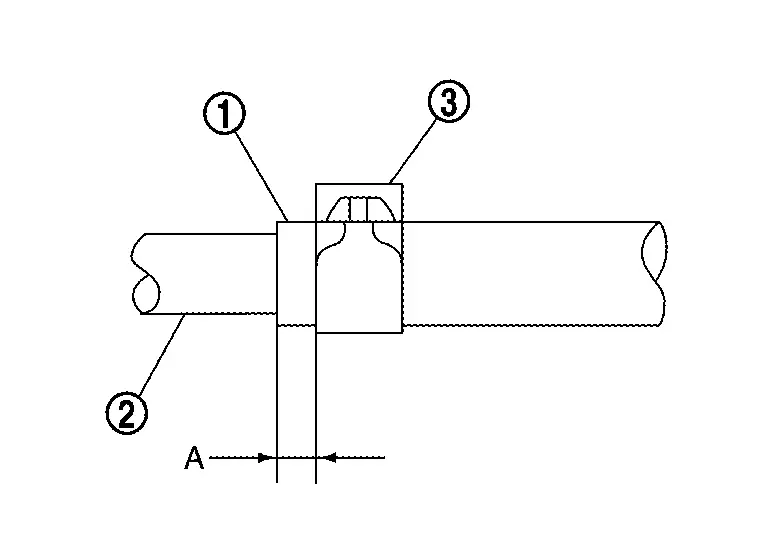
-
When installing the A/T water hose
to the clip , attach the paint mark on the A/T water hose to the rightward of the vehicle.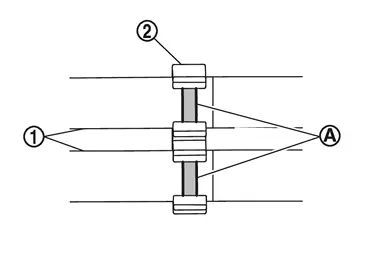
Inspection and Adjustment
INSPECTION AFTER INSTALLATION
Start the engine, and check the joints for coolant leakage. Refer to ENGINE COOLANT : Inspection.
Other materials
Ignition Coil, Spark Plug and Rocker Cover
Exploded View
Bank 1 side
Ignition coil
Spark plug
Rocker cover
Rocker cover gasket
Blow-by hose 1 (bank 1)
Clamp
Blow-by hose 2 (bank 1)
Intake camshaft position sensor
Exhaust camshaft position sensor
Crankcase pressure sensor
Comply ...
Precautions
PRECAUTIONS FOR SUPPLEMENTAL RESTRAINT SYSTEM (SRS) AIR BAG AND SEAT BELT PRE-TENSIONER : Precautions
The Supplemental Restraint System such as “AIR BAG” and “SEAT BELT PRE-TENSIONER”, used along with a front seat belt, helps to reduce the risk or severity of injury to the driver and front p ...
Passenger Side
Description
Passenger door does not lock/unlock using door lock and unlock switch.
Diagnosis Procedure
CHECK DOOR LOCK ACTUATOR
Check door lock actuator (passenger side).
Refer to Diagnosis Procedure.
Is the inspection result normal?
YES>>
GO TO 2.
NO>>
Repair or replace the malfunctio ...