Accelerator Control System
Exploded View
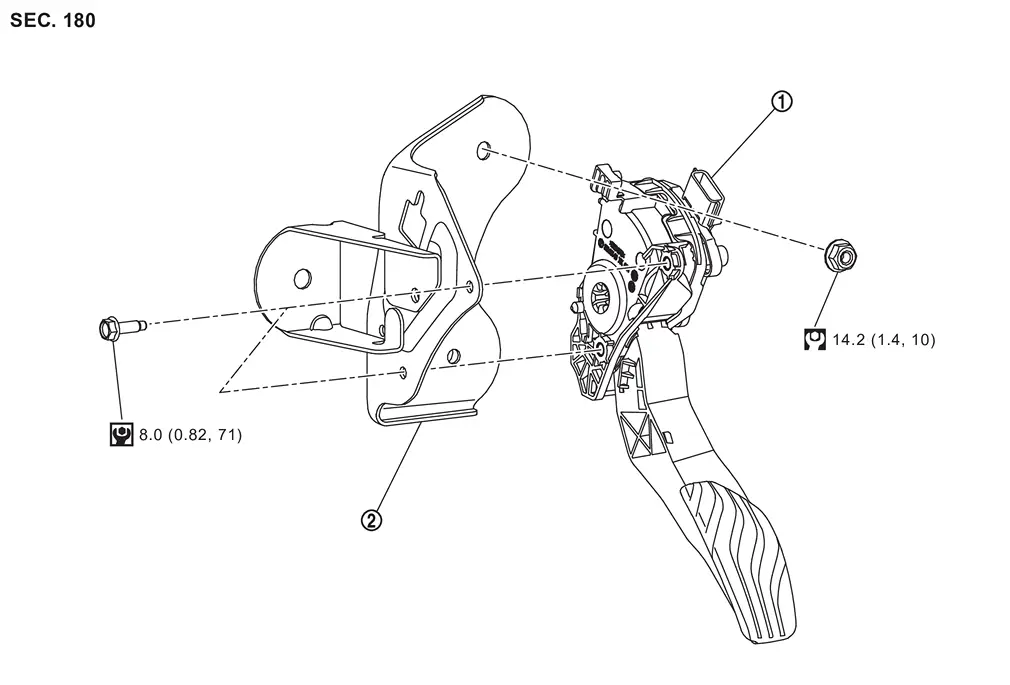
 |
Accelerator pedal assembly |  |
Accelerator pedal bracket | ||
 |
: N·m (kg-m, ft-lb) | ||||
 |
: N·m (kg-m, in-lb) |
Removal and Installation
REMOVAL
CAUTION:
-
Never disassemble accelerator pedal assembly.
-
Never remove accelerator pedal position sensor from accelerator pedal assembly.
-
Avoid impact from dropping etc. during handling.
-
Be careful to keep accelerator pedal assembly away from water.
Disconnect accelerator pedal harness connector as follows.Slide the connector lock to  upward (1).
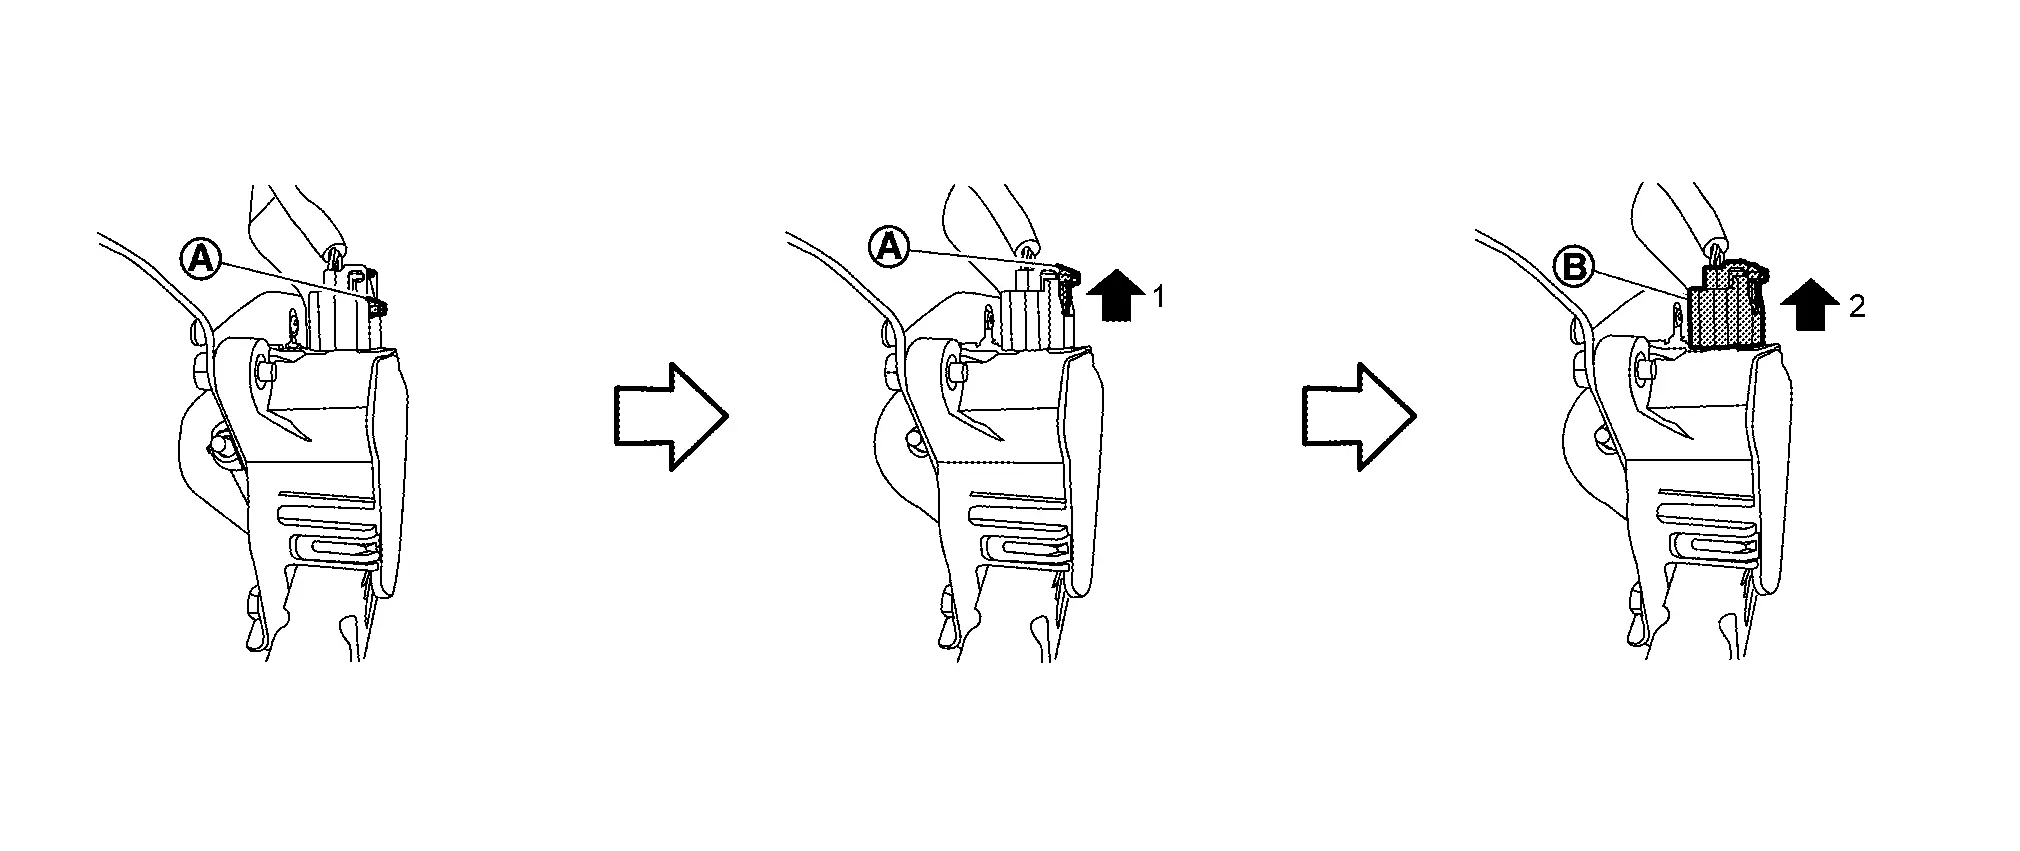
 to upward (2) with pushing in the connector lock.
Remove the mounting bolts, and remove accelerator pedal assembly.
If necessary remove mounting nut, and remove accelerator pedal bracket.
INSTALLATION
Note the following, and install in the reverse order of removal.
-
Install the protrusion
of the bracket into the locating hole of the accelerator pedal assembly before tightening the accelerator pedal assembly mounting bolts.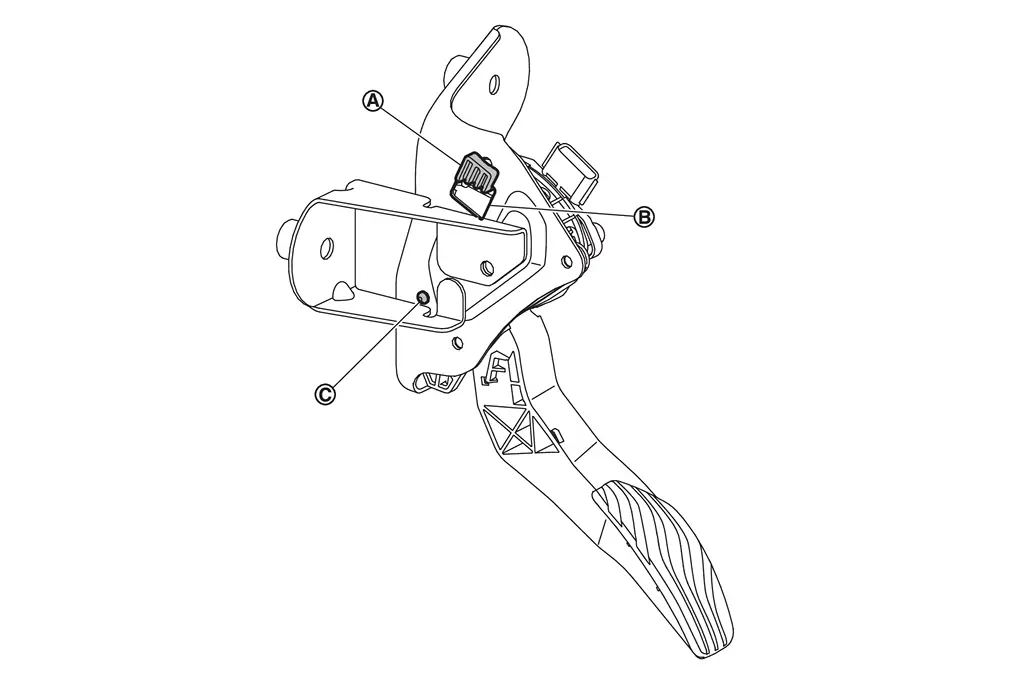

: Locating pin CAUTION:
-
When inserting accelerator pedal assembly to protrusion
, never scratch locating hole with the protrusion. -
Tighten bolts with the locating pin
securely inserted in the bracket hole.
-
CAUTION:
When harness connector of accelerator pedal position sensor is disconnected, perform “ACCELERATOR PEDAL RELEASED POSITION LEARNING�. Refer to Work Procedure.
Inspection
INSPECTION AFTER INSTALLATION
-
Check accelerator pedal moves smoothly within the whole operation range when it is fully depressed and released.
-
Check accelerator pedal securely returns to the fully released position.
 NOTE:
NOTE:
For the electrical inspection of accelerator pedal position sensor. Refer to Component Inspection.
Other materials
Precautions on child restraints
The Nissan Armada is designed with advanced safety systems to protect all occupants,
but the correct use of child restraints remains one of the most critical factors
in ensuring child safety. Proper installation and usage of child restraint systems
in the Nissan Armada significantl ...
Second Seat Cushion
Disassembly and Assembly
DISASSEMBLYRemove seatback trim and pad. Refer to Disassembly and Assembly.
Disengage seat cushion trim fixing retainers .
Disengage seat cushion trim fixing retainers .
Disengage harness fixing clip of seat cushion, and then disconnect harness connector.
CAUTION:
Before ...
Passenger Door Mirror Control Module
Exploded View
Passenger door mirror control module
Clip
Front door panel
: vehicle front
Removal and Installation
REMOVALRemove front door finisher (passenger side). Refer to Removal & Installation.
Disconnect harness connector.
Disengage passenger door mirror control module fixin ...