
Nissan Armada 2025-2026 Service and Repair Manual: Adjustment
WARNING:
| Recommended fluid and fluid capacity | : Refer to Fluids and Lubricants. |
CAUTION:
Use only recommended A/T fluid. Never mix with other A/T fluid.
Always maintain the A/T fluid temperature within between 45°C (113°F) and 55°C (131°F) while checking with CONSULT when the A/T fluid level adjustment is performed.
Start the engine.
Adjust the A/T fluid temperature to be approximately 50°C (122°F).
 NOTE:
NOTE:
Check that the "Fluid temperature" in "Data Monitor" is between 45°C (113°F) and 55°C (131°F) using CONSULT.
Lift up the vehicle.
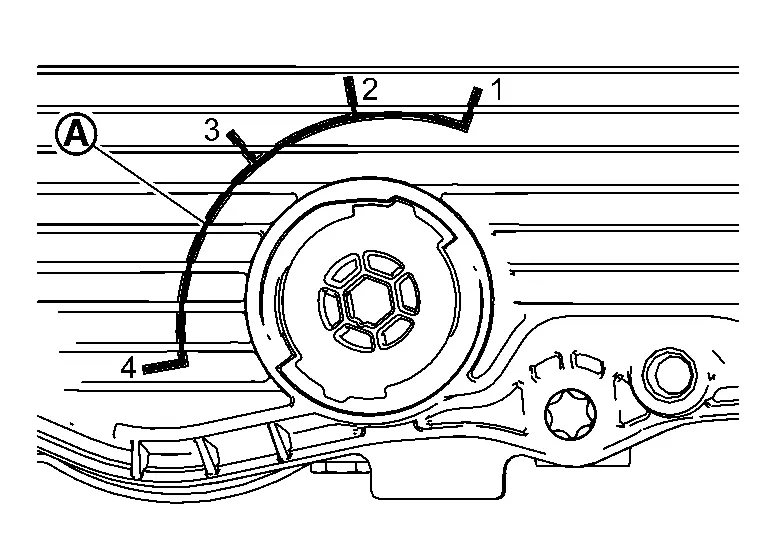
Install the A/T fluid injection plug (SST: NI-52972–1) and charge pipe adapter set (SST: NI-52584) into the oil pan.
| (1) | : Closed |
| (2) | : Slow drain |
| (3) | : Overflow |
| (4) | : Drain |
NOTE:
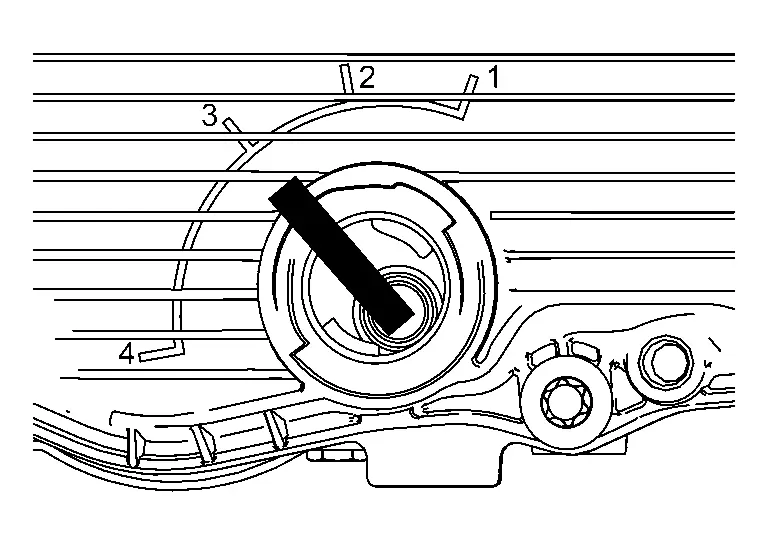
The overflow tube has a deformed hexagonal shape, the current overflow tube position determines the position for the OFT position change wrench (SST: NI-52972–2) alignment.
Insert OFT position change wrench (SST: NI-52972–2) into the overflow tube and rotate to position (1) (Closed).
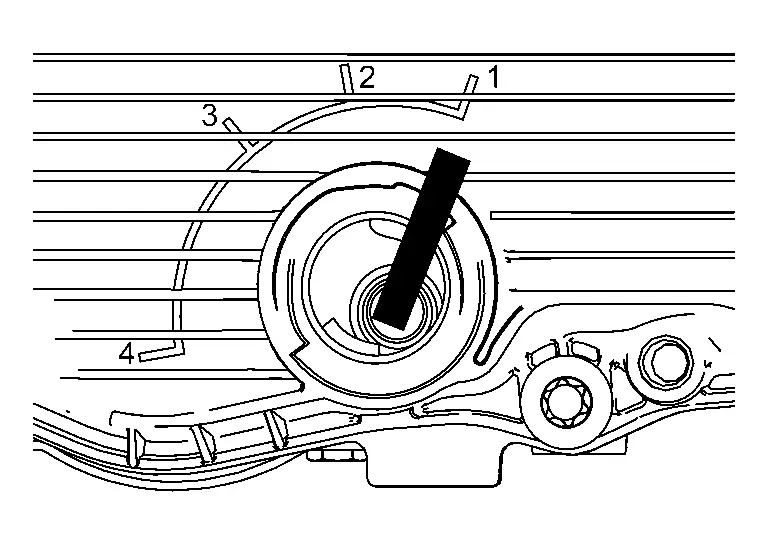
| (1) | : Closed |
| (2) | : Slow drain |
| (3) | : Overflow |
| (4) | : Drain |
Install the drain plug and tighten it to the specified torque.
| Drain plug | : 6 N·m (0.61 kg-m, 53 in-lb) |
CAUTION:
Never over tighten the drain plug.
Never reuse O-ring
Work end.
 Changing
WARNING:
Recommended fluid and fluid capacity Refer to Fluids and Lubricants.
CAUTION:
Use only recommended A/T fluid. Never mix with other A/T fluid.
Start the engine.
Adjust the A/T fluid temper ...

Other materials:
Removal and Installation
CAUTION:
Disconnect the battery negative terminal or remove power circuit fuse when performing the operation for preventing electric leakage. Refer to Precautions for Removing Battery Terminal.
REMOVAL
Remove front bumper fascia. Refer to following.
City model: Removal and Installation.
Off road mo ...
Passenger Compartment
WARNING:
MEASUREMENT (EXTERIOR)
Unit: mm (in)
Unit: mm (in)
«The others» Point Dimension Memo Point Dimension Memo Point Dimension Memo – 1591 (62.64) – 1892 (74.49) – 849 (33.43) – 1785 (70.28) – 1647 (64.84) – 909 (35.79) – 1788 (70.39) – 2019 (79.49) – ...
Removal and Installation
REMOVAL
Remove rear moonroof glass. Refer to Removal and Installation.
Disengage sunshade stay using a remover tool (B) from sunshade slider as shown by the arrow in the figure.
CAUTION:
Apply protective tape (C) on remover tool to protect parts from damage.
Push sunshade stay according to nume ...

0.0056