Exploded View
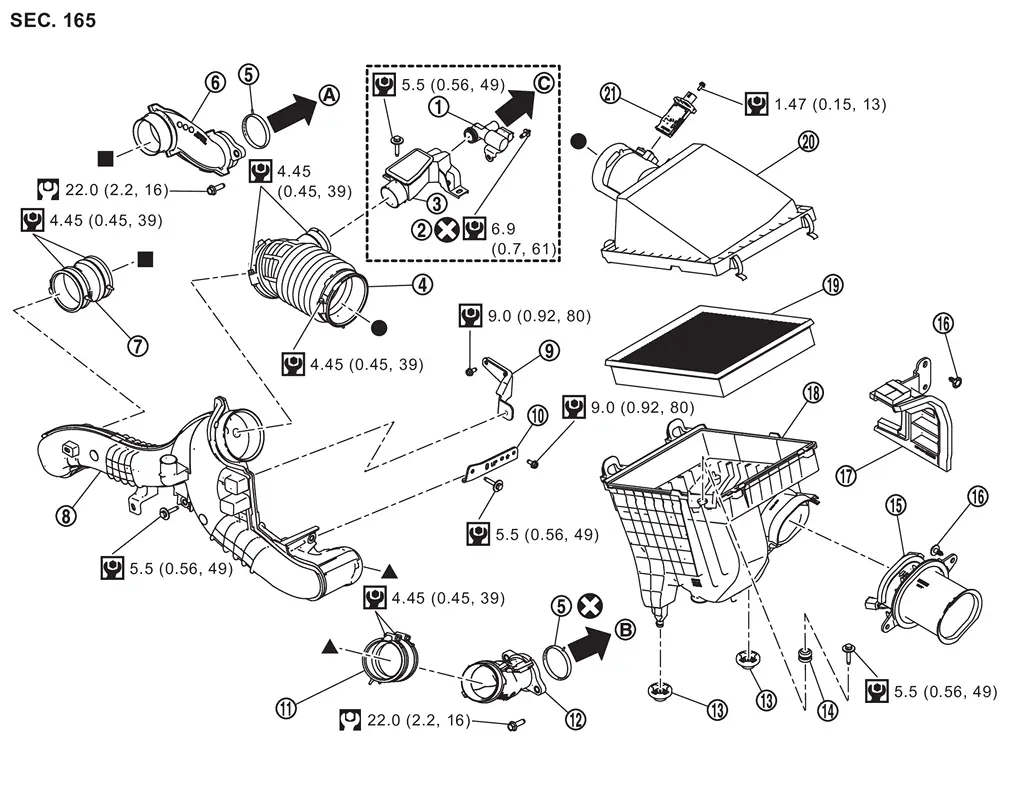
* When removing the crankcase ventilation valve exchange as a set.
Removal and Installation
WARNING:
Jacking up or lift up the vehicle may the vehicle height to go down which cause a personal injury and/or damage to the air suspension component parts. Refer to Precaution for when Jacking and Lifting Up the vehicle with Electronic Air Suspension System.
REMOVAL
 NOTE:
NOTE:
The mass air flow sensor can be removed while still installed on the air cleaner cover.
Remove engine cover. Refer to Removal and Installation.
Disconnect mass air flow sensor harness connector  .
.
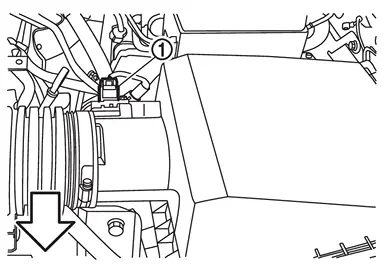
| : vehicle front |
Remove mass air flow sensor from air cleaner cover if necessary.
CAUTION:
Handle mass air flow sensor according to the following instructions.
-
Never shock mass air flow sensor.
-
Never disassemble mass air flow sensor.
-
Never touch mass air flow sensor.
Remove air cleaner filter. Refer to Removal & Installation.
Loosen clamp  of the air duct 1 and remove the air duct 1 from the air cleaner cover
  .
.
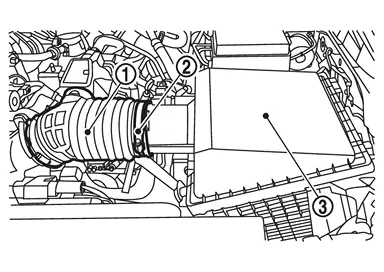
Remove mounting bolt  of air cleaner body and remove air cleaner body.
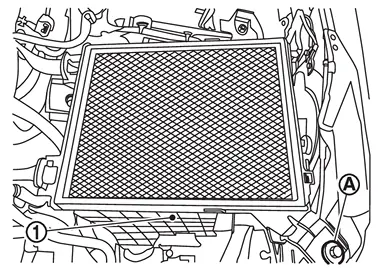
Loosen clamp of the air duct 1 and separate the air duct 1 and resonator .
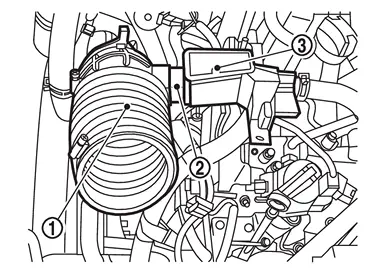
If necessary, loosen clamp of the air duct 1 and remove the air duct 1 from the inlet air duct 2 .
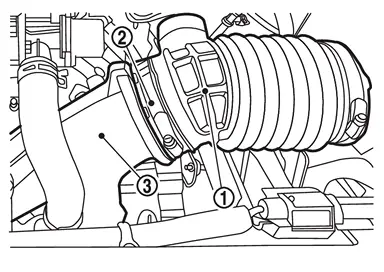
Remove air inlet tube 2. Refer to Removal & Installation.
Remove reservoir tank tube mounting clip from inlet air duct 2. Refer to RADIATOR : Exploded View.
Loosen connection between the inlet air duct 2 and the air duct 2 (bank 1). Refer to Exploded View.
Loosen connection between the inlet air duct 2 and the air duct 2 (bank 2). Refer to Exploded View.
Remove inlet air duct 2 mounting bolt and remove the inlet air duct 2. Refer to Exploded View.
Remove air duct 2 (bank 1) and air duct 2 (bank 2) if necessary.
INSTALLATION
Note the following, and install in the reverse order of removal.
CAUTION:
Never reuse gasket.
-
Align and install each connection part. Make sure the screw clamp is firmly fixed.
-
Fixing clips shall be fixed after inserting air cleaner body assembly protrusion to air cleaner case botch hole.
-
Make sure whether air cleaner body has been firmly installed by shaking it.
-
If a mass air flow sensor is replaced, carry out the teach of “Idle Air Volume Learning�. Refer to Work Procedure.
Inspection
INSPECTION AFTER REMOVAL
Inspect air duct and resonator assembly for crack or tear.
-
If anything is found, replace air duct and resonator assembly
Other materials
Display Screen Is Not Displayed (information Display)
Diagnosis Procedure
PERFORM SELF-DIAGNOSIS OF DISPLAY UNIT
Perform “Self Diagnostic Result� of “Display unit�.
Is DTC detected?
YES>>
Perform diagnosis procedure on the detected DTC. Refer to DTC Index.
NO>>
GO TO 2.
PERFORM SELF-DIAGNOSIS OF COMBINATION METER
Perform “Self D ...
Ambient Sensor
Removal and Installation
REMOVALRemove front grille. Refer to Removal and Installation.
Disengage fixing pawl.
: Pawl
Disconnect harness connector to remove ambient sensor .INSTALLATIONInstall in the reverse order of removal. ...
Around View Monitor
Symptom Table
AROUND VIEW MONITOR SYSTEM Symptoms Check items Probable malfunction location
Screen is not switched to camera image, when camera switch is pressed and when shift position is shifted to the reverse position.
“AROUND VIEW MONITOR� is not displayed on the system selection scree ...