Removal and Installation
REMOVAL
Pull up and remove engagement with body from the seam of back door weather-strip.
CAUTION:
-
Never pull strongly on back door weather-strip.
-
When removing back door weather-strip, pull it away from the vehicle by holding back door weather-strip by the base part
 , and not the upper part, for preventing damage.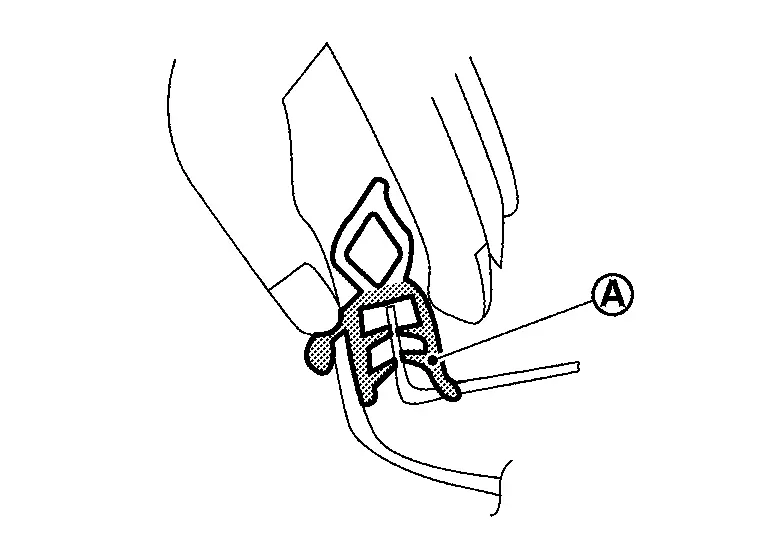
INSTALLATION
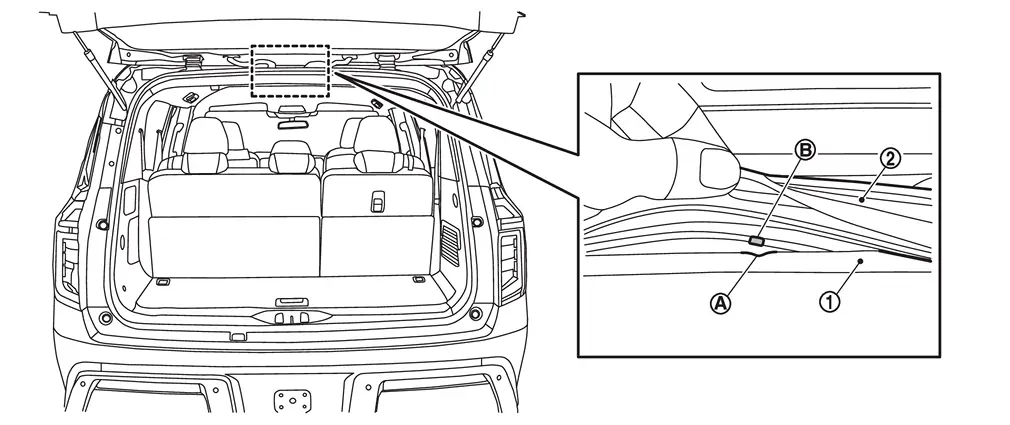
Working from the upper section, align back door weather-strip  center mark (green color)
  with vehicle center position mark and install weather-strip onto the vehicle
  .
.
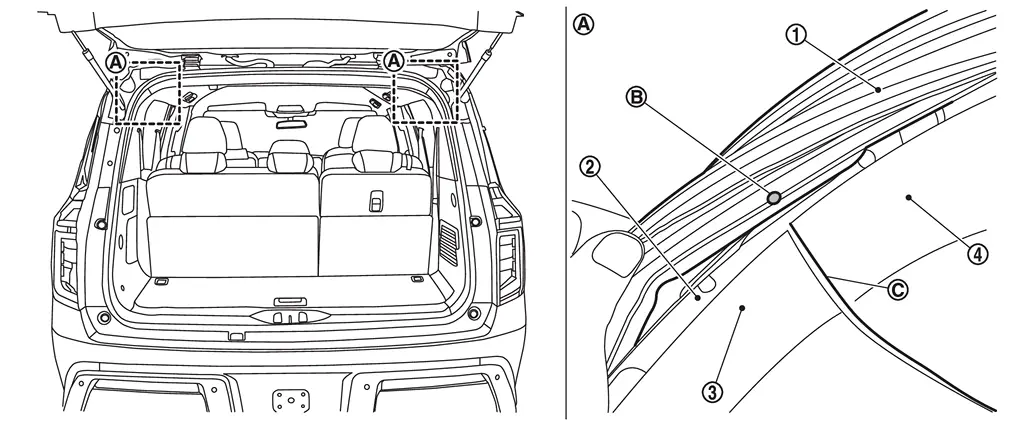
Align back door weather-strip matching mark (yellow color) with border  between roof rear garnish
  and back pillar garnish
  , and then install weather-strip onto the vehicle .
CAUTION:
Never install weather-strip while pulling it.
Install weather-strip onto the vehicle between the locations installed in procedure step 1 and 2.
Align the seam of back door weather-strip with the center of back door striker , and then install weather-strip onto the vehicle.
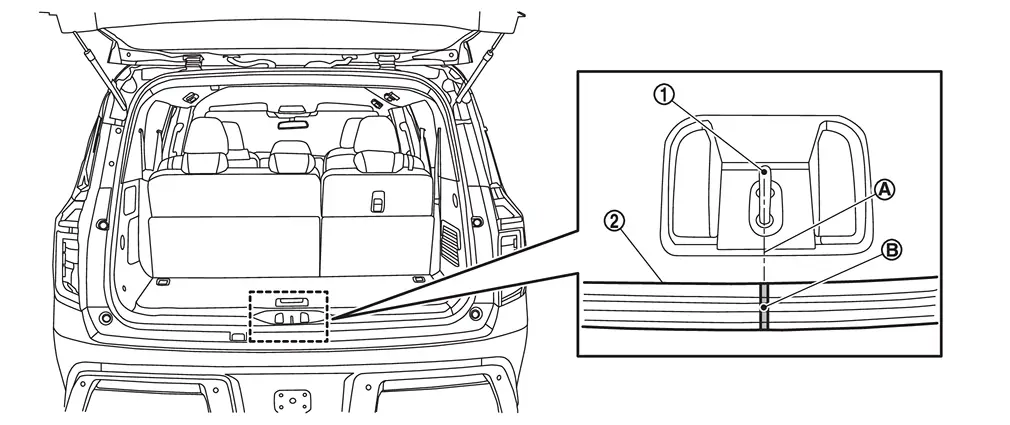
Align back door weather-strip matching mark (yellow color) with border between luggage side lower finisher and luggage rear plate , and then install weather-strip onto the vehicle .
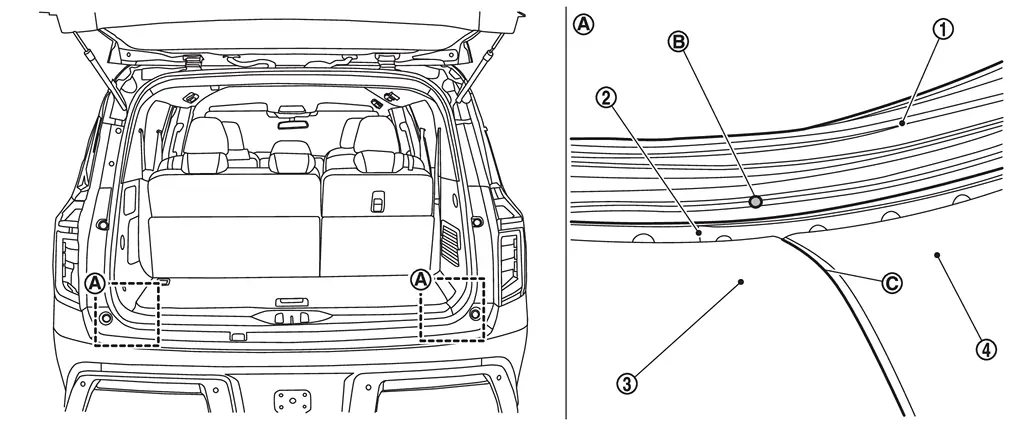
CAUTION:
Never install weather-strip while pulling it.
Install weather-strip onto the vehicle between the locations installed in procedure step 4 and 5.
Install weather-strip onto the vehicle between the locations installed in procedure step 2 and 5.
Pull back door weather-strip gently to ensure that there is no loose section.
CAUTION:
Check that weather-strip fits tightly in each corner.
Other materials
Hill descent control switch
WARNING
In the Nissan Armada, never rely exclusively on the hill descent control
system to regulate vehicle speed on steep downhill slopes. Always maintain full
control of the vehicle and be prepared to apply the brake pedal when necessary.
Extra caution is required when driving on ...
Rear Drive Shaft
Exploded View
Circular clip
Dust shield
Housing
Snap ring
Ball cage/steel ball/inner race assembly
Stopper ring
Boot band
Boot
Shaft
Joint sub-assembly
: Wheel side
1: NISSAN genuine grease or an equivalent.
2: Apply paste [serv ...
Steering Column Control Module
Removal and Installation
REMOVALRemove instrument lower panel LH. Refer to Removal and Installation.
Remove steering column control module bracket mounting screw .
Disconnect steering column control module connector.
Remove steering column control module.INSTALLATIONNote the following items, and t ...