Inspection and Adjustment
INSPECTION
Brake Pedal Height
Check the height (H1) between the floor panel  and the brake pedal upper surface.
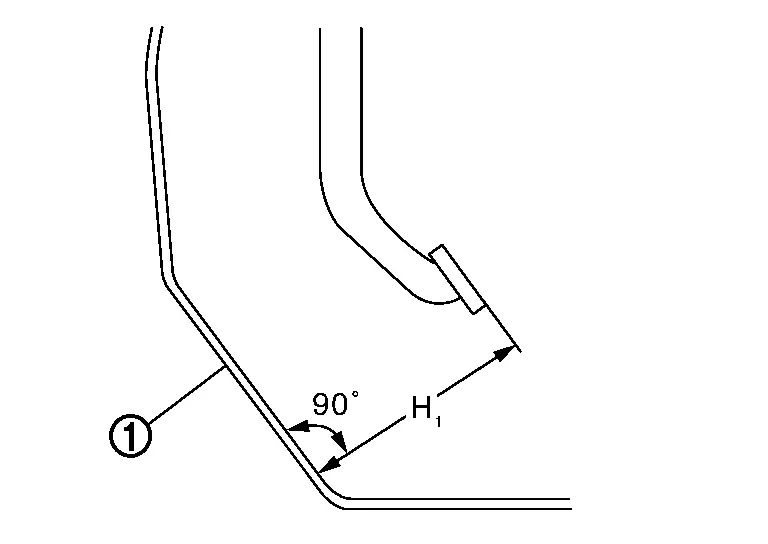
| H1 | : Refer to Brake Pedal. |
CAUTION:
Remove the front floor carpet.
Stop Lamp Switch
Check the clearance (A) among the brake pedal lever  and the stop lamp switch mounting bracket
  .
.
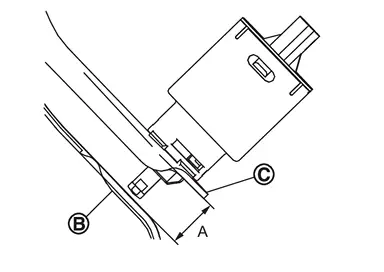
| A | : Refer to Brake Pedal. |
CAUTION:
The stop lamp must turn off when the brake pedal is released.
 NOTE:
NOTE:
Never touch the brake pedal (pad) when checking the clearance between brake pedal lever and stop lamp switch.
Brake Pedal Play
Press the brake pedal. Check the brake pedal play (A) (stroke until fluid pressure occurs).
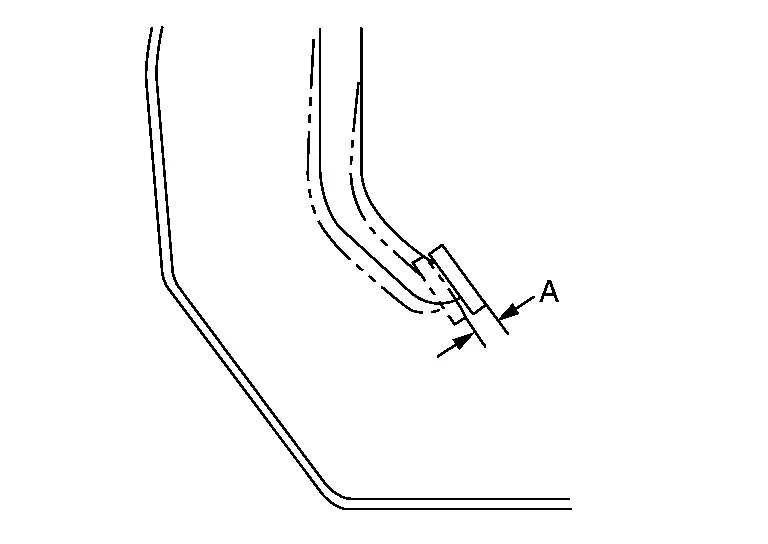
| A | : Refer to Brake Pedal. |
Depressed Brake Pedal Height
Check the height between the floor panel and the brake pedal upper surface (H2) when depressing the brake pedal at 490 N (50 kg, 110 lb) while engine ON.
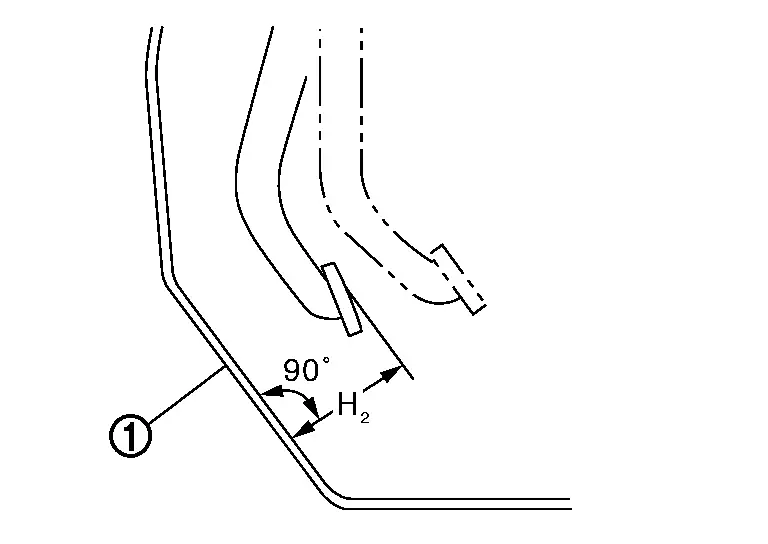
| H2 | : Refer to Brake Pedal. |
CAUTION:
Remove the front floor carpet.
ADJUSTMENT
Brake Pedal Height
Perform the following procedure when brake pedal height is not within the specified value because brake pedal height is not adjustable.
Replace brake pedal assembly when input rod length is within specified value. Refer to Inspection.
Stop Lamp Switch
Remove instrument lower panel LH. Refer to Removal and Installation.
Disconnect the harness connector from stop lamp switch.
Loosen the stop lamp switch 90 degree counterclockwise.
Install stop lamp switch , follow the procedure below.
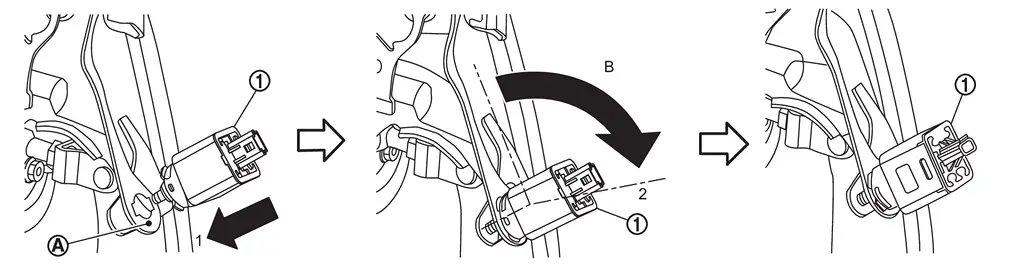
 .
.
| B | : About 90 degree |
CAUTION:
-
The clearance (A) between the brake pedal lever
and stop lamp switch mounting bracket must be the specified value.A : Refer to Brake Pedal. -
The stop lamp must be turned off when the brake pedal is released.
Depressed Brake Pedal Height
Perform the air bleeding. Refer to Work Procedure.
Check the height between the floor panel and the brake pedal upper surface (H2) when depressing the brake pedal at 490 N (50 kg, 110 lb) while engine ON.
| H2 | : Refer to Brake Pedal. |
CAUTION:
Remove the front floor carpet.
Other materials
Event Data Recorders (EDR)
Basic information
Your Nissan Armada is equipped with an Event Data Recorder (EDR), a system designed
to capture critical vehicle data during specific crash or near-crash situations.
These events may include airbag deployment or impact with road obstacles. The
primary function of the EDR is to ...
Diagnosis and Repair Work Flow
Work Flow
OVERALL SEQUENCEDETAILED FLOWGET INFORMATION FOR SYMPTOM
Get detailed information from the customer about the symptom (the condition and the environment when the incident/malfunction occurs).
Check operation condition of the function that is malfunctioning.
>>
GO TO 2.
CHECK ...
Front Door Striker
Removal and Installation
REMOVALRemove TORX bolts, and then remove front door striker.INSTALLATIONNote the following items, and then install in the reverse order of removal.CAUTION:
Never reuse TORX bolt. Always replace it with a new one when it is removed.
Before tighten front door striker moun ...