Removal and Installation
CAUTION:
Never damage the body panel.
REMOVAL
Remove front kicking plate. Refer to Removal and Installation.
Remove hood lock control handle (driver side). Refer to Removal and Installation.
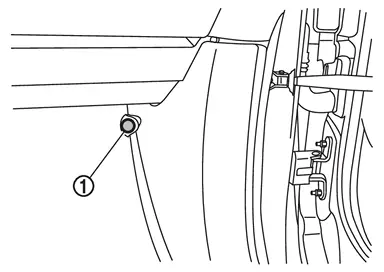
Disengage dash trim clip  from dash side finisher.
Disengage dash side finisher fixing clips, and then remove dash side finisher.
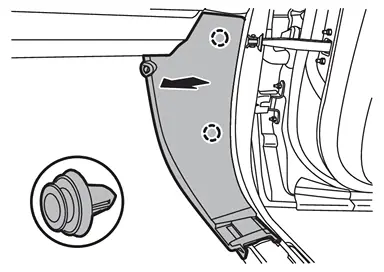
 |
: Clip |
INSTALLATION
Note the following items, and then install in the reverse order of removal.
CAUTION:
-
Visually check clips for deformation and damage during installation. Replace with new ones if necessary.
-
Check in advance that clip is accurately aligned with the portions on body panel, and then install by pressing in.
-
After installation, check that the lip of body side welt covers. Refer to Inspection.
Other materials
Oil Cooler
Exploded View
Oil cooler
O-ring
Oil filter
Connector bolt
Oil catch plate
Clamp
Oil cooler hose 2
Oil cooler hose 3
Oil cooler pipe 2
Oil cooler hose 1
Oil cooler pipe 1
Comply with the installation procedure when tightening. Refer to Removal and ...
Precautions
Precautions for Removing Battery Terminal
When disconnecting the 12V battery terminal, turn off the ACC power before disconnecting the 12V battery terminal, observing “How to disconnect 12V battery terminal� described below.
NOTE:
Some ECUs operate for a certain fixed time even after ignit ...
Precautions
Precaution for Supplemental Restraint System (SRS) "AIR BAG" and "SEAT BELT PRE-TENSIONER"
The Supplemental Restraint System such as “AIR BAG� and “SEAT BELT PRE-TENSIONER�, used along with a front seat belt, helps to reduce the risk or severity of injury to the driver and front passenger fo ...