Removal and Installation
CAUTION:
Never damage the body panel.
REMOVAL
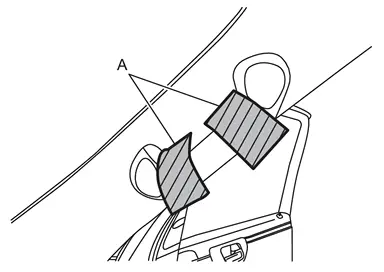
Apply protective tapes (A) on assist grip to protect it from damage.
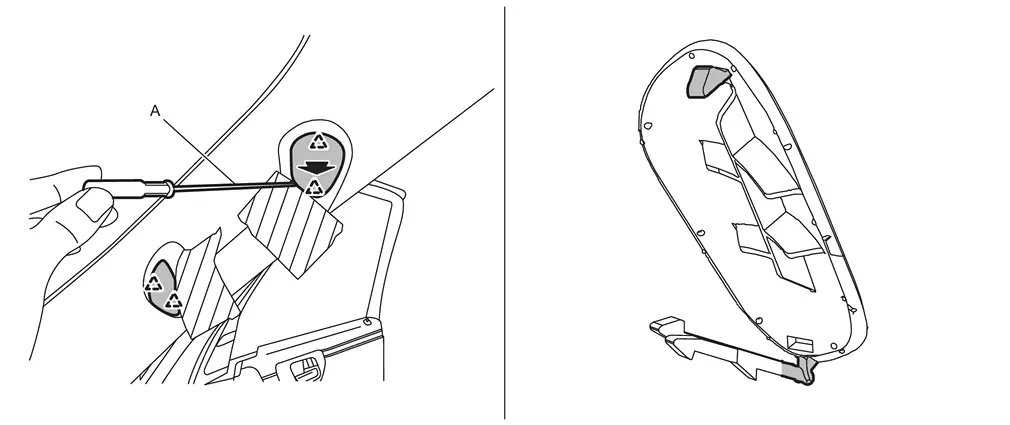
Disengage assist grip cap fixing pawls of assist grip using a remover tool (A), and then remove assist grip cap of assist grip.
 |
: Pawl |
Remove assist grip mounting bolts, and then remove assist grip.
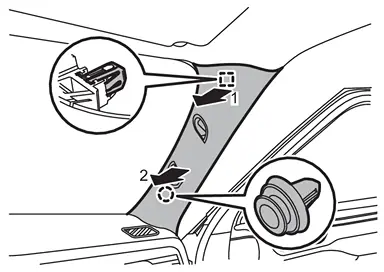
Disengage front pillar garnish fixing clip and metal clip according to numerical order 1→2 indicated by arrows as shown in the figure.
 |
: Clip |
 |
: Metal clip |
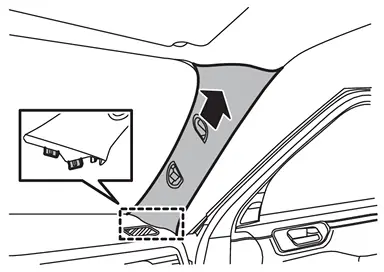
Disengage front pillar garnish fixing portions, and then remove front pillar garnish.
INSTALLATION
Note the following items, and then install in the reverse order of removal.
CAUTION:
-
Visually check clip and metal clip for deformation and damage during installation. Replace with new ones if necessary.
-
Check in advance that clip and metal clip are accurately aligned with the portions on body panel, and then install by pressing in.
-
After installation, check that the lip of body side welt covers. Refer to Inspection.
Other materials
Precautions for Removing Battery Terminal
PRECAUTIONS FOR REMOVING BATTERY TERMINAL : Precautions
When disconnecting the 12V battery terminal, turn off the ACC power before disconnecting the 12V battery terminal, observing “How to disconnect 12V battery terminal� described below.
NOTE:
Some ECUs operate for a certain fixed time ev ...
Seat Control Unit
Driver Seat
Removal and Installation
Refer to Removal and Installation.
Passenger Seat
Removal and Installation
REMOVALDisconnect passenger seat control unit connector.
Remove passenger seat control unit fixing screws .
Remove passenger seat control unit.INSTALLATIONNote the following items, and ...
Drive Mode Select Switch
Exploded View
Select switch unit
Drive mode select switch
Removal and Installation
Remove select switch unit. Refer to VDC OFF SWITCH : Removal & Installation.
Unhook the pawls () to remove the drive mode select switch from the select switch unit .
INSTALLATIONInstall in ...