Removal and Installation
CAUTION:
Never damage the body panel.
REMOVAL
Remove front kicking plate. Refer to Removal and Installation.
Remove hood lock control handle (driver side). Refer to Removal and Installation.
Disengage dash trim clip  from dash side finisher.
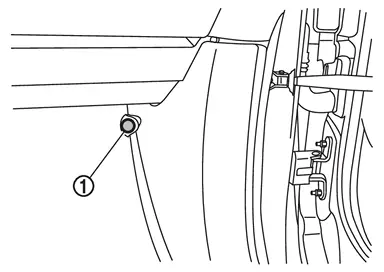
Disengage dash side finisher fixing clips, and then remove dash side finisher.
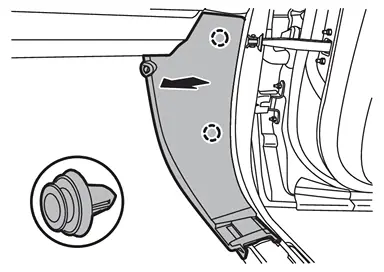
 |
: Clip |
INSTALLATION
Note the following items, and then install in the reverse order of removal.
CAUTION:
-
Visually check clips for deformation and damage during installation. Replace with new ones if necessary.
-
Check in advance that clip is accurately aligned with the portions on body panel, and then install by pressing in.
-
After installation, check that the lip of body side welt covers. Refer to Inspection.
Other materials
Rear Propeller Shaft
Exploded View
REMOVAL
Propeller shaft assembly
: vehicle front
: N·m (kg-m, ft-lb)
: Always replace after every disassembly.
DISASSEMBLY
Snap ring
Journal bearing
Journal
Sleeve yoke
Propeller shaft tube
Flange yoke
: vehicle front
: Always ...
Rear Camera
Removal and Installation
REMOVALRemove the back door finisher. Refer to Removal and Installation.
Remove the rear camera mounting screws , then remove the rear camera .
INSTALLATIONInstall in the reverse order of removal.
Perform parameter writing. (With ProPILOT Assist 2.1) Refer to Work Procedur ...
Transfer Fluid: Atx93c
Inspection
WARNING:
Jacking up or lift up the vehicle may the vehicle height to go down which cause a personal injury and/or damage to the air suspension component parts. Refer to Precaution for when Jacking and Lifting Up the vehicle with Electronic Air Suspension System.
FLUID LEAKAGECheck t ...