Work Flow
OVERALL SEQUENCE
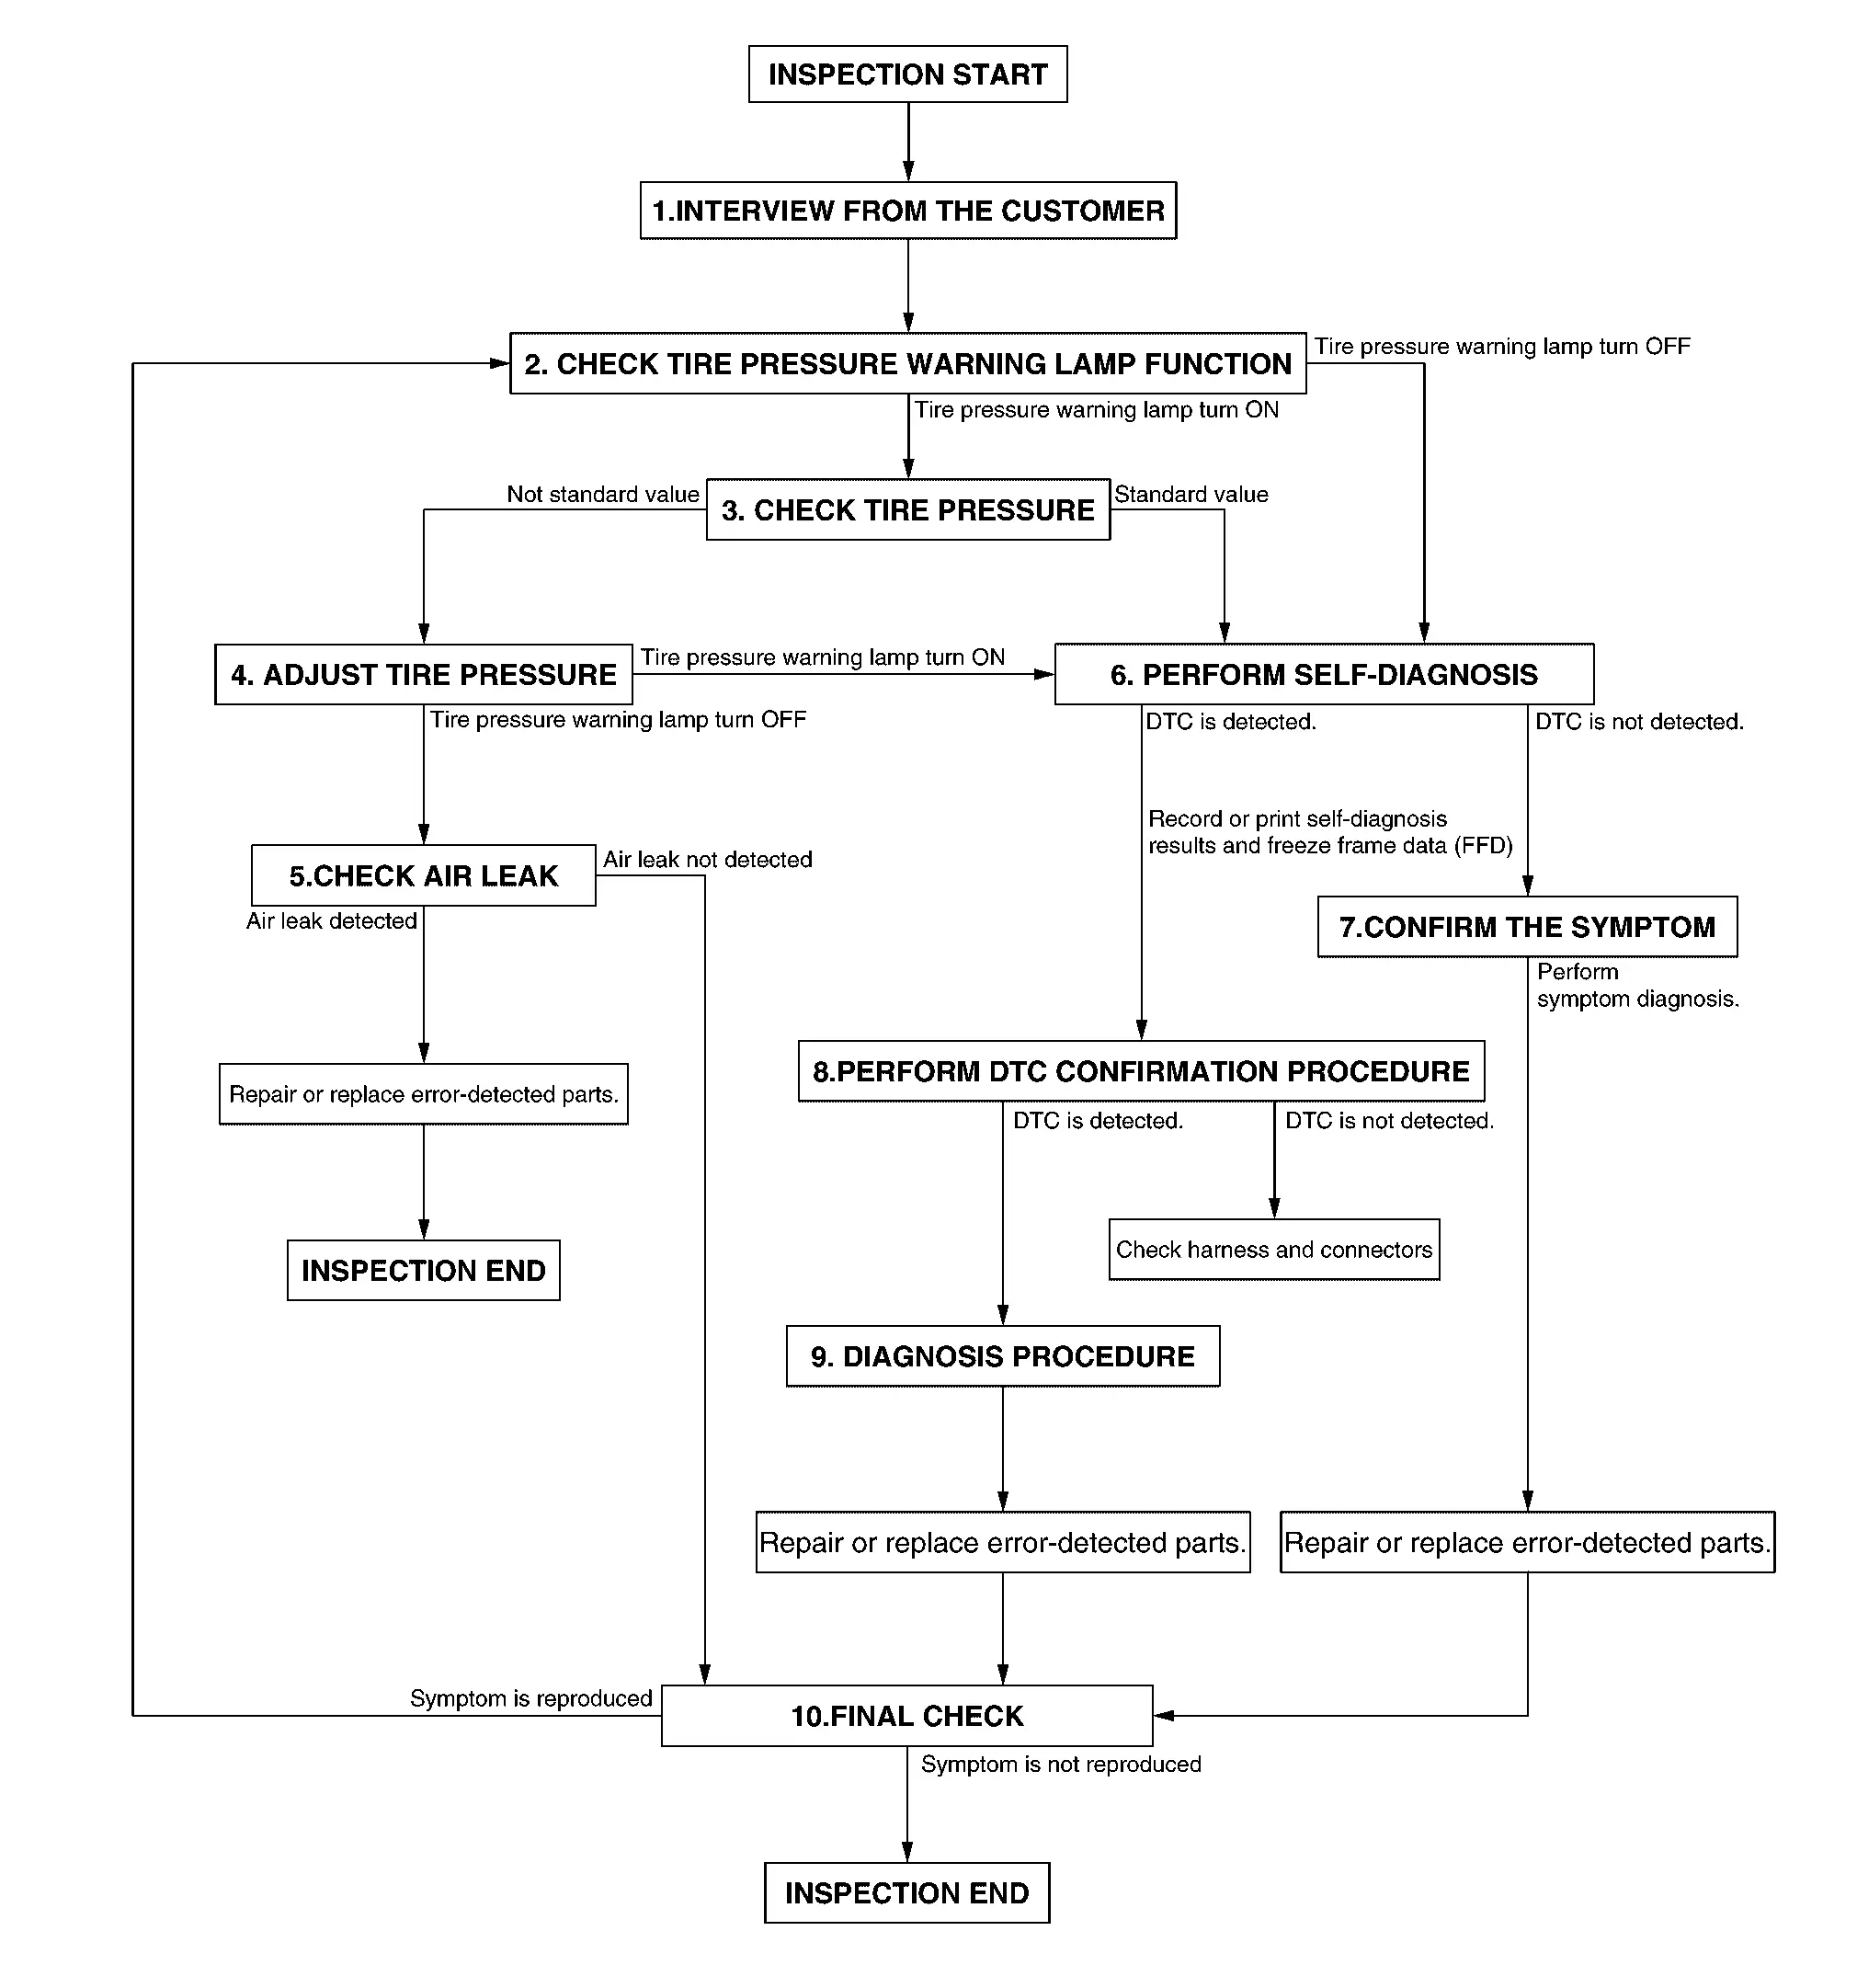
DETAILED FLOW
INTERVIEW FROM THE CUSTOMER
Clarify customer complaints before inspection. To do so, reproduce the symptom before hand and fully understand it. Then interview the customer thoroughly. Check the symptoms by driving vehicle with the customer, if necessary.
CAUTION:
Customers are not professional. Never guess easily like “maybe the customer means that...,� or “ maybe the customer mentions this symptom�.
>>
GO TO 2.
CHECK TIRE PRESSURE WARNING LAMP FUNCTION
Check that tire pressure warning lamp in combination meter.
Tire pressure warning lamp turn ON?
YES>>GO TO 3.
NO>>GO TO 6.
CHECK TIRE PRESSURE
Check the tire pressure of all wheels. Refer to TIRE AIR PRESSURE : Service Data.
 NOTE:
NOTE:
Check the tire pressure of cold condition.
Is the inspection standard value?
YES>>GO TO 6.
NO>>GO TO 4.
ADJUST TIRE PRESSURE
-
Check and adjust the tire pressure for all wheels specified to the value. Refer to TIRE AIR PRESSURE : Service Data.
-
Drive the vehicle at 25 km/h (16 MPH) or more reaches 10 minuets in total.
Tire pressure warning lamp turn OFF?
YES>>GO TO 5.
NO>>GO TO 6.
CHECK AIR LEAK
Using soapsuds etc., check air leak.
NOTE:
Check air valve.
Is air leak detected?
YES>>Repair or replace error-detected parts. Replace the valve. Perform tire pressure sensor ID registration. Refer to Description.
NO>>INSPECTION END
PERFORM SELF-DIAGNOSIS
With CONSULT
Perform self-diagnosis for "AIR PRESSURE MONITOR� of “BCM�.
Is DTC detected?
YES>>Record or print self-diagnosis results and freeze frame data (FFD). GO TO 8.
NO>>GO TO 7.
CONFIRM THE SYMPTOM
Perform symptom diagnosis. Refer to Symptom Table.
>>
Repair or replace error-detected parts. GO TO 10.
PERFORM DTC CONFIRMATION PROCEDURE
With CONSULT
Perform DTC confirmation procedures for the detected DTC, and then check that DTC is detected again.
Is DTC detected?
YES>>GO TO 9.
NO>>Check harness and connectors based on the information obtained by interview. Refer to Intermittent Incident.
DIAGNOSIS PROCEDURE
Perform DTC Diagnosis Procedure.
>>
Repair or replace error-detected parts. GO TO 10 .
FINAL CHECK
Recheck the symptom and check that the symptom is not reproduced on the same conditions.
Is the symptom reproduced?
YES>>GO TO 2.
NO>>INSTPECTION END
Other materials
3rd row seats
Basic information
The third row seating area in the Nissan Armada is engineered to deliver both
flexibility and safety, ensuring that passengers benefit from comfort while maintaining
proper restraint system performance. Correct usage of the 3rd row seats in the Nissan
Armada is essential for ...
Symptoms and Troubleshooting
Symptom Table
The diagnostics item numbers show the sequence for inspection. Inspect in order from item 1.
Perform diagnoses of symptom table 1 before symptom table 2.
SYMPTOM TABLE 1 Diagnostic item Reference Symptom
Poor performance
Driving performance Strange noise
Shift point is hi ...
Diagnosis and Repair Workflow
Work Flow
OVERALL SEQUENCEDETAILED FLOWGET INFORMATION FOR SYMPTOM
Get detailed information from the customer about the symptom (the condition and the environment when the incident/malfunction occurs).
Check operation condition of the function that is malfunctioning.
>>
GO TO 2.
CHECK ...