Exhaust System
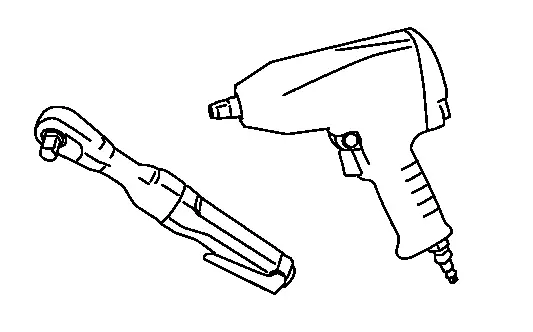
Commercial Service Tool
| Tool name | Description | |
|---|---|---|
| Power tool |
|
Loosening bolts and nuts |
Exhaust System
Inspection
WARNING:
-
Jacking up or lift up the vehicle may the vehicle height to go down which cause a personal injury and/or damage to the air suspension component parts. Refer to Precaution for when Jacking and Lifting Up the vehicle with Electronic Air Suspension System.
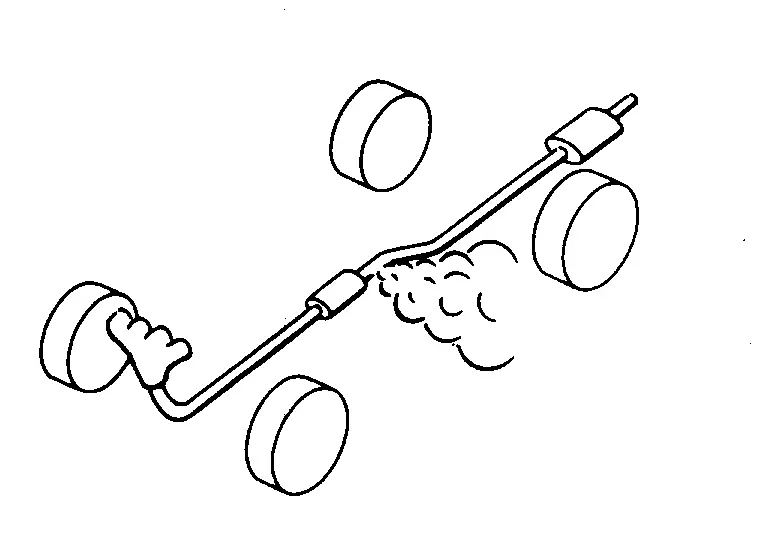
Check exhaust pipes, muffler and mounting for improper attachment, leakage, cracks, damage or deterioration.
-
If damage is found, repair or replace damaged parts.
Exhaust System
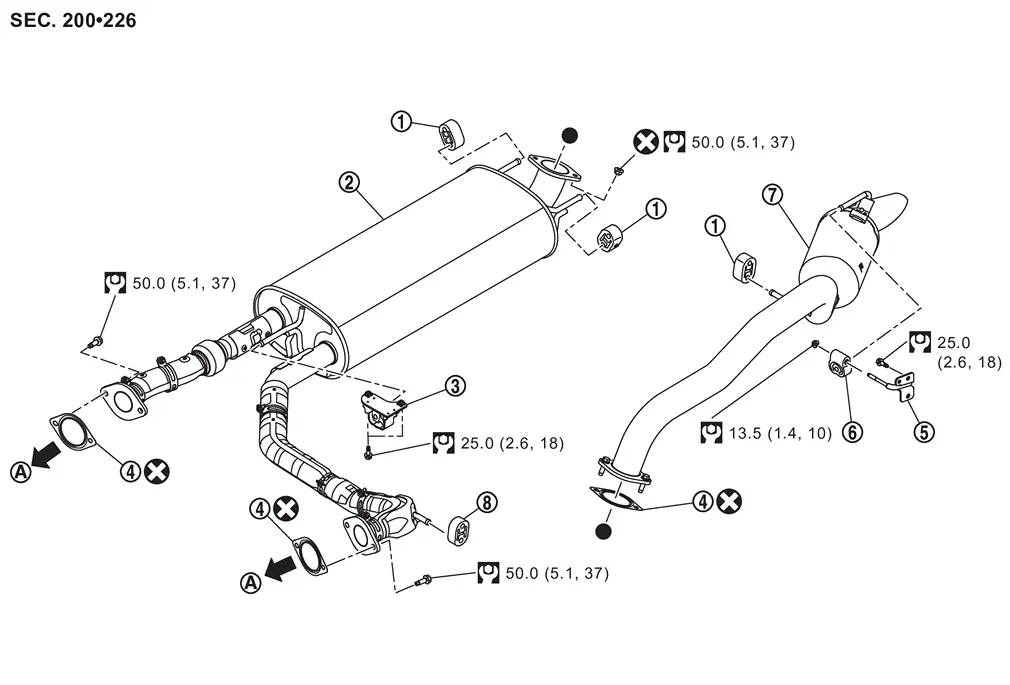
Exploded View
 |
Mounting rubber 1 |  |
Main muffler |  |
Mounting rubber 2 |
 |
Gasket |  |
Mounting bracket |  |
Mounting rubber 3 |
 |
Rear muffler |  |
Mounting rubber 4 | ||
 |
To catalyst. Refer to Exploded View. | ||||
 : N·m (kg-m, ft-lb) : N·m (kg-m, ft-lb) |
|||||
 : Always replace after every disassembly. : Always replace after every disassembly. |
|||||
 : Indicates that the parts is connected at points with same symbols in actual vehicle. : Indicates that the parts is connected at points with same symbols in actual vehicle. |
|||||
Removal & Installation
WARNING:
-
Jacking up or lift up the vehicle may the vehicle height to go down which cause a personal injury and/or damage to the air suspension component parts. Refer to Precaution for when Jacking and Lifting Up the vehicle with Electronic Air Suspension System.
REMOVAL
Remove spare tire. Refer to Removal & Installation.
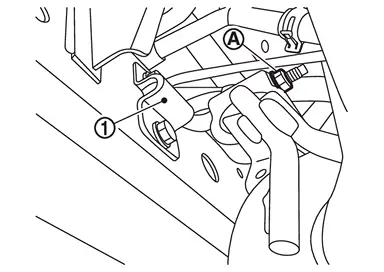
Remove rear muffler with the following procedure: Loosen the mounting nut of the mounting bracket .
CAUTION:
Be careful not to hit the rear muffler with the tool.
Remove mounting rubber 1 and rear muffler from the vehicle as a set.
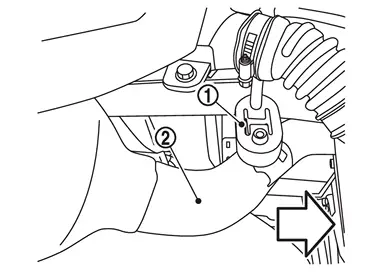
| : vehicle front |
from the mounting bracket , and remove the mounting rubber 3 and rear muffler as a set from the mounting bracket.
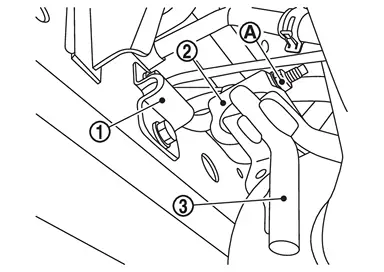
and mounting rubber 3 from rear muffler .
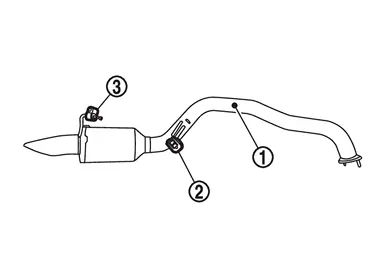
if necessary.
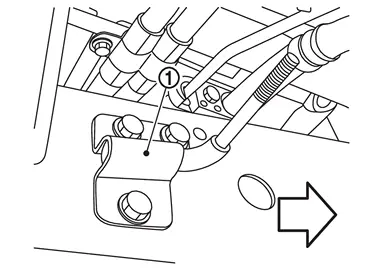
| : vehicle front |
Disconnect each connection and remove the main muffler.
INSTALLATION
Note the following items, and install in the reverse order of removal.
-
Temporarily tighten bolts and nuts when installing exhaust pipe assembly. Tighten them to the specified torque when connecting the vehicle rear to the vehicle front.
CAUTION:
-
Always replace exhaust tube gaskets with new ones when reassembling.
-
If heat insulator is badly deformed, repair or replace it. If deposits such as mud pile up on the heat insulator, remove them.
-
When installing heat insulator avoid large gaps or interference between heat insulator and each exhaust pipe.
-
Remove deposits from the sealing surface of each connection. Connect them securely to avoid gases leakage.
-
Check each part for unusual interference, and then tighten them to the specified torque.
-
When installing each mounting rubber, avoid twisting or unusual extension in up/down and right/left directions.
EXHAUST SYSTEM : Inspection (Removal & Installation)
INSPECTION AFTER INSTALLATION
-
Check clearance between tail tube and rear bumper is even.
-
With engine running, check exhaust tube joints for gas leakage and unusual noises.
-
Check to ensure that mounting brackets and mounting rubbers are installed properly and free from undue stress. Improper installation could result in excessive noise and vibration.
Other materials
Safety note
WARNING
Never disassemble or modify the Nissan Armada system components. Doing
so may result in malfunction, fire, electric shock, or serious injury.
If the Nissan Armada system shows abnormal behavior, such as freezing,
loss of sound, or delayed response, discontinue use immediately.
...
About microSD card
WARNING
Never allow children to handle or play with the microSD card used in your
Nissan Armada. Due to its small size, accidental swallowing may occur, which can
lead to choking, serious injury, or even life-threatening situations.
NOTE:
If the microSD card is removed from the Nissan Armada ...
Back Door Window Glass
Exploded View
Back door outer panel
Back door window glass
Spacer A
Clip upper RH
Clip lower
Spacer B
Spacer C
Back door window glass molding
Dam sealant rubber
Clip upper LH
Glass primer
Adhesive
Adhesive mark
: Always replace after every disassembly.
...