
Nissan Armada 2025-2026 Service and Repair Manual: Exploded View
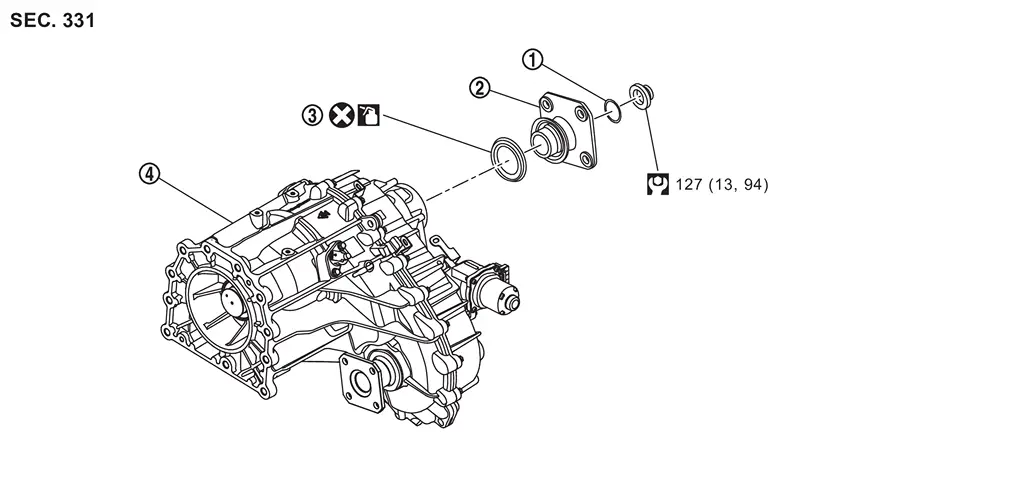
 | O-ring |  | Rear companion flange |  | Rear oil seal |
 | Transfer assembly | ||||
 | : N·m (kg-m, ft-lb) | ||||
 | : Always replace after every disassembly. | ||||
 | : Apply transfer fluid. | ||||
 Rear Oil Seal
...
 Removal and Installation
WARNING:
REMOVAL
Remove the drain plug to drain the transfer fluid. Refer to Draining.
Remove the rear propeller shaft. Refer to Removal and Installation.
Remove main muffler. Refer to EXHAUST SYSTEM ...
Other materials:
Removal and Installation
CAUTION:
Never bend the fixing pawl of rear armrest.
REMOVAL
Remove rear door finisher. Refer to Removal and Installation.
Disconnect rear power window switch harness connector.
Remove rear armrest fixing screws , and then remove rear armrest from rear door finisher .
: Pawl
Remove rear power ...
Removal and Installation
CAUTION:
Never damage the back door panel.
REMOVAL
CAUTION:
Fully open back door.
Apply protective tape (A) on back door lower finisher to protect it from damage.
Disengage automatic back door switch finisher fixing pawls using a remover tool (A).
: Pawl
Disconnect harness connectors, and the ...
Diagnostic Work Sheet
DESCRIPTION
INTERVIEW SHEET SAMPLE
Interview sheet Customer name MR/MS Registration number Initial year registration Vehicle type VIN Storage date Engine / Traction motor Mileage km (Mile) Symptom □ Does not operate (   ) function □ Warning lamp turns ON.
â–¡â–¡â–¡â–¡â–¡â–¡â–¡â ...

0.0079