Exploded View
For Second Bench Seat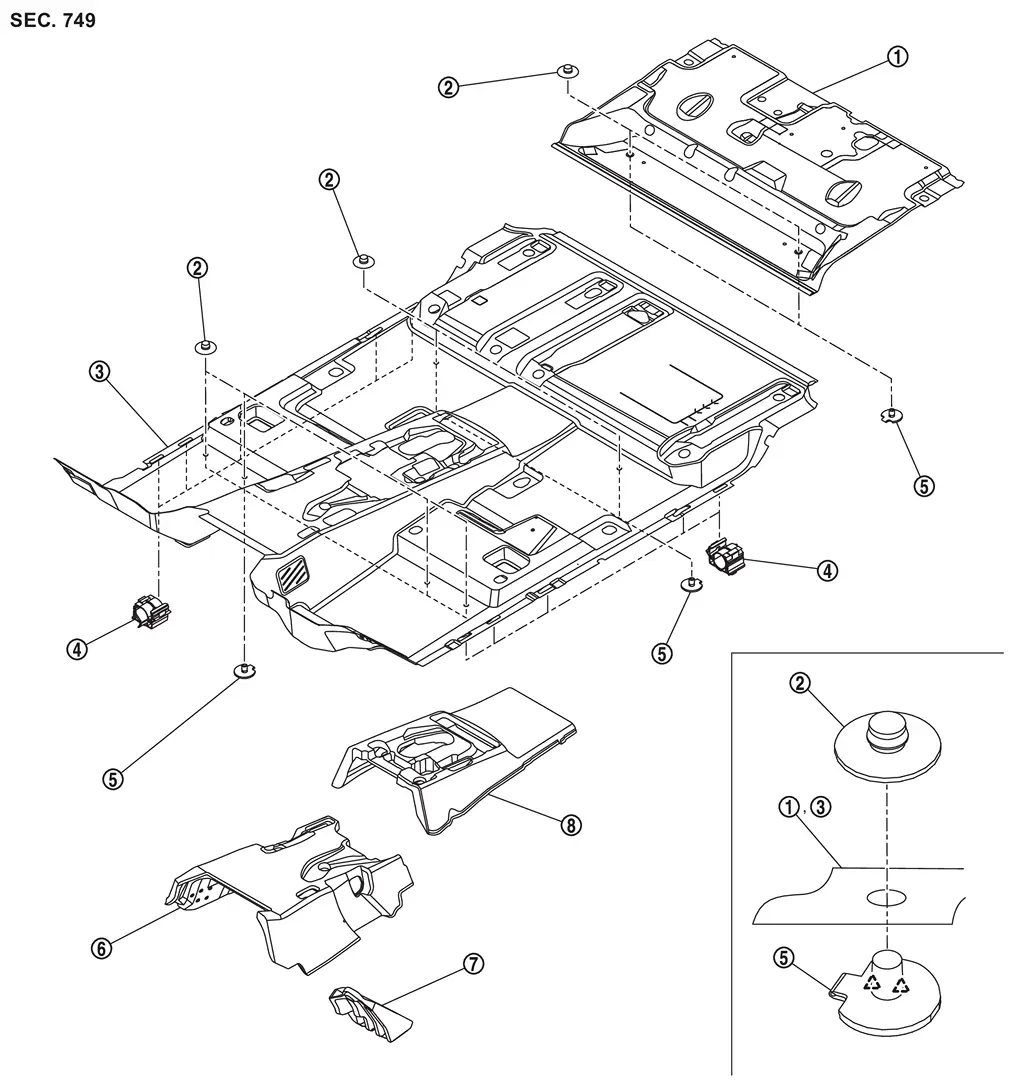
 |
Rear floor carpet |  |
Carpet hook |  |
Front floor carpet |
 |
Harness clip |  |
Base |  |
Front floor center spacer |
 |
Footrest |  |
Front floor rear spacer | ||
 |
: Pawl | ||||
For Second Captain Seat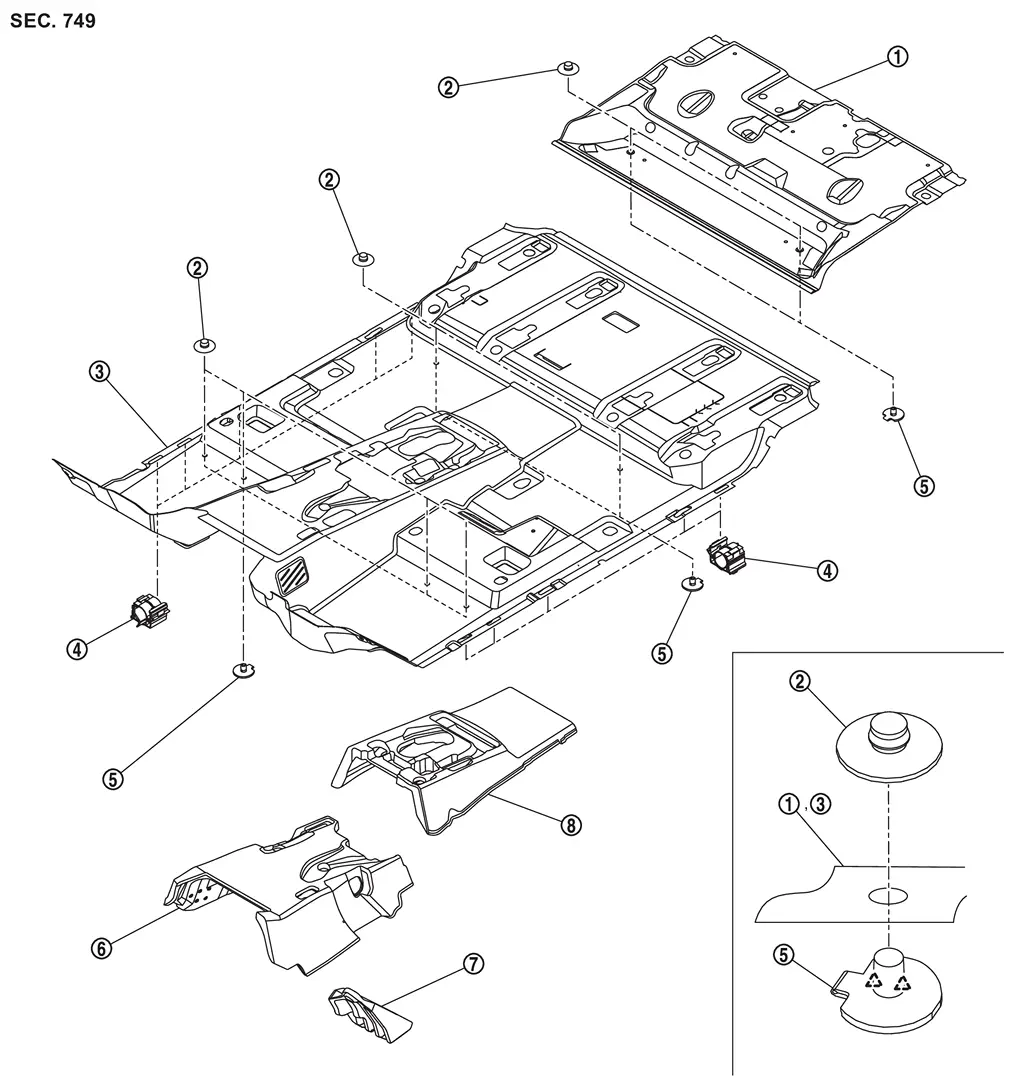
|
Rear floor carpet | |
Carpet hook | |
Front floor carpet |
|
Harness clip | |
Base | |
Front floor center spacer |
|
Footrest | |
Front floor rear spacer | ||
|
: Pawl | ||||
Front Floor Carpet
Removal and Installation
CAUTION:
Never damage the body panel.
REMOVAL
Remove seat.Remove front seat assembly (LH and RH). Refer to Removal and Installation. Remove second seat assembly (LH and RH).
-
Captain seat: Refer to Removal and Installation.
-
Bench seat: Refer to Removal and Installation.
Remove rear floor carpet. Refer to Removal & Installation.
Remove dash side finisher (LH and RH). Refer to Removal and Installation.
Remove center pillar lower garnish (LH and RH). Refer to Removal and Installation.
Remove console.Remove front center console assembly. Refer to Removal and Installation. Remove front center console brackets. Remove rear center console assembly (if equipped). Refer to Removal and Installation.
Remove steering member stay LH. Refer to Removal and Installation.
Remove rear floor duct 1 (LH and RH). Refer to Removal and Installation.
Disconnect each harness connector, and then remove body harness fixing clips and each control unit to vehicle body center side.
Remove front floor carpet.
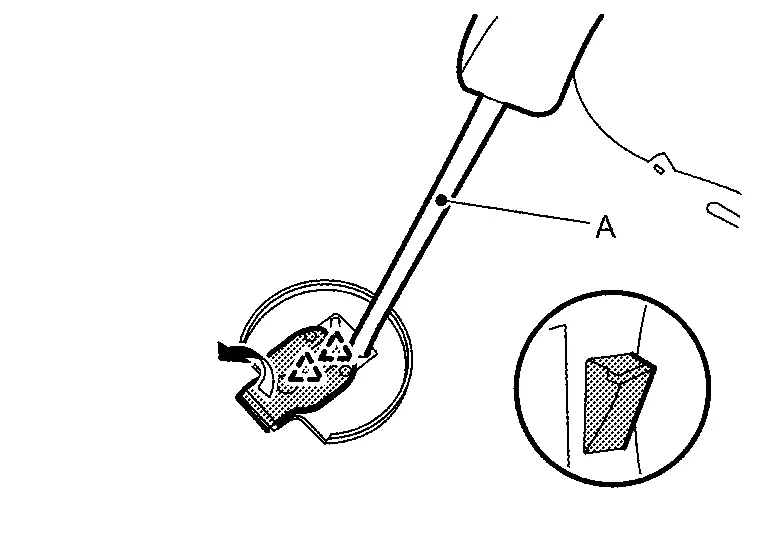
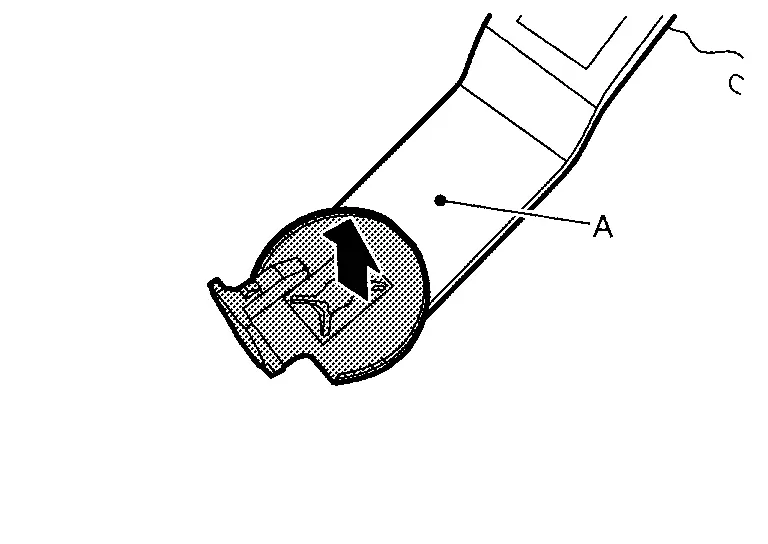
Remove carpet hook.Disengage base fixing pawls using a remover tool (A), and then unlock.
|
: Pawl |
INSTALLATION
Note the following item, and then install in the reverse order of removal.
CAUTION:
Check in advance that pawls are accurately aligned with the hole on base mounting part, and then install by pressing in.
Rear Floor Carpet
Removal and Installation
CAUTION:
Never damage the body panel.
REMOVAL
Remove luggage side lower finisher. Refer to Removal and Installation.
Remove rear floor carpet.
Remove carpet hook.Disengage base fixing pawls using a remover tool (A), and then unlock.
|
: Pawl |
INSTALLATION
Note the following item, and then install in the reverse order of removal.
CAUTION:
Check in advance that pawls are accurately aligned with the hole on base mounting part, and then install by pressing in.
Other materials
Does Not Restart After the Stop/start System Is Activated
Diagnosis Procedure
CHECK SYMPTOM
Check the symptoms.
A stop/start indicator lamp turned on, and did an engine perform a stall at the time of restart from a stop/start system?
YES>>
GO TO 2.
NO>>
Refer to Symptom Table.
CHECK STOP/START PROHIBIT CAUSE
With CONSULT
Select “Stop/Star ...
Luggage Trim
Exploded View
Luggage side upper finisher RH
Rear pillar finisher RH
Luggage side lower finisher RH
Seat belt hook
Seat switch escutcheon RH
Rope hook
Back pillar garnish LH
Luggage side upper finisher LH
Rear pillar finisher LH
Seat switch escutcheon LH
Luggage si ...
Steering Telescopic
Diagnosis Procedure
CHECK STEERING TELESCOPIC MECHANISM
Check for the following.
Mechanism deformation or pinched foreign materials.
Interference with other parts because of poor installation.
Is the inspection result normal?
YES>>
GO TO 2.
NO>>
Repair or replace the malfunctioni ...