Removal and Installation
CAUTION:
Never damage the body panel.
REMOVAL
CAUTION:
When removing, always use a remover tool that is made of plastic to prevent damage to the parts.
Remove center pillar lower garnish. Refer to Removal and Installation.
Pull out tongue of seat belt pre-tensioner retractor from buckle of lap pre-tensioner. Refer to Removal and Installation.
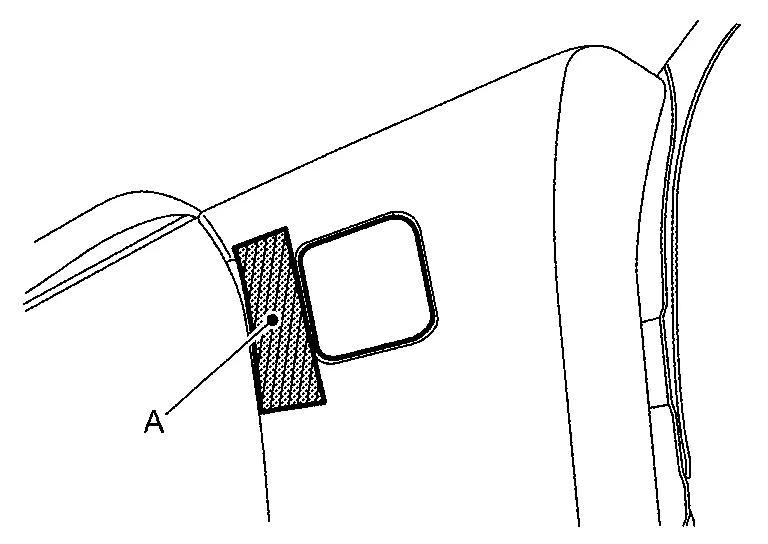
Apply protective tape (A) on center pillar upper garnish to protect it from damage.
Disengage pillar cap fixing pawls of center pillar upper garnish using a remover tool (A), and then remove pillar cap of center pillar upper garnish.
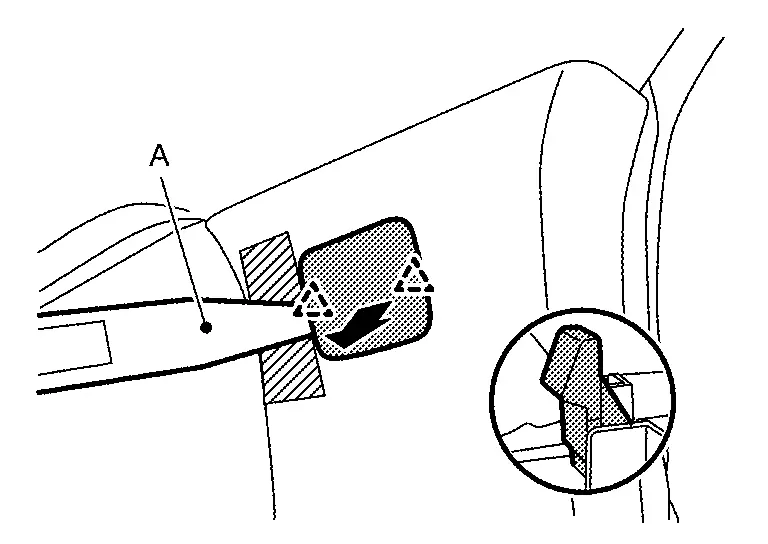
 |
: Pawl |
Remove center pillar upper garnish mounting bolt.
Disengage center pillar upper garnish lower side fixing clip.
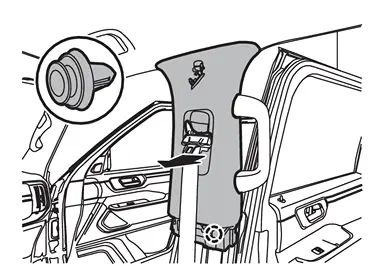
 |
: Clip |
Pull out seat belt, and then remove center pillar upper garnish.
INSTALLATION
Note the following items, and then install in the reverse order of removal.
CAUTION:
-
Visually check clip for deformation and damage during installation. Replace with new ones if necessary.
-
Check in advance that clip is accurately aligned with the hole on body panel, and then install by pressing in.
-
After installation, check that the lip of body side welt covers. Refer to Inspection.
Other materials
BSW system limitations
WARNING
The following limitations apply to the Nissan Armada Blind Spot Warning (BSW)
system. Ignoring these limitations or relying solely on the system may lead to serious
injury or even fatal accidents.
The Nissan Armada BSW system is not capable of detecting every vehicle
or object in ...
How to turn off the VDC system
The Nissan Armada should normally be driven with the Vehicle Dynamic Control
(VDC) system activated, as it plays a critical role in maintaining stability, traction,
and overall vehicle control in a wide range of driving conditions.
However, in certain situations—such as when the Nissan Armada ...
Engine Coolant
Service Data
ENGINE COOLANT CAPACITY (APPROXIMATELY)Unit: ℓ (US qt, Imp qt) Engine coolant capacity [With reservoir tank (“MAX� level)]
13.0 (13-6/8,11-4/8)
Reservoir tank engine coolant capacity (At “MAX� level)
1.61 (1-6/8,1-3/8)
...