Removal and Installation
REMOVAL
CAUTION:
Never damage front door glass and front door panel.
Remove front door pull handle bracket. Refer to Removal and Installation.
Remove front door sash inner cover. Refer to Removal and Installation.
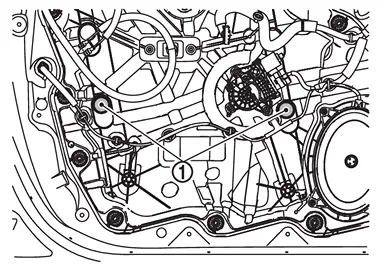
Remove hole seals  from front door panel.
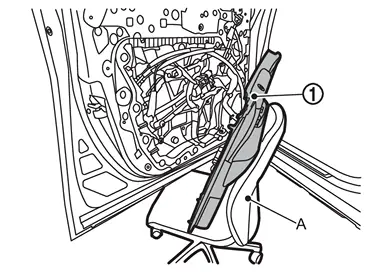
Reconnect power window main switch connector with front door finisher.
 NOTE:
NOTE:
The front door finisher is big and heavy component. When reconnect it, use the chair/similar something (A) to support front door finisher as shown in the figure.
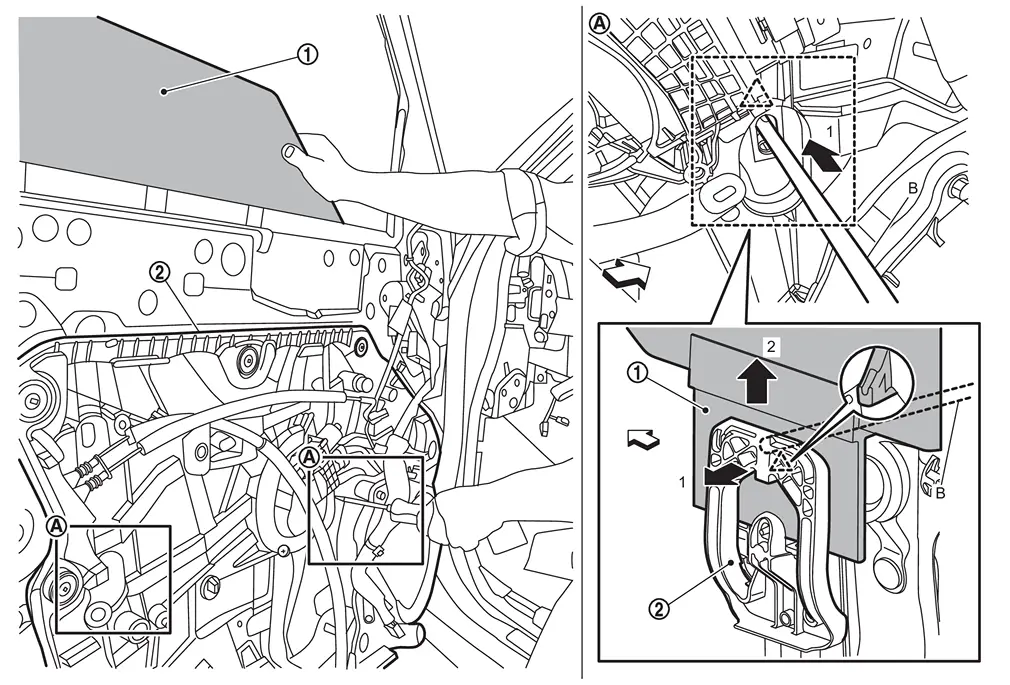
Operate power window main switch to raise or lower front door glass until front door glass fixing pawl positions can be seen.
Disengage front door glass fixing pawls of front door module assembly  using a removal tool (B) according to numerical order 1→2 indicated by arrows as shown in the figure.
 |
: Pawl |
| : vehicle front |
Pull up front door glass to upward, and then remove front door glass.
CAUTION:
Never damage front door glass, front door glass run, and front door panel.
INSTALLATION
Note the following items, and then install in the reverse order of removal.
CAUTION:
-
Never reuse hole seal. Always replace it with a new one when it is removed.
-
After installing front door glass, perform the inspection and adjustment. Refer to Inspection and Adjustment.
Inspection and Adjustment
SYSTEM INITIALIZATION
Perform additional service for operating the power window control system normally after installing front door glass. Refer to Work Procedure.
FITTING INSPECTION
-
Check that glass is fitted securely into the sash groove.
-
Lower glass slightly [approximately 10 to 20 mm (0.39 to 0.79 in)], and check that the clearance to the sash is parallel. Loosen each fastener to correct the glass position if the clearance between the glass and sash are not parallel.
Other materials
Second Seat (captain Seat)
Exploded View
REMOVAL
Headrest
Second seat assembly (RH seat)
Outside seat leg cover
Inside seat leg cover
Second seat assembly (LH seat)
: Pawl
: N·m (kg-m, ft-lb)
DISASSEMBLYLH Seat
Seatback lever unit cap
Seatback lever unit
Headrest holder (lock)
...
Door Does Not Lock/unlock with Intelligent Key
Description
All doors do not lock/unlock using Intelligent Key button.NOTE:
Before starting diagnosis check that vehicle condition is as shown in “Conditions of vehicle�, and check each symptom.SYMPTOM TABLE (BOTH INTELLIGENT KEYS HAVE THE SAME SYMPTOMS) Door lock operation (remote keyless entry ...
Microphone
Removal & Installation
REMOVALRemove the map lamp assembly. Refer to Removal and Installation.
Remove the microphone harness connector .
Use a suitable tool to release pawls and remove the switch finisher .
: Pawls
CAUTION:
Do not damage pawls.
Use a suitable tool to release pawl and re ...