Exploded View
Front Foot Lamp (LH)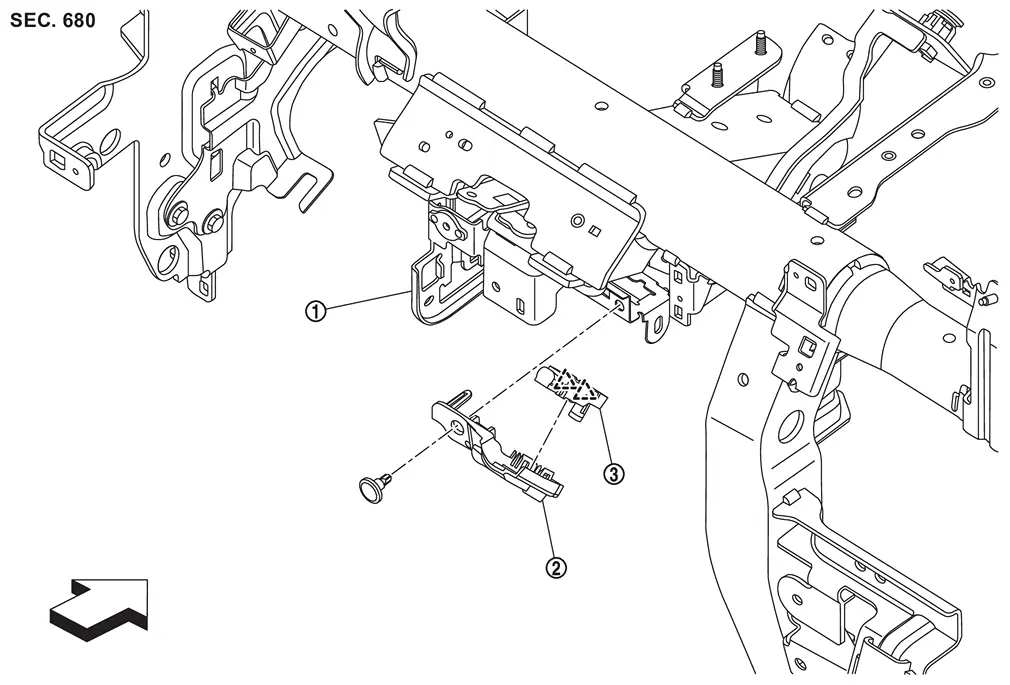
 |
Steering member assembly |  |
Front foot lamp bracket (LH) |  |
Front foot lamp (LH) |
 |
: Pawl | ||||
| : vehicle front | |||||
Front Foot Lamp (RH)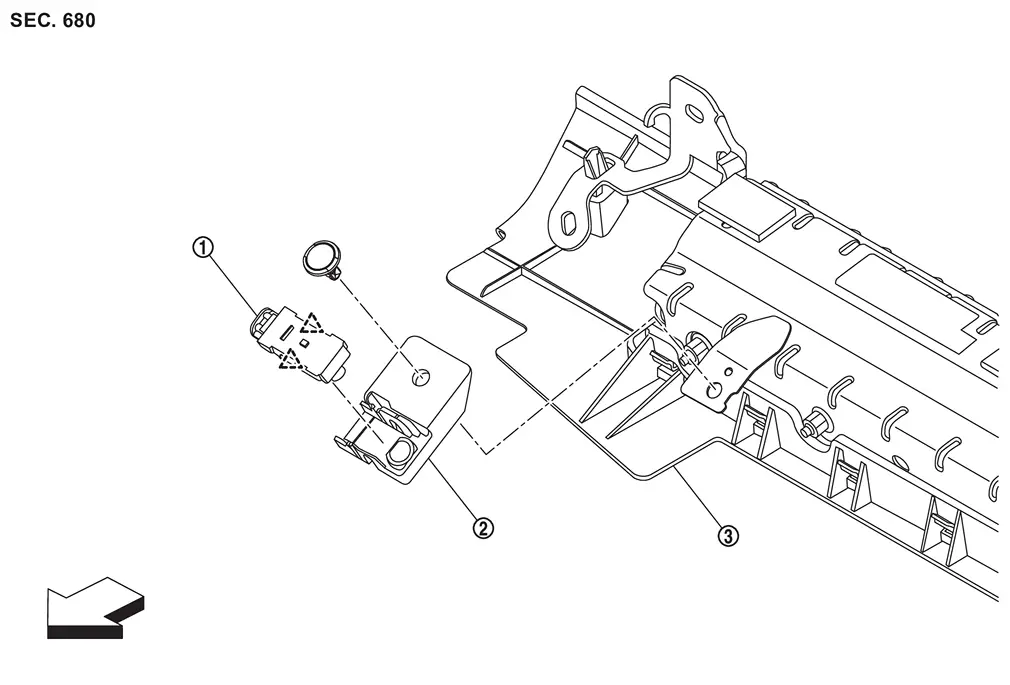
|
Front foot lamp (RH) | |
Front foot lamp bracket (RH) | |
Passenger knee air bag module |
|
: Pawl | ||||
| : vehicle front | |||||
Front Foot Lamp (lh)
Removal and Installation
CAUTION:
Disconnect the battery negative terminal or remove power circuit fuse when performing the operation for preventing electric leakage. Refer to Precautions for Removing Battery Terminal.
REMOVAL
Remove driver knee air bag module mounting bolts, and then move driver knee air bag module to secure workspace. Refer to Removal and Installation.
Disconnect harness connector.
Remove fixing clip  , and then remove front foot lamp bracket (LH).
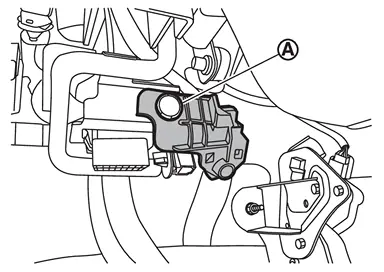
Disengage front foot lamp (LH) fixing pawls using a remover tool (A), and then remove front foot lamp (LH).
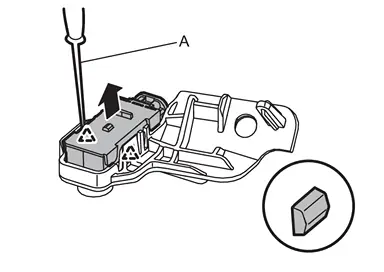
|
: Pawl |
INSTALLATION
Install in the reverse order of removal.
Replacement
CAUTION:
-
Disconnect the battery negative terminal or remove power circuit fuse when performing the operation for preventing electric leakage. Refer to Precautions for Removing Battery Terminal.
-
Replacement of bulb is not possible due to the adoption of LED. When replacement, replace front foot lamp (LH) as a single part. Refer to Removal and Installation.
Front Foot Lamp (rh)
Removal and Installation
CAUTION:
Disconnect the battery negative terminal or remove power circuit fuse when performing the operation for preventing electric leakage. Refer to Precautions for Removing Battery Terminal.
REMOVAL
Remove passenger knee air bag module mounting bolts, and then move passenger knee air bag module to secure workspace. Refer to Removal and Installation.
Disconnect harness connector.
Remove fixing clip , and then remove front foot lamp bracket (RH).
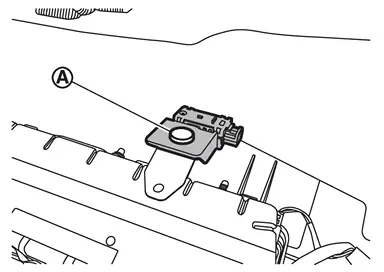
Disengage front foot lamp (RH) fixing pawls using a remover tool (A), and then remove front foot lamp (RH).
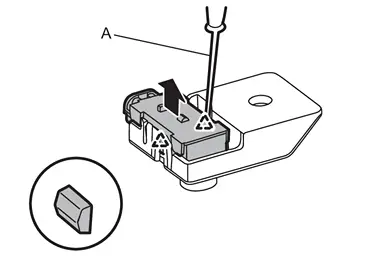
|
: Pawl |
INSTALLATION
Install in the reverse order of removal.
Replacement
CAUTION:
-
Disconnect the battery negative terminal or remove power circuit fuse when performing the operation for preventing electric leakage. Refer to Precautions for Removing Battery Terminal.
-
Replacement of bulb is not possible due to the adoption of LED. When replacement, replace front foot lamp (RH) as a single part. Refer to Removal and Installation.
Other materials
Precaution for Supplemental Restraint System (srs) Air Bag and Seat Belt Pre-Tensioner
PRECAUTIONS FOR SUPPLEMENTAL RESTRAINT SYSTEM (SRS) AIR BAG AND SEAT BELT PRE-TENSIONER : Precautions
The Supplemental Restraint System such as “AIR BAG� and “SEAT BELT PRE-TENSIONER�, used along with a front seat belt, helps to reduce the risk or severity of injury to the driver and front p ...
Front Door
Exploded View
Front door panel
Grommet
Front door striker
TORX bolt
Front door check link
Front door hinge (lower)
Front door hinge (upper)
Front door weather-strip
Front door parting seal rear
Front door parting seal front
Drain hole cover
: Clip
...
Inverter Unit
Exploded View
Bracket LH
Inverter unit
Bracket RH
:N·m (kg-m, in-lb)
Removal and Installation
REMOVALRemove luggage side lower finisher LH. Refer to Removal and Installation.
Disconnect inverter unit harness connector.
Remove inverter unit mounting nuts.
Remove the bracket from the i ...