Disassembly and Assembly
WARNING:
When working, be careful to prevent accidental explosion front side air bag module and front center air bag module (with front center air bag module). Refer to Precaution for Supplemental Restraint System (SRS) "AIR BAG" and "SEAT BELT PRE-TENSIONER".
CAUTION:
When disassemble, always use a remover tool that is made of plastic to prevent damage.
DISASSEMBLY
Disengage seatback board fixing retainer  .
.
-
With 4way power seat system
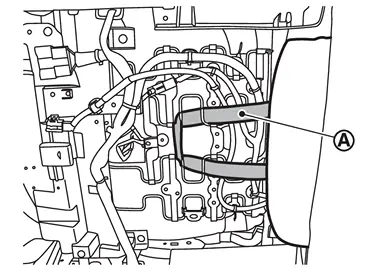
-
With 8way power seat system
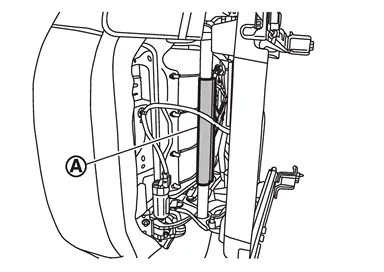
Disengage fixing clips and pawls according to numerical order 1→2 indicated by arrows as shown in the figure, and then remove seatback board.
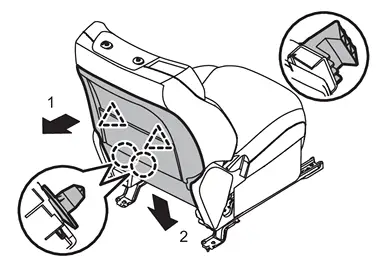
 |
: Clip |
 |
: Pawl |
Disengage seatback trim fixing retainers .
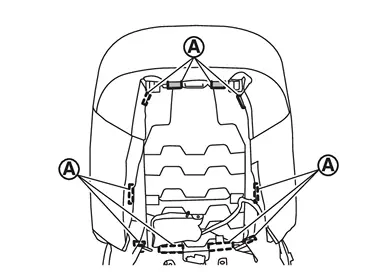
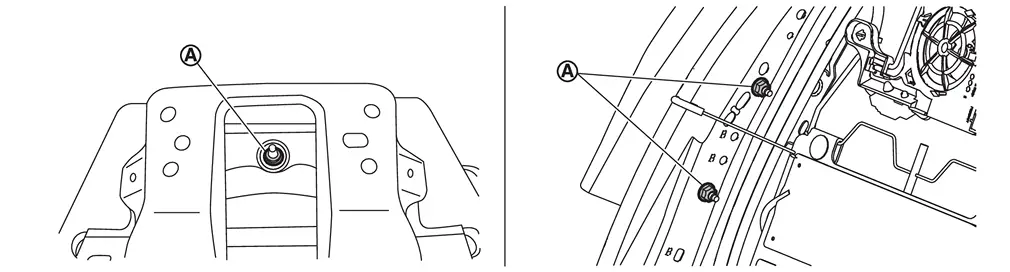
Remove mounting nut(s) , and then disengage seatback trim fixing plate(s).
-
Without front center air bag module
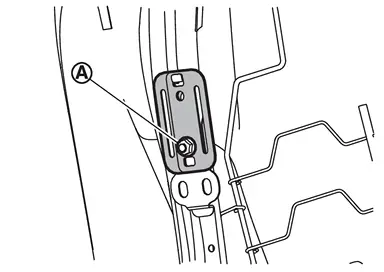
-
With front center air bag module
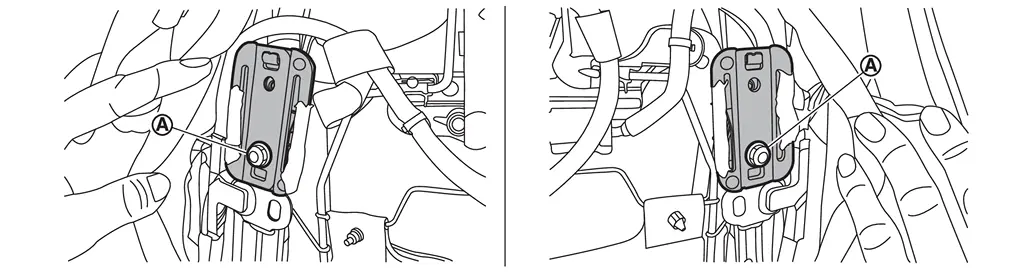
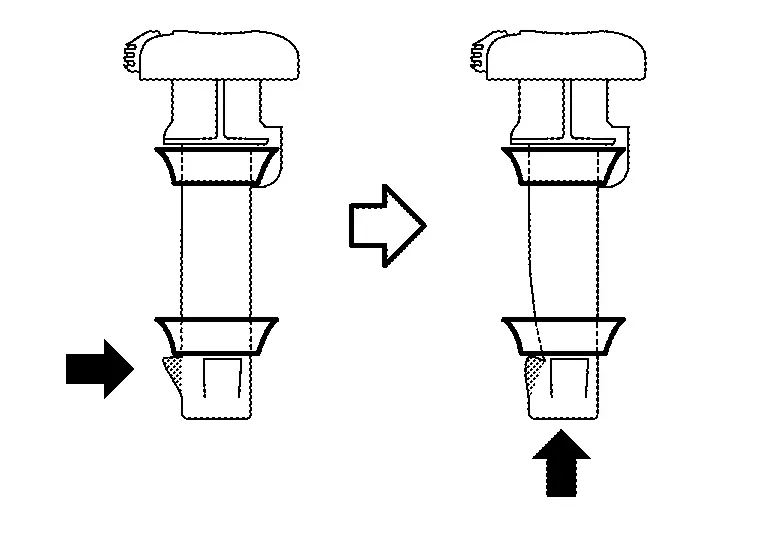
Remove headrest holders by raising it while pinching pawls from the bottom of headrest holders.
CAUTION:
Before removing headrest holders, check its orientation because it has installation direction (front/rear, left and right).
Disengage harness fixing clips of seatback, and then disconnect harness connectors.
CAUTION:
Before performing removal operation, check the installation position of harness connectors and harness fixing clips.
Remove seatback trim and pad as a set from seat frame assembly.
-
Without front heater and ventilation system
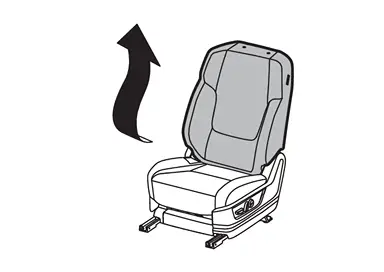
-
With front heater and ventilation system
Disengage fixing pawls according to numerical order 1→2 indicated by arrows as shown in the figure, and then remove seatback trim and pad as a set from seat frame assembly.
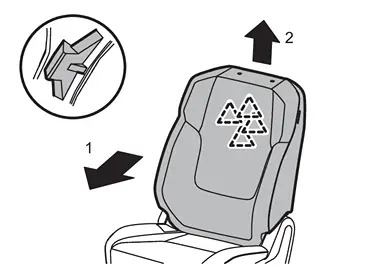
: Pawl
Remove hog rings, and then separate seatback trim and pad.
CAUTION:
-
Before removing hog rings, check its position because it should be installation in position.
-
Never disassemble seatback pad and seatback heater (if equipped).
-
Never disassemble seatback pad
 , seatback bellows , and seatback blower motor cover
  (if equipped).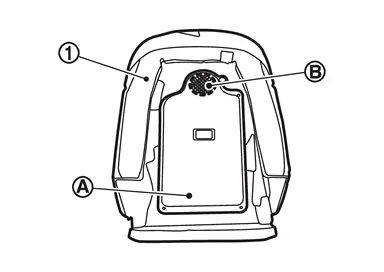
Remove front side air bag module mounting nuts .
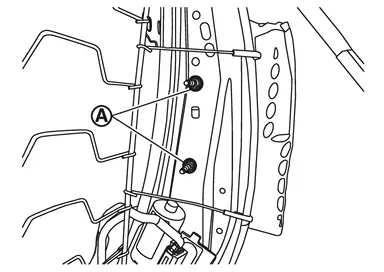
Remove front side air bag module.
CAUTION:
-
Note how the part is installed for reference during assembly.
-
To prevent accidental explosion, always place the front side air bag module with deploying direction facing upward.
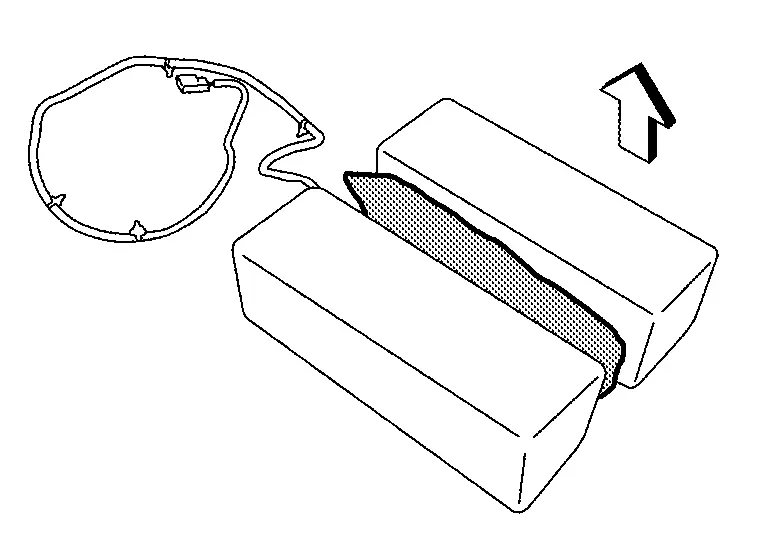
: Deploying direction -
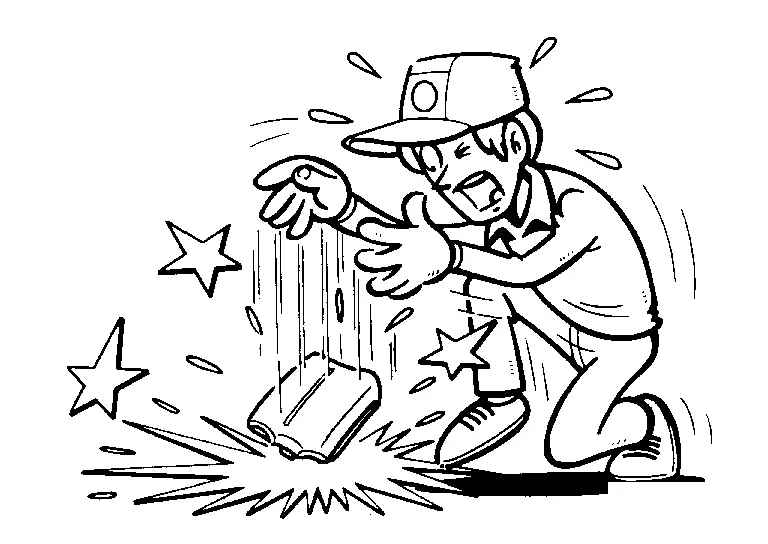
To prevent damage to the parts, never impact the front side air bag module.
-
Replace the front side air bag module if it is dropped or sustains an impact.
-
To prevent accidental explosion, never insert any foreign objects (screwdriver, etc.) into the front side air bag module.
-
To prevent accidental explosion, never disassemble the front side air bag module.
-
To prevent accidental explosion, never expose the front side air bag module to temperature of more than 90°C (194°F).
-
To prevent damage to the parts, never allow oil, grease, detergent, or water to come in contact with the front side air bag module.
Remove front center air bag module (with front center air bag module).Remove front center air bag module mounting nuts .
Remove the following parts after removing seatback trim and pad from seat frame assembly.
-
Seatback blower motor (if equipped). Refer to Removal and Installation.
-
Lumbar support unit (with 2way lumbar support system).
-
Lumbar support unit (with 4way lumbar support system).
-
Seatback suspension (without lumbar support system).
ASSEMBLY
Note the following items, and then assemble in the reverse order of disassembly.
CAUTION:
-
Never reuse hog ring after disassembly, using new hog ring.
-
Always install hog ring in position.
-
Use new hog ring if removed or crimped unsuccessfully.
-
Never reuse headrest holders after removal, using new headrest holders.
-
Before installing headrest holders, check its orientation because it has installation direction (front/rear, left and right).
-
When installing front side air bag module and front center air bag module (with front center air bag module), following bellow items.
-
Never reuse front side air bag module and front center air bag module (with front center air bag module) mounting nuts after removal, replace with new nuts.
-
Never damage the air bag harness.
-
Tighten mounting nuts to the specified torque. Refer to Exploded View.
-
Never tighten mounting nut as twice.
-
-
Never reuse seatback trim fixing plate(s) mounting nut(s) after removal, replace with new nut.
-
Be installed harnesses and harness fixing clips in position.
-
If harnesses clip be broken, replace with new clip and it install in position where marked before removing clip.
- Perform self-diagnosis using CONSULT and confirm if the system is normal. Refer to CONSULT Function.
-
After the work is completed, check that no system malfunction is detected by air bag warning lamp.
Other materials
Brake Fluid
Inspection
WARNING:
Jacking up or lift up the vehicle may the vehicle height to go down which cause a personal injury and/or damage to the air suspension component parts. Refer to Precaution for when Jacking and Lifting Up the vehicle with Electronic Air Suspension System.
BRAKE FLUID LEVEL
C ...
Second Seat (captain Seat)
Exploded View
REMOVAL
Headrest
Second seat assembly (RH seat)
Outside seat leg cover
Inside seat leg cover
Second seat assembly (LH seat)
: Pawl
: N·m (kg-m, ft-lb)
DISASSEMBLYLH Seat
Seatback lever unit cap
Seatback lever unit
Headrest holder (lock)
...
Folding Switch
Removal and Installation
REMOVALRemove luggage side lower finisher RH. Refer to Removal and Installation.
Disengage fixing pawls and then remove folding switch.
: Pawl
INSTALLATIONInstall in the reverse order of removal. ...