Exploded View
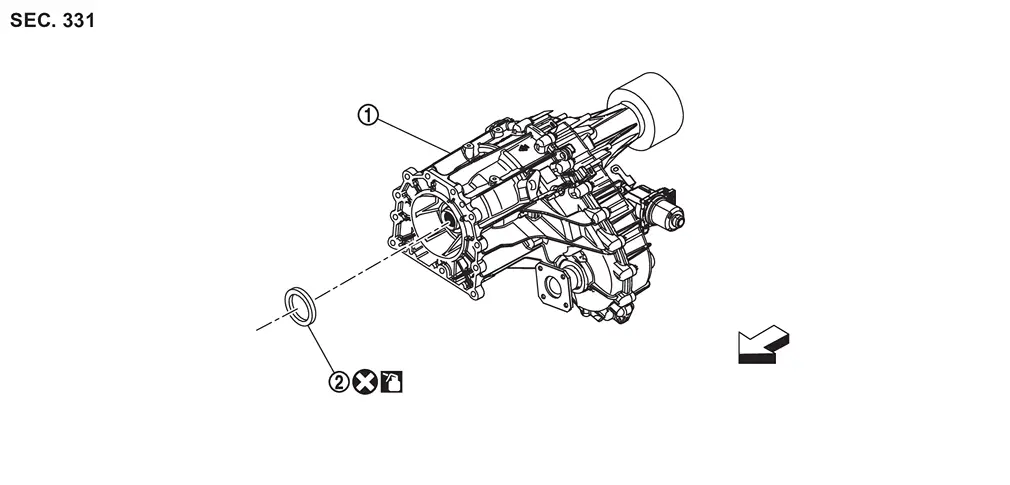
 |
Transfer assembly |  |
Input oil seal | ||
 |
: vehicle front | ||||
 |
: Always replace after every disassembly. | ||||
 |
: Apply transfer fluid. | ||||
Removal and Installation
WARNING:
-
Jacking up or lift up the vehicle may the vehicle height to go down which cause a personal injury and/or damage to the air suspension component parts. Refer to Precaution for when Jacking and Lifting Up the vehicle with Electronic Air Suspension System.
REMOVAL
Remove transfer assembly from vehicle. Refer to Removal and Installation.
Remove input oil seal.
CAUTION:
Never damage the front case and input shaft.
INSTALLATION
Note the following, and install in the reverse order of removal.
-
Install input oil seal with a drift (A) (commercial service tool) within the dimension (L) shown as follows.
L : 1.5 – 2.5 mm (0.059 – 0.098 in) 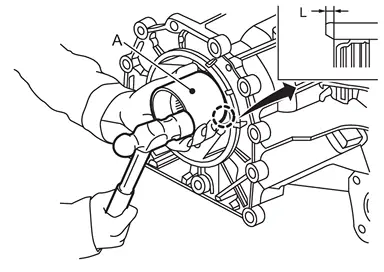
CAUTION:
-
Never reuse input oil seal.
-
Apply transfer fluid onto circumference of oil seal.
-
When installing, never incline input oil seal.
-
Never handle the oil seal inner periphery and oil seal lip.
-
Other materials
Oil Cooler
Exploded View
Oil cooler
O-ring
Oil filter
Connector bolt
Oil catch plate
Clamp
Oil cooler hose 2
Oil cooler hose 3
Oil cooler pipe 2
Oil cooler hose 1
Oil cooler pipe 1
Comply with the installation procedure when tightening. Refer to Removal and ...
Electric Intake Valve Timing Control Module
Exploded View
Bracket
Electric intake valve timing control module
: vehicle front
: N·m (kg-m, in-lb)
Removal & Installation
REMOVALRemove air cleaner body. Refer to Removal and Installation.
Remove harness clip to bracket.
Disconnect electric intake valve timing con ...
Vr35ddtt
Alternator
Engine
VR35DDTT
Type
A003TV8091
MITSUBISHI make
Nominal rating
(V - A)
14 - 230
Ground polarity
Negative
Minimum revolution under no-load
(When 13.5 V is applied)
(rpm)
Less than 1,500
Hot output current
(When 13.5 V is applied)
(A/rpm)
More t ...