Exploded View
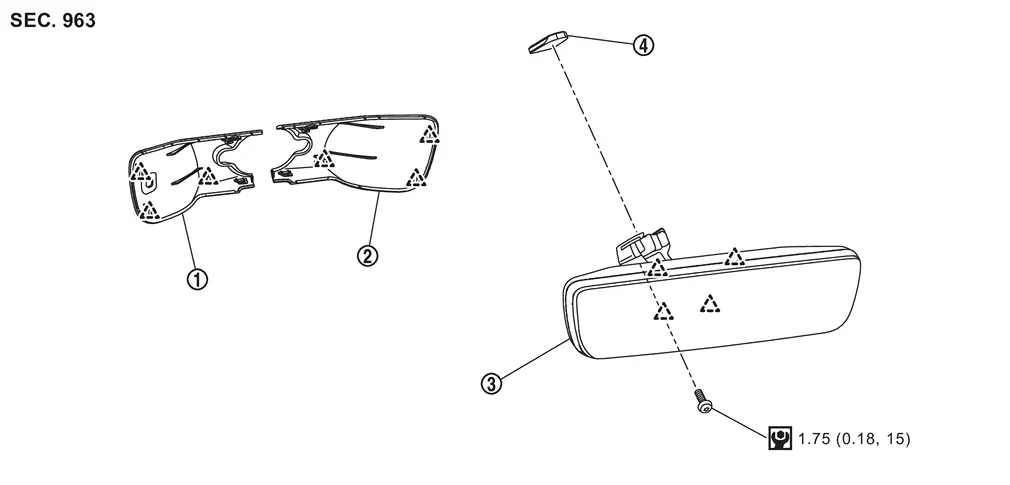
 |
Intelligent rear view mirror cover LH |  |
Intelligent rear view mirror cover RH |  |
Intelligent rear view mirror |
 |
Inside mirror base | ||||
 |
: Pawl | ||||
 |
: N·m (kg-m, in-lb) | ||||
Removal and Installation
CAUTION:
Never move intelligent rear view mirror beyond the movable range as the wiring may break.
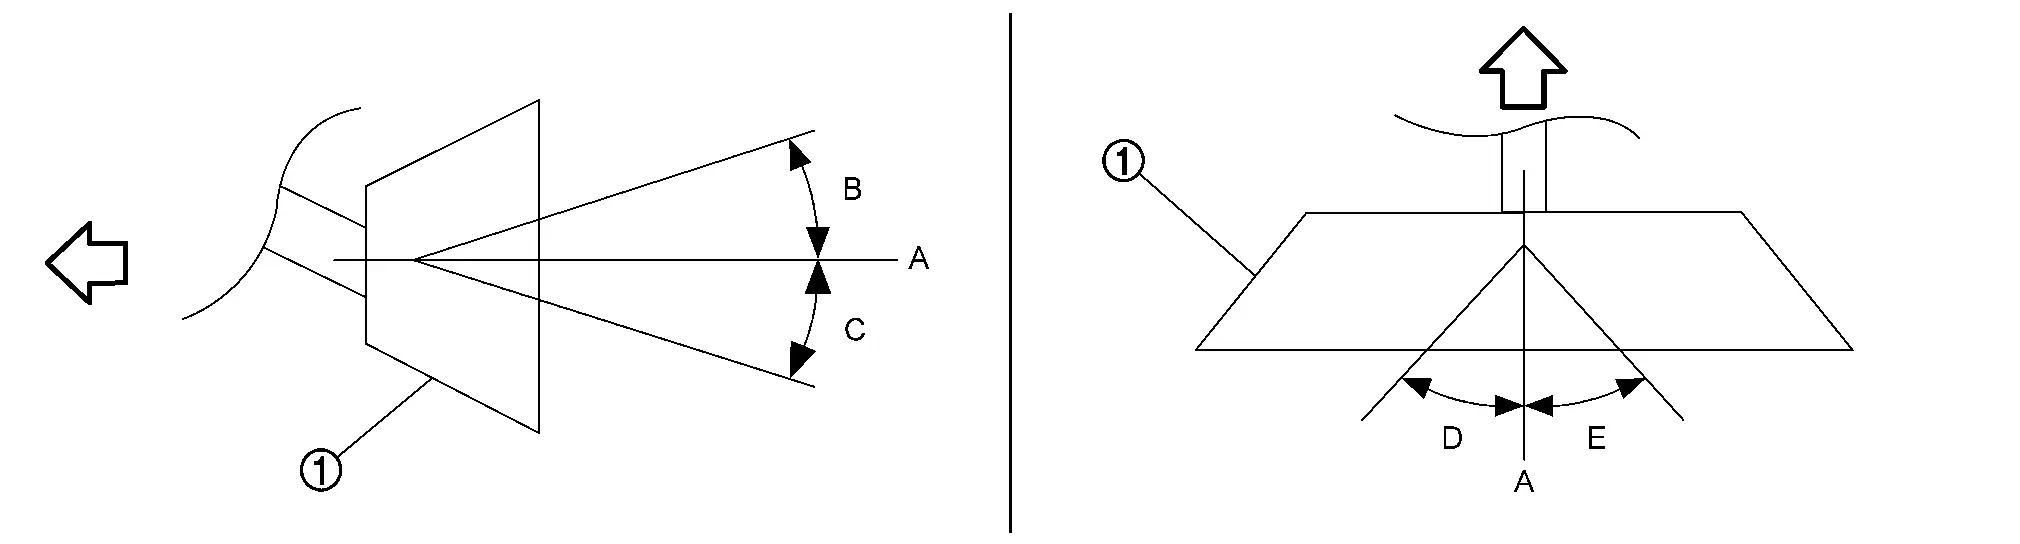
| : vehicle front |
| intelligent rear view mirror movable range | |
| A | : Standard position |
| B | : Less than 20° (upward adjustment range) |
| C | : Less than 20° (downward adjustment range) |
| D | : Less than 30° (left adjustment range) |
| E | : Less than 30° (right adjustment range) |
REMOVAL
Remove cover. Refer to the following.
-
Without ProPILOT ASSIST 2.1: Removal and Installation.
-
With ProPILOT ASSIST 2.1: Removal and Installation.
Apply protective tapes (A) on the part to protect it from damage.
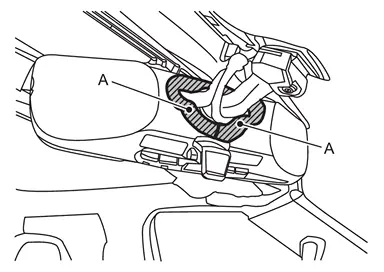
Disengage fixing pawls of the intelligent rear view mirror cover (LH and RH) using a remover tool (A), and then remove intelligent rear view mirror cover (LH and RH).
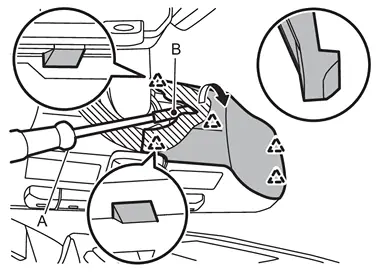
CAUTION:
Use a remover tool wrapped in tape (B).
|
: Pawl |
Disconnect intelligent rear view mirror harness connectors  and
and  .
.
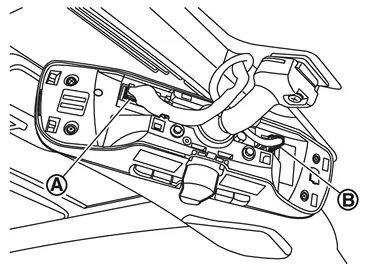
Remove intelligent rear view mirror fixing screw .
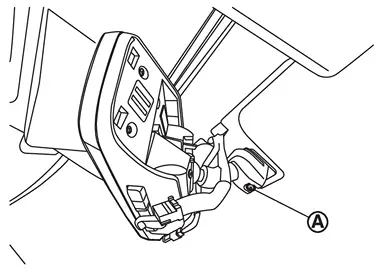
Slide the intelligent rear view mirror to the upper side and remove it from the inside mirror base.
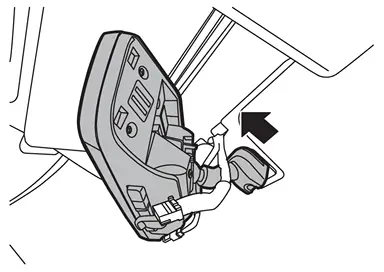
INSTALLATION
Note the following items, and then install in the reverse order of removal.
CAUTION:
-
Tighten intelligent rear view mirror fixing screw to the specified torque. Refer to Exploded View.
-
Install while sliding intelligent rear view mirror along the glass surface.
Other materials
How to use the automatic brake hold function
Basic information
For optimal use of the Nissan Armada automatic brake hold system, follow the
operational guidelines outlined below to ensure safe and effective performance.
To maintain braking force automatically
When the Nissan Armada automatic brake hold function is active and the white
i ...
Front Oil Seal
Removal and Installation
WARNING:
Jacking up or lift up the vehicle may the vehicle height to go down which cause a personal injury and/or damage to the air suspension component parts. Refer to Precaution for when Jacking and Lifting Up the vehicle with Electronic Air Suspension System.
REMOVA ...
Back Door Opener Switch Assembly
Removal and Installation
REMOVAL
Remove back door finisher. Refer to Removal and Installation.
Disconnect license plate lamp harness connectors.
Remove back door opener switch assembly fixing pawls using a remover tool (A), and then remove back door opener switch .
: Pawl
INSTALLATIONIn ...