Removal and Installation
CAUTION:
Never damage rear door panel.
REMOVAL
Remove rear door finisher. Refer to Removal & Installation.
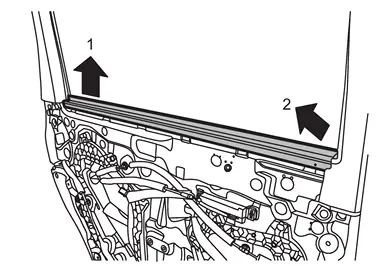
Remove inside seal according to numerical order 1→2 indicated by arrows as shown in the figure.
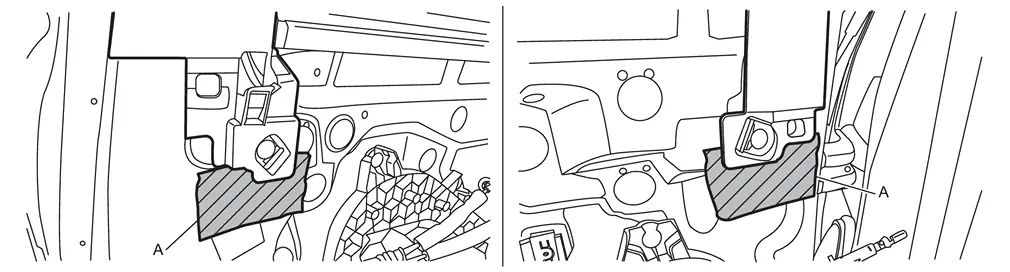
Apply protective tapes (A) on rear door panel to protect it from damage.
Disengage rear door sash inner cover fixing clips using a remover tool (A).
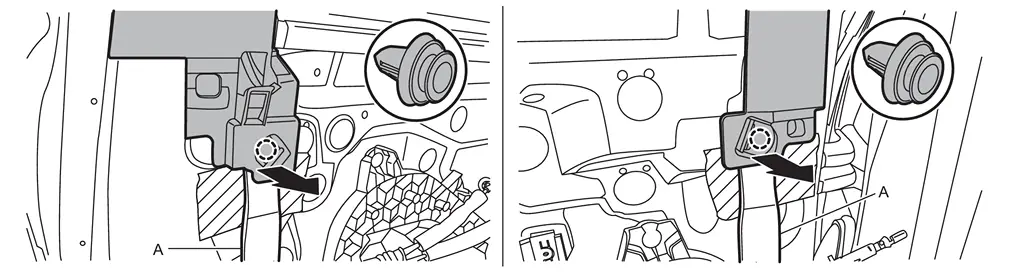
 |
: Clip |
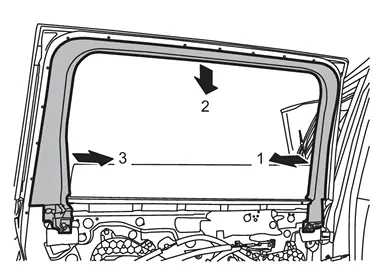
Remove rear door sash inner cover according to numerical order 1→3 indicated by arrows as shown in the figure.
INSTALLATION
Note the following items, and then install in the reverse order of removal.
CAUTION:
-
Visually check clips for deformation and damage during installation. Replace with new ones if necessary.
-
Check in advance that clips are accurately aligned with the portions on rear door panel, and then install by pressing in.
Other materials
Aeb Off Warning Lamp Is Blinking
Symptom Description
Without ProPILOT Assist 2.1The AEB OFF warning lamp is blinking. Refer to Diagnosis Procedure.NOTE:
When any of the following conditions, the AEB OFF warning lamp blinks:
The distance sensor area of the front of the vehicle is covered with dirt or is obstructed
The interior t ...
Refrigerant
Description
CONNECTION OF SERVICE TOOLS AND EQUIPMENTBe certain to follow the manufacturer’s instructions for connecting to the machine.
Leak Test
CHECK REFRIGERANT LEAKAGE USING ELECTRICAL LEAK DETECTORWARNING:
Never check refrigerant leakage while the engine is running.CAUTION:
Be careful of the ...
Inverter Unit
Exploded View
Bracket LH
Inverter unit
Bracket RH
:N·m (kg-m, in-lb)
Removal and Installation
REMOVALRemove luggage side lower finisher LH. Refer to Removal and Installation.
Disconnect inverter unit harness connector.
Remove inverter unit mounting nuts.
Remove the bracket from the i ...