
Nissan Armada 2025-2026 Service and Repair Manual: Removal and Installation
REMOVAL
CAUTION:
Before removing, take a short memo/photo to remember door harness and cable layout.
Remove front door glass. Refer to Removal and Installation.
Disconnect harness connectors  , and then disengage harnesses fixing clips.
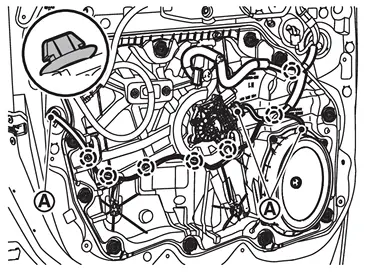
 | : Clip |
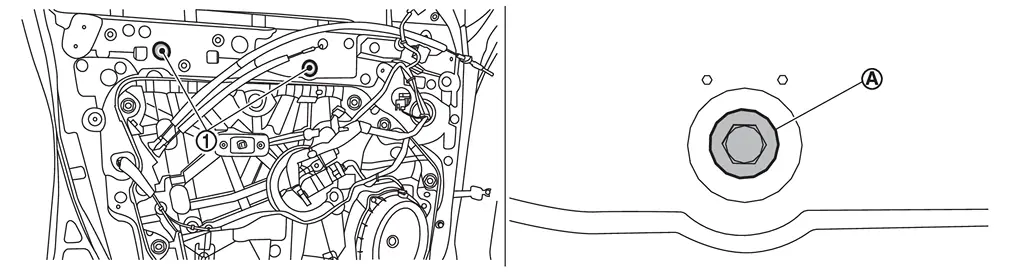
Remove hole seals  from front door panel, and then remove front door module assembly mounting bolts from service holes.
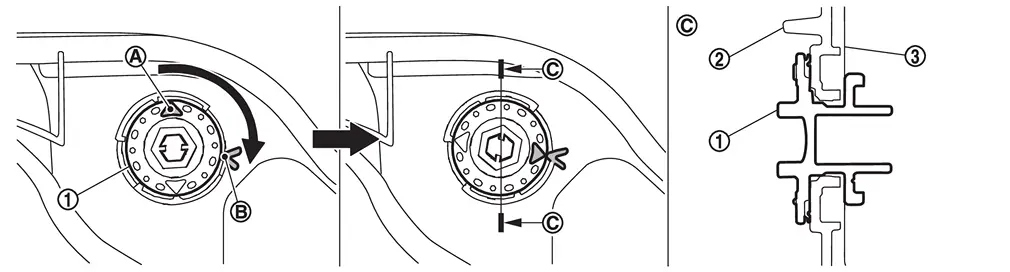
Remove front door regulator fasteners.Turn front door regulator fastener counterclockwise to disengage fixing pawls.
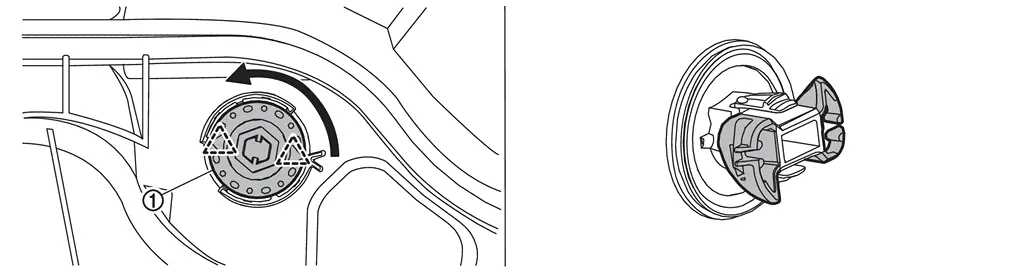
 | : Pawl |
Disengage fixing pawls, and then remove front door module assembly according to numerical order 1→2 indicated by arrows as shown in the figure.
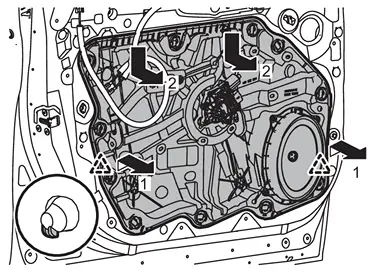
| : Pawl |
INSTALLATION
Note the following items, and then install in the reverse order of removal.
CAUTION:
When front door regulator fastener
installation, align arrow mark of front door regulator fastener with position mark  of front door module assembly
  .
.

Front door panel Never reuse hole seal. Always replace it with a new one when it is removed.

 Disassembly and Assembly
DISASSEMBLY
Remove front door module assembly. Refer to Removal and Installation.
Remove front door power window motor mounting bolts, and then remove front door power window motor.
ASSEMBLY
Note the ...
Other materials:
Work Flow
DETAILED FLOW
INTERVIEW FROM THE CUSTOMER
CAUTION:
>>
GO TO 2.
CHECK SYMPTOM
CAUTION:
>>
GO TO 3.
PERFORM SELF-DIAGNOSIS
With CONSULT
Perform self-diagnosis for “CHASSIS CONTROL�.
Is DTC detected?
YES>>
Record or print self-diagnosis results and freeze frame data (FFD). ...
Calibration of Yaw Rate Sensor
CAUTION:
Always perform the yaw rate sensor calibration before driving when the following operation is performed. Refer to Work Procedure.
×: Required —: Not required
Procedure Yaw rate sensor calibration Removing/ installing ABS actuator and electric unit (control unit) × Replacing ABS act ...
Exploded View
Crankcase ventilation valve* Crankcase ventilation valve bolt* Resonator* Air duct 1 Gasket Air duct 3 (bank 1) Air duct 2 (bank 1) Inlet air duct 2 Bracket 1 Bracket 2 Air duct 2 (bank 2) Air duct 3 (bank 2) Grommet Mounting rubber Inlet air duct 1 Clip Air guide Air cleaner body ...

0.0054