
Nissan Armada 2025-2026 Service and Repair Manual: Removal and Installation
REMOVAL
WARNING:
CAUTION:
Start engine.
Turn OFF the electronic air suspension function. Refer to Operation.
Stop engine.
Lift up the vehicle.
Remove protector mounting bolts and clips, and remove protector.
Remove silicone sealant  between the air connector
  and air tank
  .
.
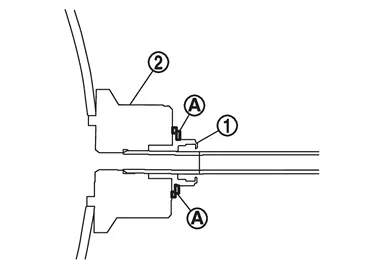
CAUTION:
Never damage air connector and air tank.
Apply the matching mark to the air tube when replacing air connector .
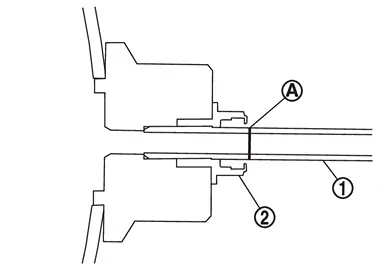
Loosen the air connector and perform air bleeding.
CAUTION:
Be careful since air flows swiftly from air tube.
Loosen the air connector slowly.
Never disconnect the air connector until the air completely bleeds.
When reusing the air connector , remove air tube and air connector together from air tank  .
.
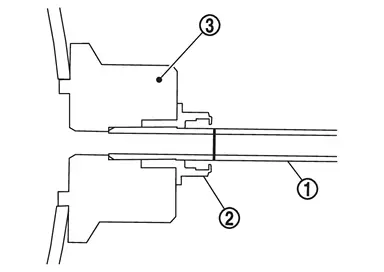
CAUTION:
Never damage air connector and air tube.
When reusing air connector, never remove air tube from air connector.
 NOTE:
NOTE:
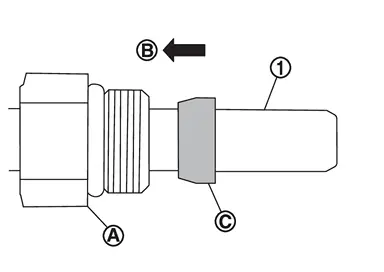
CAUTION:
Never damage air tube.
Remove the air connector partfrom the air tube .
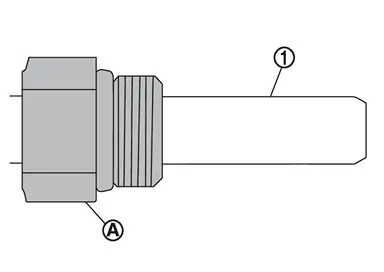
CAUTION:
Never damage air tube.
Remove bracket mounting bolts , and remove brakets from air tank .
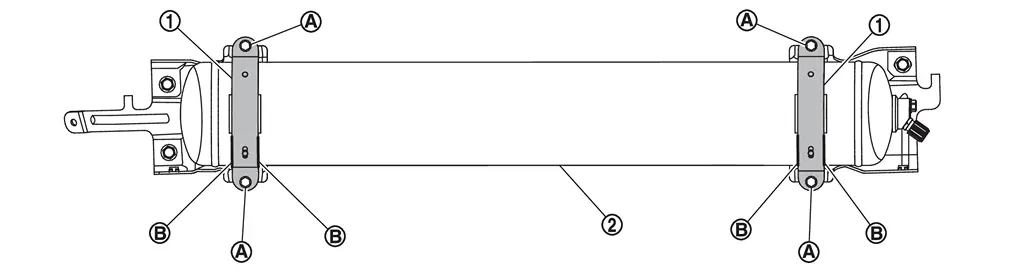
CAUTION:
When reusing the air tank, apply the matching marks  to the air tank to confirm the installing position of bracket.
Remove air tank from brackets.
Rmove brackets from frame.
INSTALLATION
Install bracket to frame.
Install air tank to brackets.
Install brackets to air tank , and install bracket mounting bolts .
CAUTION:
When reusing the air tank, align the matching marks
applied when removing and install.When replaced the air tank, align the air tank
installation dimensions (A) and install the bracket . 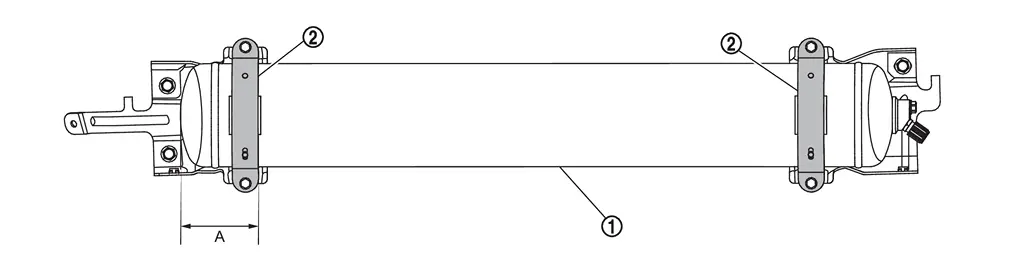
A : 85 - 95 mm (3.35 - 3.74 in) Install cap
of air tank shown in figure.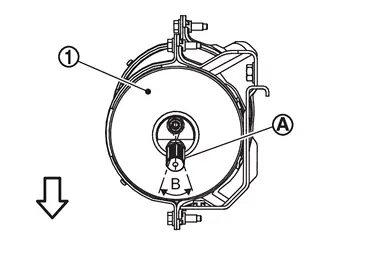

: Vehicle lower B : ±5 degrees
When reusing the air connector, install air tubes and air connectors together to air tank .
CAUTION:
Never damage air connector and air tube.
Never remove the vinyl tape until installing the air tube and air connector.
Never let foreign materials entered into parts.
When replaced the air connector, follow the procedure below.Install air connectors to air tank. Insert the air tube straight into the air connector to the marked point which is applied when removing.
CAUTION:
Securely insert the air tube with no damage and twist.
Never remove the air connector cover until air tube is installed.
Never let foreign materials entered into parts.
Apply silicone sealant to faces air connector and air tank .
CAUTION:
Before applying the silicone sealant, make sure that there are no clearance between air tank and air connector.
Apply the silicone sealant to the air tank and air connector jointed parts without any clearance.
Start engine.
Fill the air to the air tank for 180 seconds using CONSULT. Refer to Work Support.
Stop engine.
Install protector, and install mounting bolts and clips.
Lift down the vehicle.
Start engine.
Perform pressure measurements using CONSULT. Refer to Work Support.
NOTE:
Confirm that "Air suspension internal pressure judgement" is OK.
Use CONSULT and vehicle to the normal height. Refer to Work Support.
Turn ON the electronic air suspension function. Refer to Operation.
Stop engine.
Perform inspection after installation. Refer to Inspection.
 Exploded View
Bracket Air tank Clip Protector Air connector Air tube To air suspension control module :Vehicle front : Always replace after every disassembly. :N·m (kg-m, ft-lb) :N·m (kg-m, in-lb) :A ...
 Inspection
INSPECTION AFTER INSTALLATION
Confirm to close the hood.
Always check for the air leakage with soapy water.
...
Other materials:
Examination of Panel
Irregularities in the panel must be examined carefully to see whether or not they can be repaired, and also to determine the most suitable repair method.
Refer to "Examination of Panel Damage".
Work Direction on a Vehicle
1 Area mainly accessed from the back to the front 2 Area mainly accessed ...
Perform Lubricant Return Operation
CAUTION:
If a large amount of refrigerant or lubricant leakage is detected, never perform lubricant return operation.
Start the engine and set to the following conditions.
Engine speed: Idling to 1,200 rpm
A/C switch: ON
Fan (blower) speed: Maximum speed set
Intake door position: Recirculation
Temp ...
I-FCW system operation
The Nissan Armada I-FCW system becomes active at speeds above approximately 3
MPH (5 km/h), ensuring functionality during most driving scenarios.
When a potential forward collision risk is detected, the Nissan Armada system
immediately alerts the driver by flashing the vehicle-ahead detecti ...

0.0194