
Nissan Armada 2025-2026 Service and Repair Manual: Removal and Installation
REMOVAL
Remove rear fillet molding rear fixing clips  and screws
  .
.
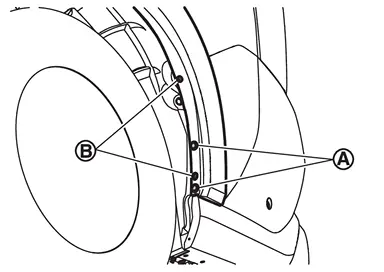
Apply protective tape (A) on the part to protect it from damage.
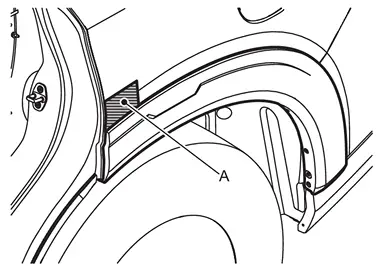
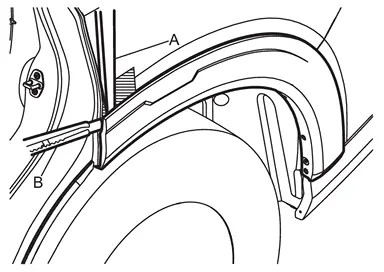
Insert a remover tool (A) between rear fillet molding rear and rear fender panel, and then cut double-sided tape using a cutter (B) while lifting rear fillet molding rear.
Disengage fixing clips, and then remove rear fillet molding rear indicated by arrows as shown in the figure.
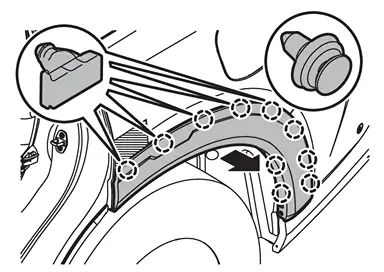
 | : Clip |
INSTALLATION
Note the following items, and then install in the reverse order of removal.
CAUTION:
Always replace double-sided tape with a new one, if rear fillet molding rear is reused.
Remove double-sided tape remaining on rear fender panel and back of rear fillet molding rear with a double-sided tape remover, after removing rear fillet molding rear.
Degrease rear fillet molding rear mounting surface of rear fender panel.
Paint grain or dust on mounting surface of rear fillet molding rear may spoil exterior appearance if it remains. Clean the mounting surface and check that no paint grain or dust remains, before starting the operation.
When installing rear fillet molding rear, visually check the clips, then replace it with new parts if they are damaged.
When installing rear fillet molding rear, check that clips are securely fitted in holes, and then press it in.
Never wash the vehicle within 24 hours after installing so as to keep adhesive.

 Fender Protector
...
Other materials:
Removal and Installation
REMOVAL
Remove cowl top side seal between cowl top cover and fender drip cover. Refer to Removal and Installation.
Disengage fixing clips, and then remove front fender drip cover.
: Clip
Disengage fixing clips, and then remove hood side seal.
INSTALLATION
Install in the reverse order of removal ...
Special Service Tools
The actual shapes of the TechMate tools may differ from those of the special service tools illustrated here.
Tool number
(TechMate No)
Tool name Description KV10111100
(NI-37228)
Seal cutter
Removing carrier cover ST30720000
(NI-25405)
Drift
a: 77 mm (3.03 in) dia.
b: 55.5 mm (2.185 in) dia.
In ...
Inspection
INSPECTION AFTER INSTALLATION
INSPECTION AFTER INSTALLATION
The following are procedures for checking fluid leakage, lubricant leakage.
Before starting engine, check oil/fluid levels including engine coolant and engine oil. If any are less than the required quantity, fill them to the specified level ...

0.0073