Foam Repair
During factory body assembly, foam insulators are installed in certain body panels and locations around the vehicle. Use the following procedure(s) to replace any factory-installed foam insulators.
URETHANE FOAM APPLICATIONS
Use commercially available Urethane foam for sealant (foam material) repair of material used on vehicle.
| <Urethane foam for foaming agent> | 3Mâ„¢ Automixâ„¢ Flexible Foam 08463 or equivalent |
Read instructions on product for fill procedures.
Example of foaming agent filling operation procedure
Fill procedures after installation of service part.Eliminate foam material remaining on vehicle side. Clean area after eliminating form insulator and foam material. Install service part. Insert nozzle into hole near fill area and fill foam material or fill enough to close gap with the service part.
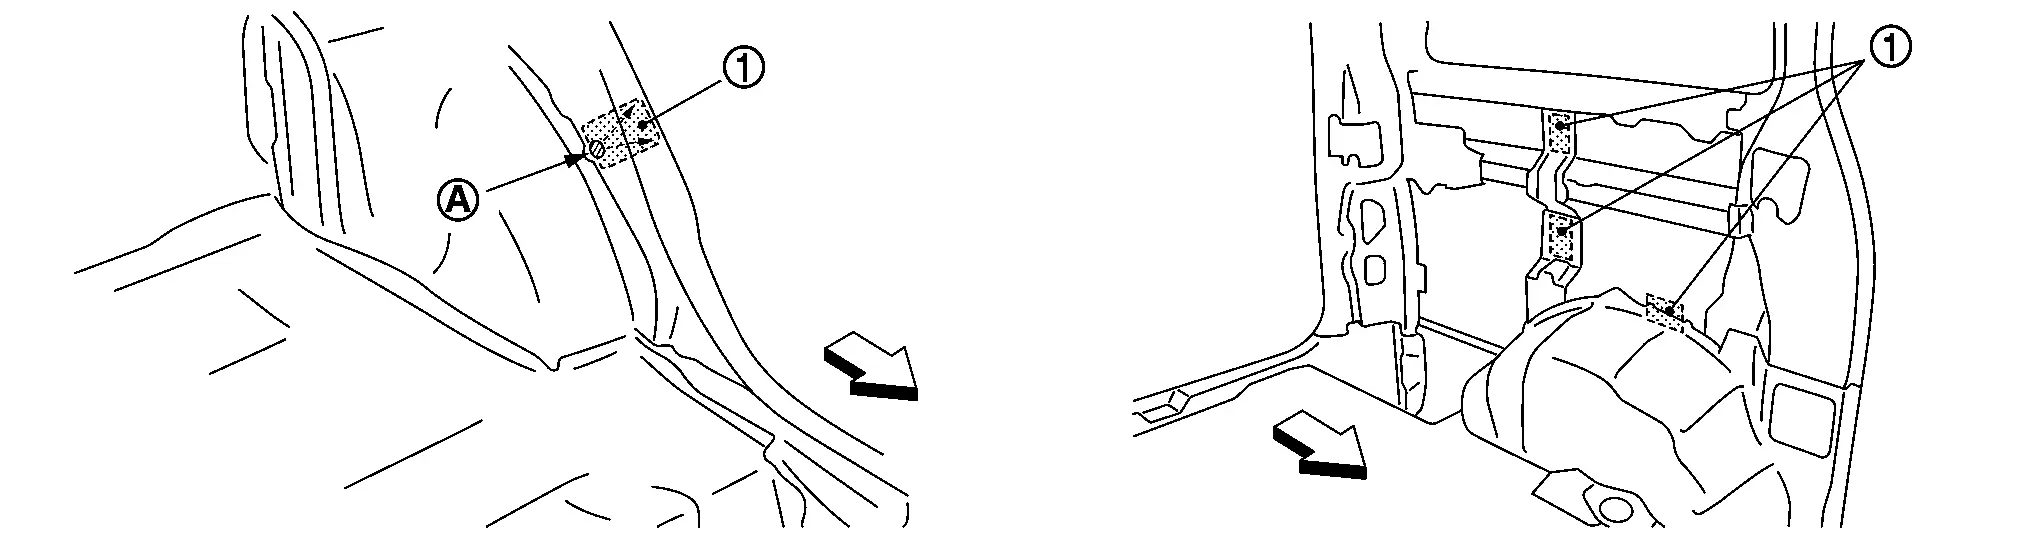
 |
Urethane foam |
 |
Nozzle insert hole |
| : vehicle front | |
Fill procedures before installation of service part.Eliminate foam material remaining on vehicle side. Clean area after eliminating foam insulator and foam material. Fill foam material on wheelhouse outer side.
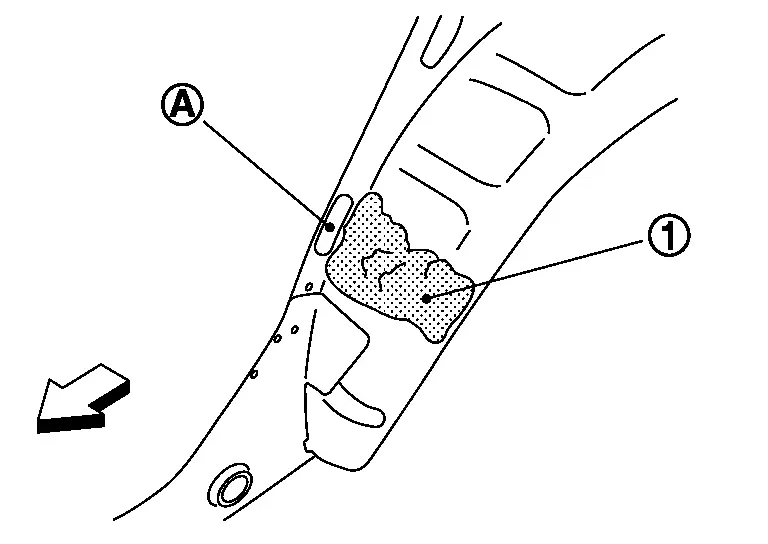
|
Urethane foam |
|
Fill while avoiding flange area |
| : vehicle front | |
 NOTE:
NOTE:
Fill enough to close gap with service part while avoiding flange area.
Install service part.NOTE:
Refer to label for information on working times.
Other materials
Brake fluid
Basic information
For detailed specifications regarding brake fluid for your Nissan Armada, refer
to the section "Capacities and recommended fluids/lubricants" in the official documentation.
Maintaining the correct brake fluid condition in the Nissan Armada is essential
for ensuring ...
Radiator Core Seal
Removal and Installation
REMOVALApply protective tape (A) on the part to protect it from damage.
Disengage radiator core seal fixing clips using a remover tool (A), and then remove radiator core seal .
: Clip
INSTALLATIONInstall in the reverse order of removal. ...
Front Door Parting Seal
Removal and Installation
REMOVALFront Door Parting Seal FrontFully open front door.
Apply protective tape (A) to front door panel around front door parting seal front for preventing damage.
Disengage fixing clips on the reverse side of front door parting seal front using a remover tool (A), and th ...