Rotation
WARNING:
-
Jacking up or lift up the vehicle may the vehicle height to go down which cause a personal injury and/or damage to the air suspension component parts. Refer to Precaution for when Jacking and Lifting Up the vehicle with Electronic Air Suspension System.
-
Follow the maintenance schedule for tire rotation service intervals. Refer to General Maintenance.
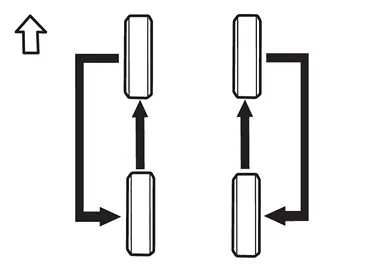
-
When installing the wheel, tighten wheel nuts to the specified torque. Refer to ROAD WHEEL TIRE : Exploded View.
CAUTION:
-
When installing wheels, tighten them diagonally by dividing the work two to three times in order to prevent the wheels from developing any distortion.
-
Be careful not to tighten wheel nut at torque exceeding the criteria.
-
Use NISSAN genuine wheel nuts for aluminum wheels.
-
-
Perform the ID registration, after tire rotation. Refer to Work Procedure.
Adjustment
WARNING:
-
Jacking up or lift up the vehicle may the vehicle height to go down which cause a personal injury and/or damage to the air suspension component parts. Refer to Precaution for when Jacking and Lifting Up the vehicle with Electronic Air Suspension System.
BALANCING WHEELS (BONDING WEIGHT TYPE)
Preparation Before Adjustment
Using releasing agent, remove double-faced adhesive tape from the road wheel.
CAUTION:
-
Be careful not to scratch the road wheel during removal.
-
After removing double-faced adhesive tape, wipe clean traces of releasing agent from the road wheel.
Wheel Balance Adjustment
-
If a tire balance machine has adhesion balance weight mode settings and drive-in weight mode setting, select and adjust a drive-in weight mode suitable for road wheels.
-
The details of the adjustment procedure are different for each model of wheel balancer. Therefore, refer to each instruction manual.
Set road wheel on tire balance machine using the center hole as a guide. Start the tire balance machine.
CAUTION:
-
Never install the inner balance weight before installing the outer balance weight.
-
Before installing the balance weight, always to clean the mating surface of the road wheel.
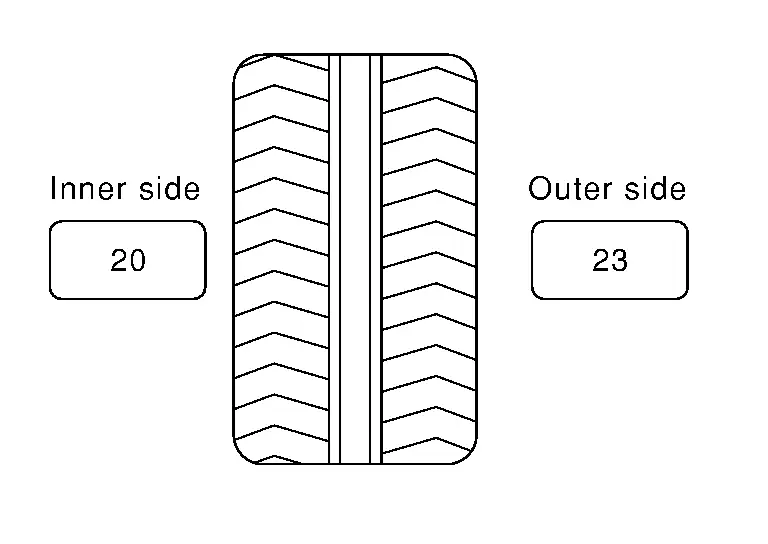
Calculation example:
23 g (0.81 oz) × 5/3 = 38.33 g (1.35 oz) ⇒ 37.5 g (1.32 oz) balance weight (closer to calculated balance weight value)
 NOTE:
NOTE:
Note that balance weight value must be closer to the calculated balance weight value.
Example:
36.2 ⇒ 35 g (1.23 oz)
36.3 ⇒ 37.5 g (1.32 oz)
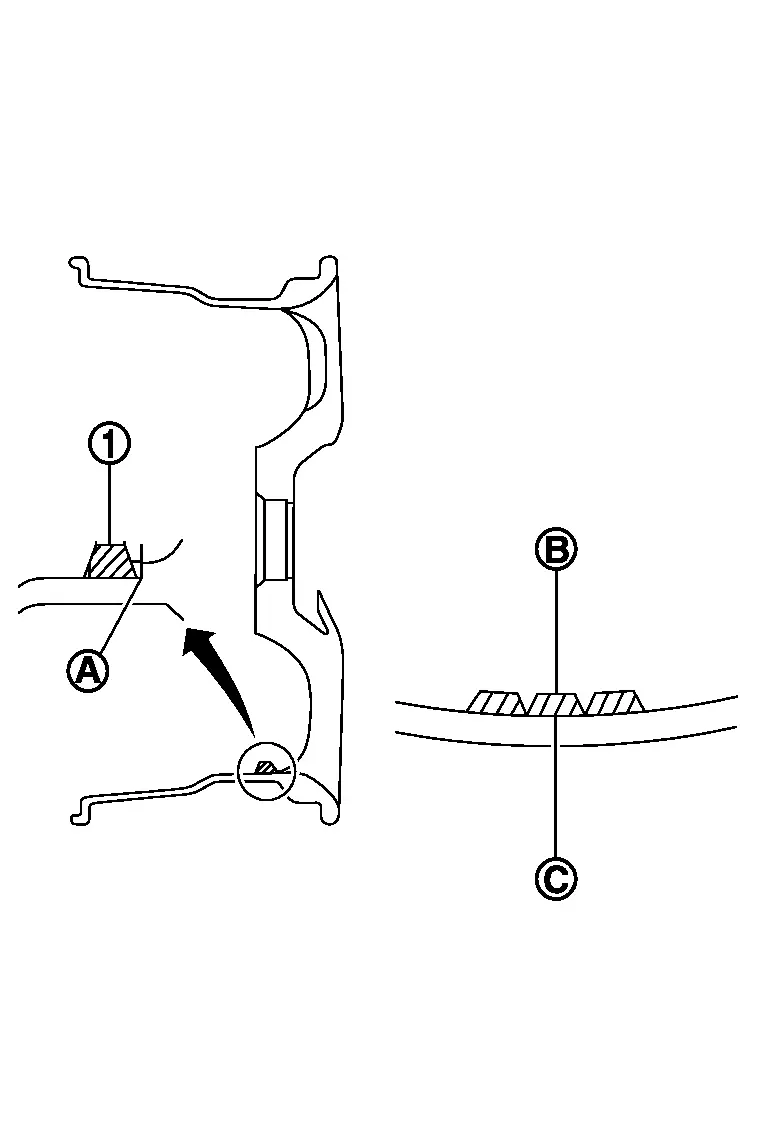
Installed balance weight in the position.-
When installing balance weight
 to road wheels, set it into the grooved area
  on the inner wall of the road wheel as shown in the figure so that the balance weight center
  is aligned with the tire balance machine indication position (angle)
  .
.
CAUTION:
-
Always use genuine NISSAN adhesion balance weights.
-
Balance weights are non-reusable; always replace with new ones.
-
Never install more than four sheets of balance weight.
-
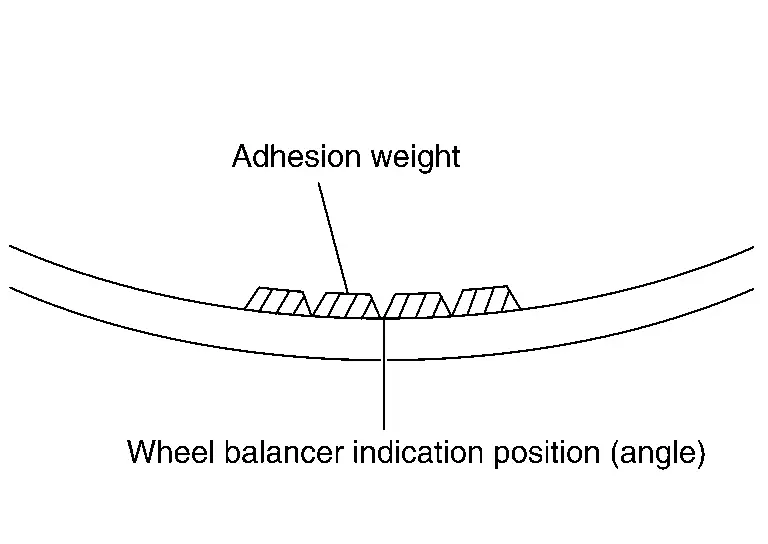
CAUTION:
Never install one balance weight sheet on top of another.
Start the tire balance machine again.
Install drive-in balance weight on inner side of road wheel in the tire balance machine indication position (angle).
CAUTION:
Never install more than two balance weight.
Start the tire balance machine. Check that the inner and outer residual unbalance value is within the allowable unbalance value.
CAUTION:
If either residual unbalance value exceeds limit, repeat installation procedures.
| Allowable unbalance value | |
| Dynamic (At flange) | : Refer to ROAD WHEEL : Service Data. |
| Static (At flange) | :Refer to ROAD WHEEL : Service Data. |
Other materials
Basic information
The Vehicle Dynamic Control (VDC) system in the Nissan Armada is an advanced
stability and traction management system that continuously monitors driver inputs
and vehicle behavior through multiple sensors. By analyzing steering input, wheel
speed, and vehicle motion, the Nissan Armada VDC syst ...
General Information Tools and Preparation
Special Service Tools
Tool number
Tool name Description
KV99112600
Crimping Pliers
Crimping terminals
Commercial Service Tools
Tool name Description
Industrial dryer
Heating heat shrinkable tube
Repair Parts
Part name Description
Harness repair kit
A: Heat shrinkable tube ...
Glass Mirror Position Cannot Be Adjusted
With Automatic Drive Positioner
Diagnosis Procedure
CHECK DOOR MIRROR MECHANISM
Check the following items.
Damage, deformation and foreign matter pinching of the door mirror mechanism.
Damage of harness due to rubbing and pinching.
Interference with other components.
Installed incorrectly.
...