Inspection
WARNING:
-
Jacking up or lift up the vehicle may the vehicle height to go down which cause a personal injury and/or damage to the air suspension component parts. Refer to Precaution for when Jacking and Lifting Up the vehicle with Electronic Air Suspension System.
BRAKE FLUID LEVEL
-
Check that the brake fluid level in the reservoir tank is within the standard (between MAX − MIN lines).
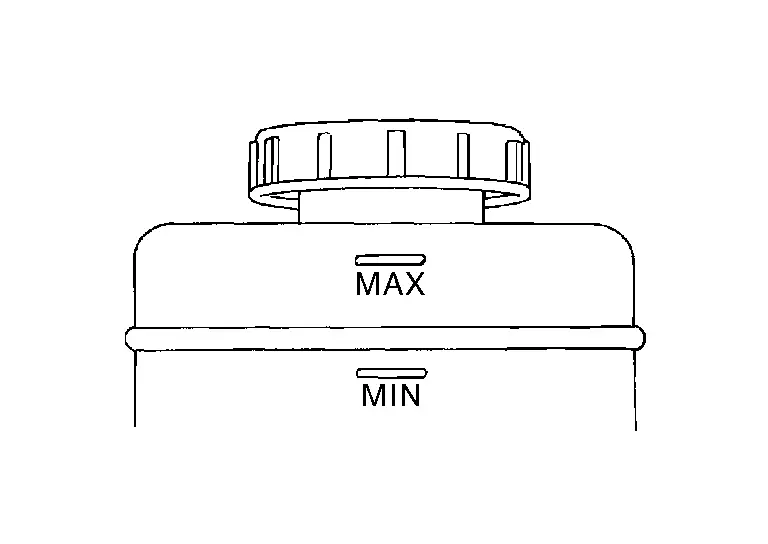
-
Visually check for any brake fluid leakage around the reservoir tank.
-
Check the brake system for any leakage if the fluid level is extremely low (lower than MIN).
-
Check the brake system for fluid leakage if the warning lamp remains illuminated even after the parking brake is released.
-
Check the reservoir tank for the mixing of foreign matter (e.g. dust) and oils other than brake fluid.
BRAKE LINE
Check brake line (tubes and hoses) for cracks, deterioration or other damage. Replace any damaged parts.
Depress the brake pedal with a force of 785 N (80 kg, 176 lb) and hold down the pedal for approximately 5 seconds with the engine running. Check for any fluid leakage.
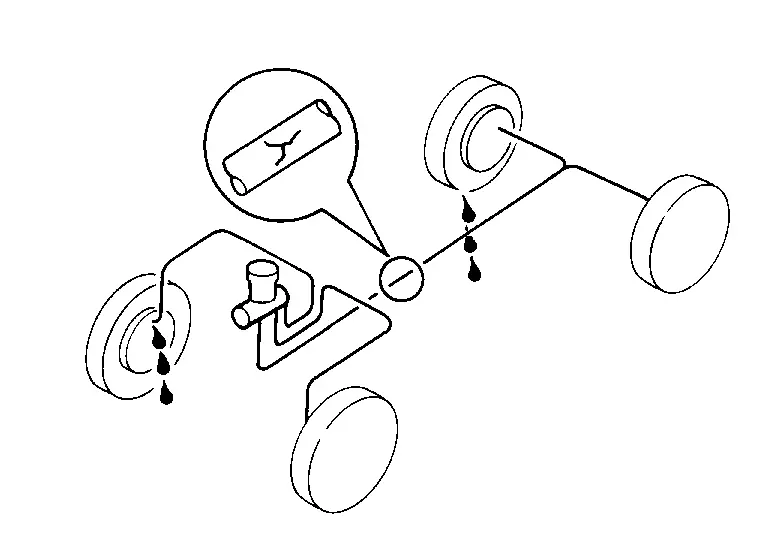
CAUTION:
Retighten the applicable connection to the specified torque and repair any abnormal (damaged, worn or deformed) part if any brake fluid leakage is present.
Draining
WARNING:
-
Jacking up or lift up the vehicle may the vehicle height to go down which cause a personal injury and/or damage to the air suspension component parts. Refer to Precaution for when Jacking and Lifting Up the vehicle with Electronic Air Suspension System.
IN CASE REPLACING OR REMOVING AND INSTALLING ELECTRICAL BRAKE CONTROL UNIT
Regarding brake fluid draining, refer to Work Procedure.
IN CASE NOT REPLACING OR REMOVING AND INSTALLING ELECTRICAL BRAKE CONTROL UNIT
CAUTION:
-
Never spill or splash brake fluid on painted surfaces. Brake fluid may seriously damage paint. Wipe it off immediately and wash with water if it gets on a painted surface.
-
The ignition switch OFF and disconnect the ABS actuator and electric unit (control unit) harness connector or the battery negative terminal before performing work.
Connect a vinyl tube to the bleed valve.
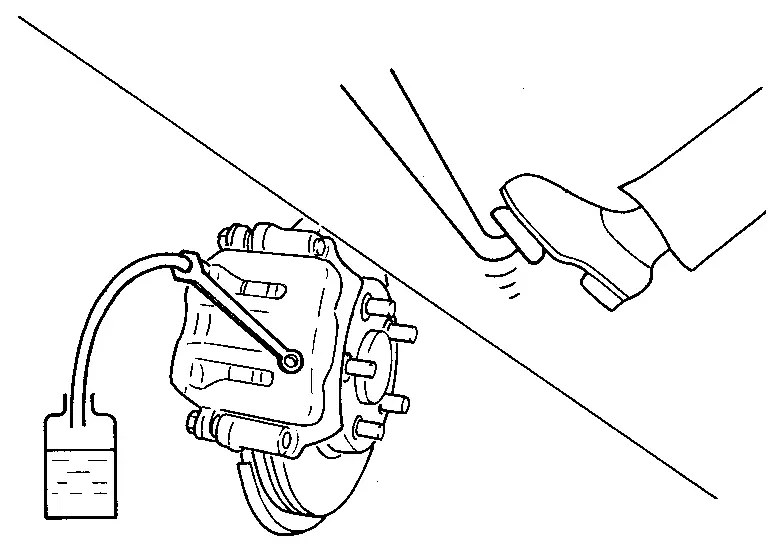
Depress the brake pedal and loosen the bleeder valve to gradually discharge brake fluid.
Refilling
WARNING:
-
Jacking up or lift up the vehicle may the vehicle height to go down which cause a personal injury and/or damage to the air suspension component parts. Refer to Precaution for when Jacking and Lifting Up the vehicle with Electronic Air Suspension System.
IN CASE REPLACING OR REMOVING AND INSTALLING ELECTRICAL BRAKE CONTROL UNIT
Regarding brake fluid draining, refer to Work Procedure.
IN CASE NOT REPLACING OR REMOVING AND INSTALLING ELECTRICAL BRAKE CONTROL UNIT
CAUTION:
-
The ignition switch OFF and disconnect the ABS actuator and electric unit (control unit) harness connector or the battery negative terminal before performing work.
-
Never spill or splash brake fluid on painted surfaces. Brake fluid may seriously damage paint. Wipe it off immediately and wash with water if it gets on a painted surface.
Check that there is no foreign material in the reservoir tank, and refill with new brake fluid.
CAUTION:
-
Never reuse drained brake fluid.
-
Never allow foreign matter (e.g. dust) and oils other than brake fluid to enter the reservoir tank.
Perform the air bleeding. Refer to Work Procedure.
Bleeding Brake System
WARNING:
-
Jacking up or lift up the vehicle may the vehicle height to go down which cause a personal injury and/or damage to the air suspension component parts. Refer to Precaution for when Jacking and Lifting Up the vehicle with Electronic Air Suspension System.
CAUTION:
Bleed the air using CONSULT. (Unable to bleed the air without using CONSULT)
Regarding brake fluid bleeding, refer to Work Procedure.
Other materials
Exterior front
The front exterior layout of the Nissan Armada highlights essential visibility,
lighting, and driver-assist components. These features contribute to improved driving
comfort, safety, and modern functionality expected from a full-size SUV like the
Nissan Armada.
Hood
Windshield wiper ...
Maximum Gross Vehicle Weight (GVW)/maximum Gross Axle Weight (GAW)
The total Gross Vehicle Weight (GVW) of your Nissan Armada must never exceed
the Gross Vehicle Weight Rating (GVWR) indicated on the F.M.V.S.S./C.M.V.S.S. certification
label.
GVW represents the combined weight of the Nissan Armada, including passengers,
cargo, luggage, hitch equipment, t ...
Driver Side Power Window Does Not Operate
Diagnosis Procedure
CHECK POWER WINDOW MAIN SWITCH POWER SUPPLY AND GROUND CIRCUIT
Check power window main switch power supply and ground circuit. Refer to Diagnosis Procedure.
Is the inspection result normal?
YES>>
GO TO 2.
NO>>
Repair or replace the malfunctioning parts.
CHECK FRONT ...