Work Procedure
If the front grille upper is removed or replaced, perform the simplified confirmation by birds-eye view screen.
CAUTION:
-
This procedure should only be performed if the front grille upper has been removed or replaced.
-
Perform camera calibration when removing or replacing each camera, removing the camera mounting parts (front bumper mall center, door mirror, etc.), or replacing the around view monitor control unit. Refer to Work Procedure.
TAKE A SCREENSHOT OF THE BIRDS-EYE VIEW SCREEN 1
-
Draw white lines with a width of 10 cm (3.9 in) or more as shown in the figure and place the vehicle.
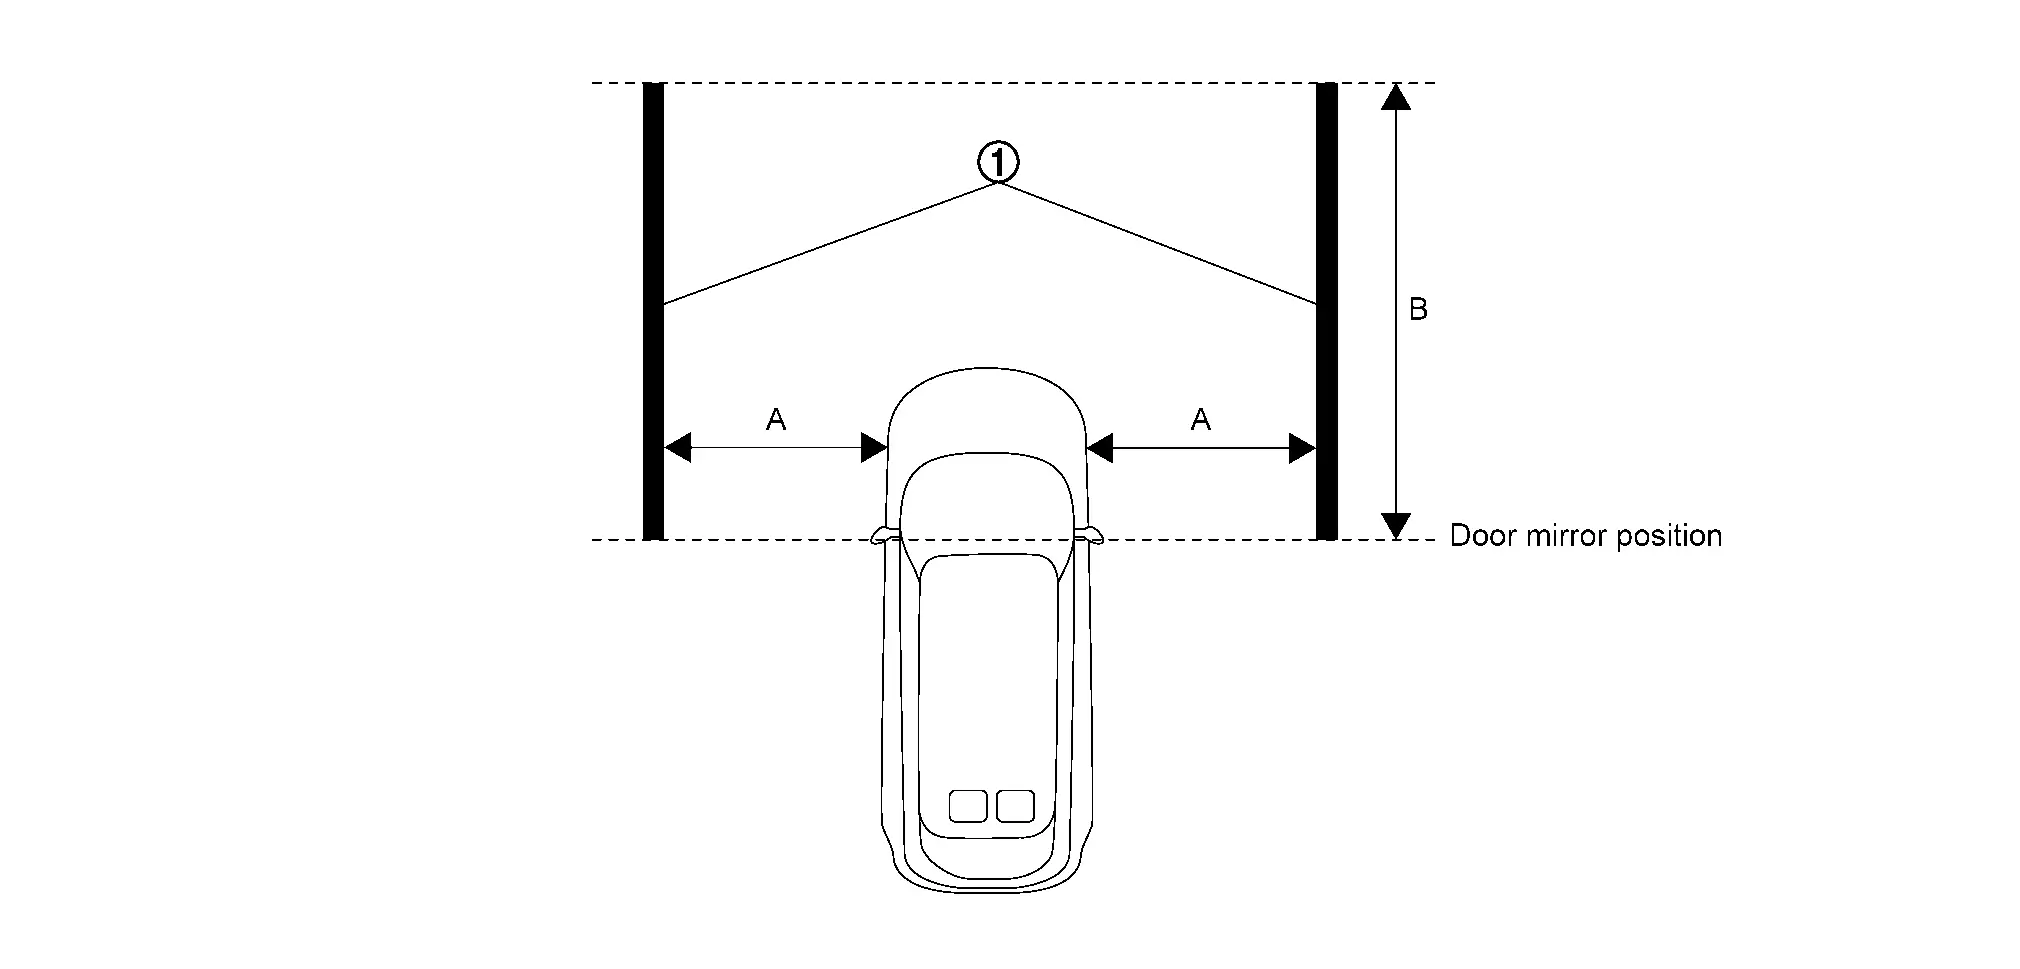

White lines
[10 cm (3.9 in) or more in width]A : 2 m (78.7 in) B : 3 m (118.1 in) -
Activate the around view monitor and display the birds-eye view screen.
-
Take a screenshot of the birds-eye view screen in the state shown in the figure.
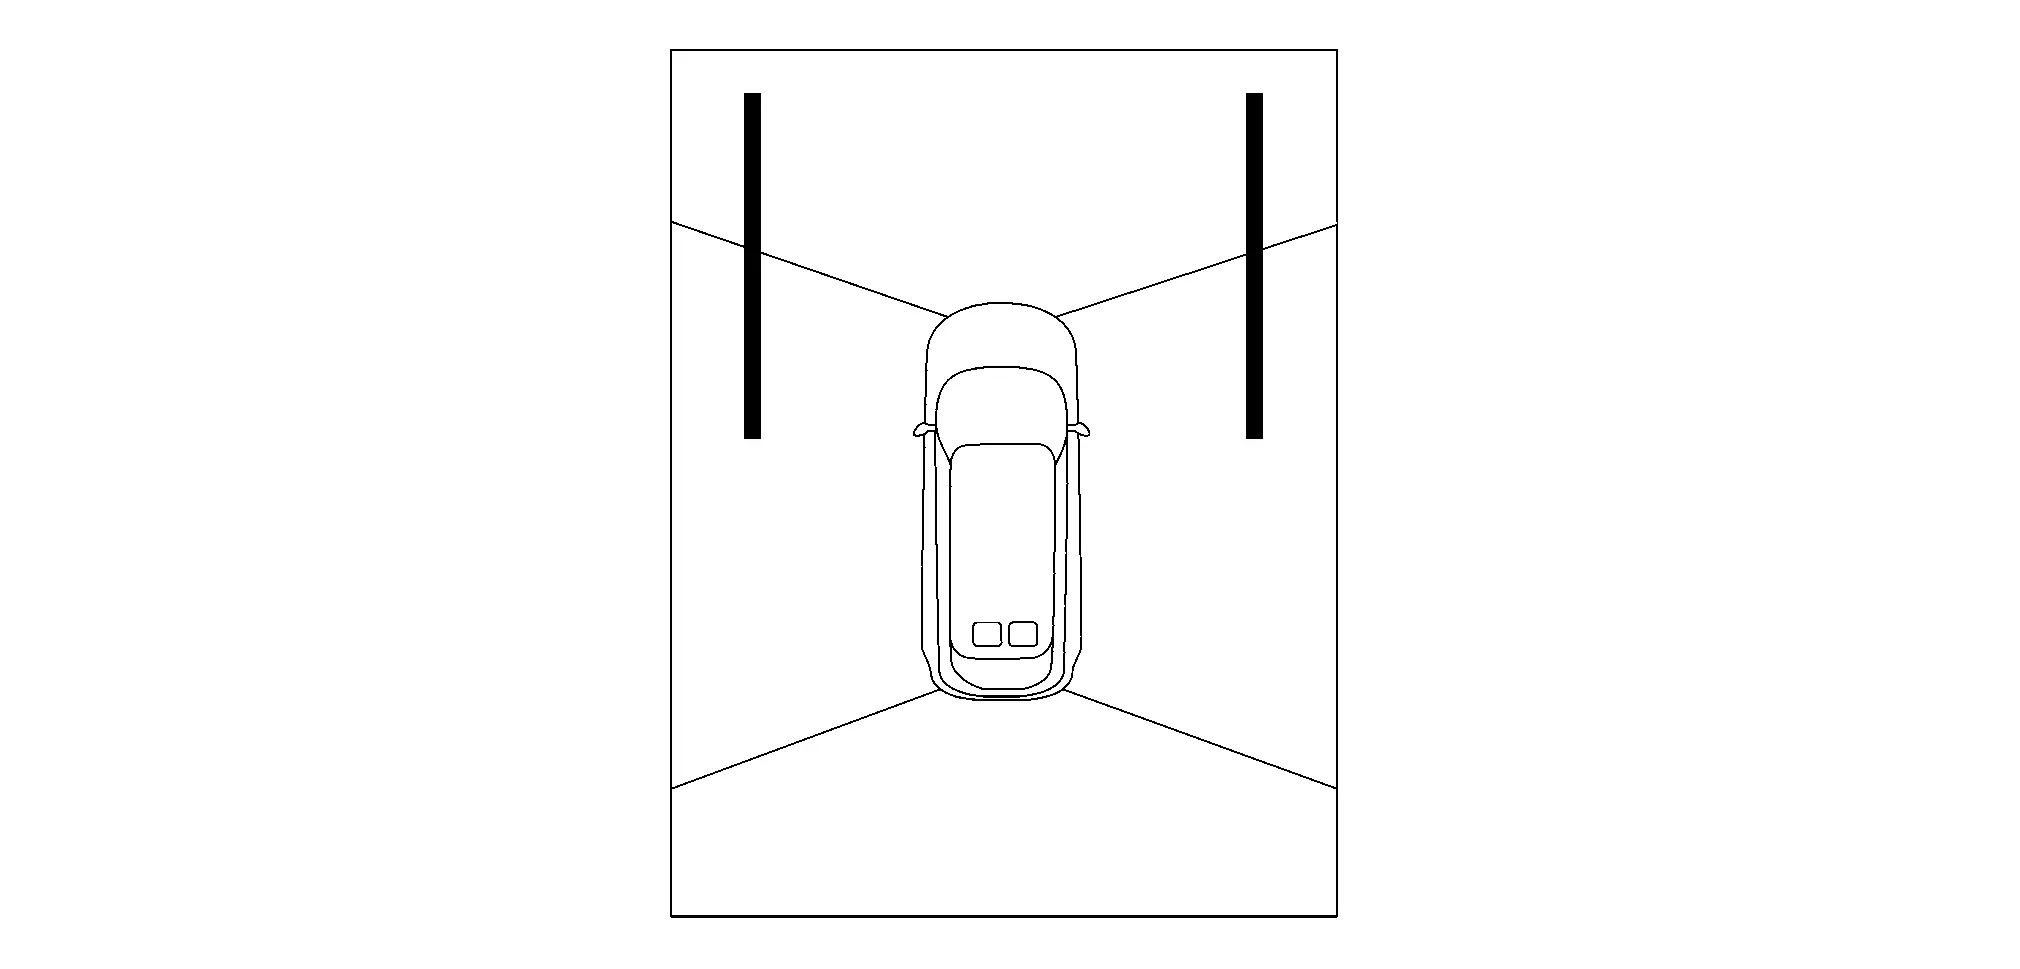
 NOTE:
NOTE:
A screenshot of the birds-eye view screen can be taken by following the steps below.
-
Insert the USB memory into the USB port.
NOTE:
Using a USB memory with an access lamp makes it easier to determine the communication status of the USB memory.
-
While pressing the camera switch, quickly turn the volume dial 3 clicks in the order of right→left→right (switches to system diagnostic mode).
-
Select “Display Diagnosis�.
-
Select “Screenshot to USB� and turn ON the screenshot.
-
Display the birds-eye view screen.
-
Press the camera switch.
-
Wait at least 10 seconds until the data is written to the USB memory.
-
>>
GO TO 2.
REMOVAL OR REPLACEMENT OF FRONT GRILL UPPER
Remove or replace the front grill upper. Refer to Removal and Installation.
>>
GO TO 3.
TAKE A SCREENSHOT OF THE BIRDS-EYE VIEW SCREEN 2
Take a screenshot of the birds-eye view screen again in the state of the figure.
>>
GO TO 4.
SCREENSHOT COMPARISON OF BIRDS-EYE VIEW SCREEN
Compare the screenshots of the birds-eye view screen before and after removing or replacing the front grill upper, and check if the white lines in the figure is misaligned.
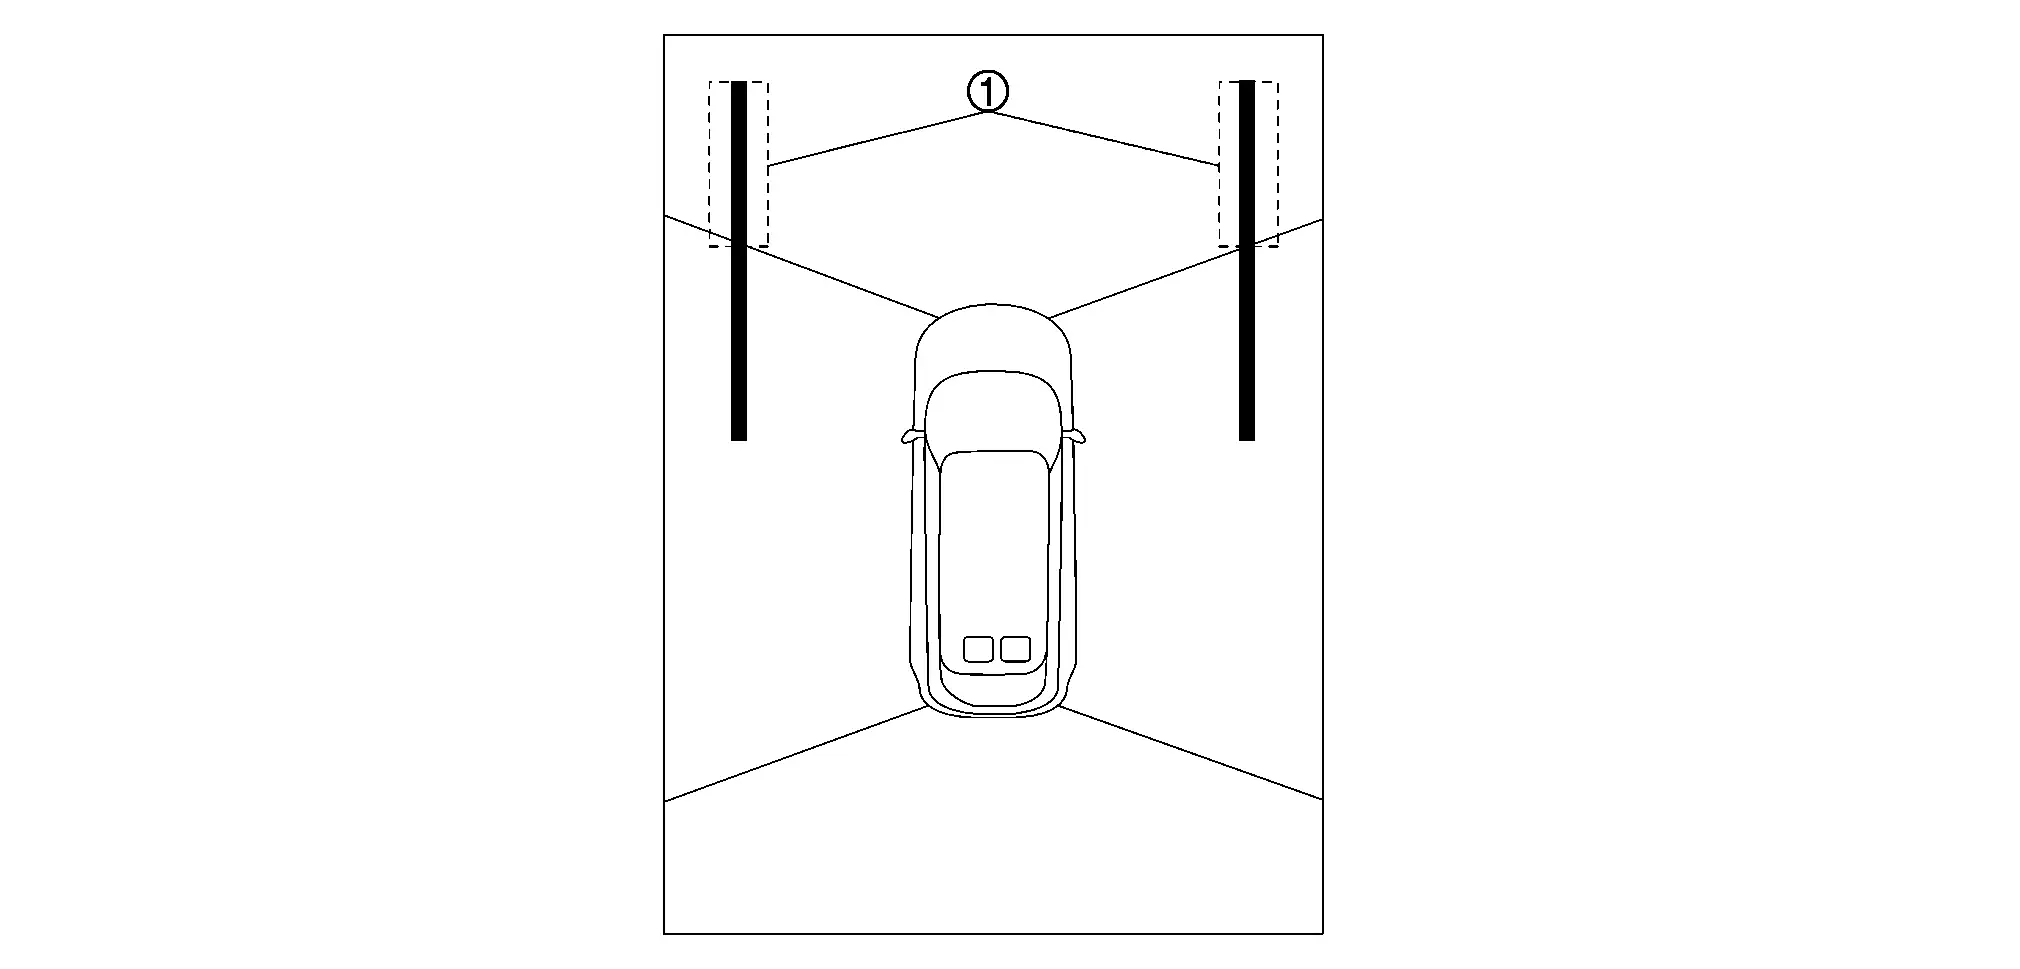
Is there a gap in the white lines?
YES>>Perform camera calibration. Refer to Work Procedure.
NO>>WORK END
Other materials
ProPILOT Assist mode indicators
Basic information
The Nissan Armada ProPILOT Assist system features multiple operating modes that
adapt dynamically to driving conditions. These modes are visually represented by
different colors, allowing the driver to quickly understand the current level of
assistance. As driving conditions ...
Towing safety
Trailer hitch
Your Nissan Armada is equipped with a factory-installed trailer towing package
designed to support reliable and safe towing operations.
This package includes a robust, frame-mounted receiver-type hitch that is engineered
to handle the maximum towing capacity of the Nissan Armada ...
Noise, Vibration and Harshness (nvh) Troubleshooting
NVH Troubleshooting Chart
2WD MODELSUse the chart below to find the cause of the symptom. If necessary, repair or replace these parts. Possible cause and SUSPECTED PARTS Symptom Reference
Steering
Noise Shake Vibration Shimmy Judder
Outer/ inner socket ball joint swinging force
×
— ...