Vr35ddtt
Exploded View
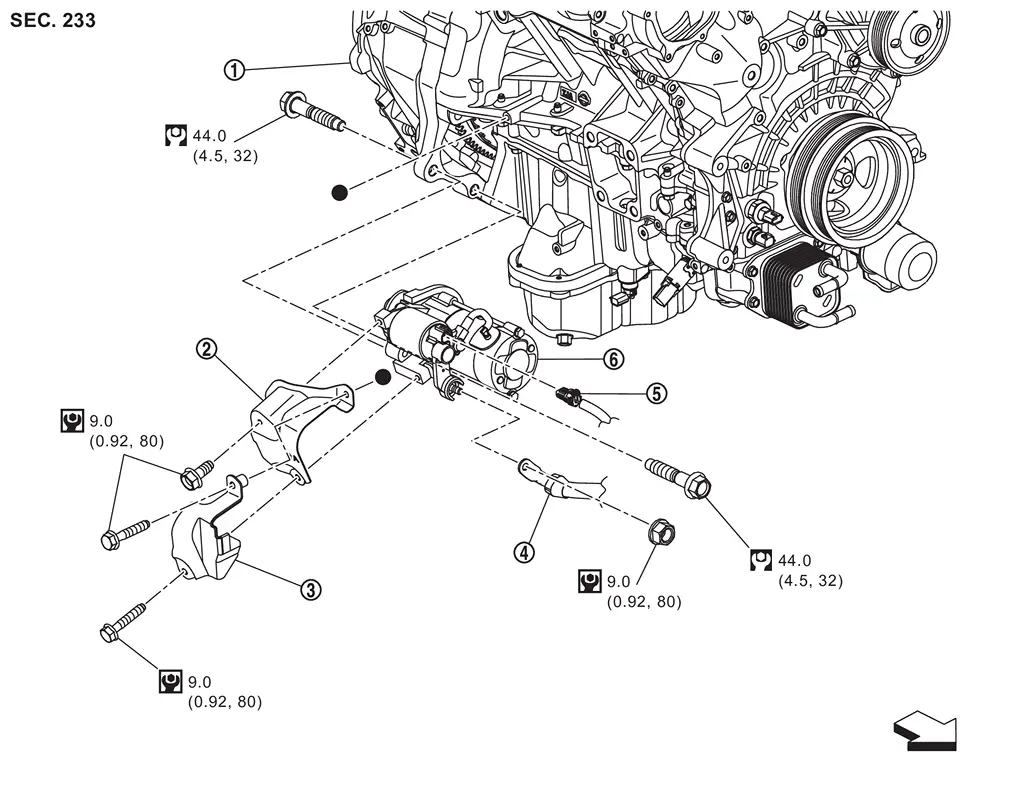
 |
Transmission housing |  |
Starter motor cover 1 |  |
Starter motor cover 2 |
 |
“B� terminal harness |  |
Starter motor harness connector |  |
Starter motor |
| : vehicle front | |||||
 |
: N·m (kg-m, in-lb) | ||||
 |
: N·m (kg-m, ft-lb) | ||||
 : Indicates that the part is connected at points with same symbol in actual vehicle. : Indicates that the part is connected at points with same symbol in actual vehicle. |
|||||
Removal and Installation
WARNING:
REMOVAL
Disconnect battery cable from negative terminal. Refer to Removal and Installation.
Remove engine under cover rear. Refer to Removal and Installation.
Remove front cross member. Refer to Removal and Installation.
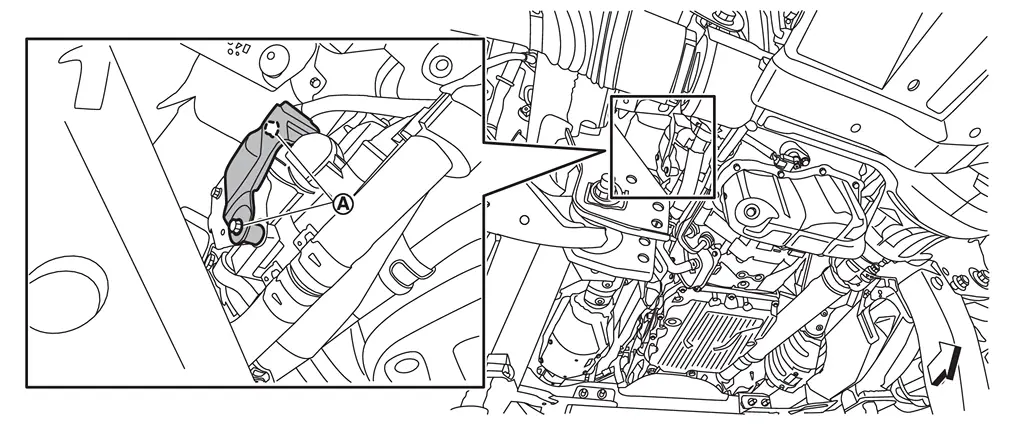
Remove starter motor cover 2 mounting bolts  , and then remove starter motor cover 2.
| : vehicle front |
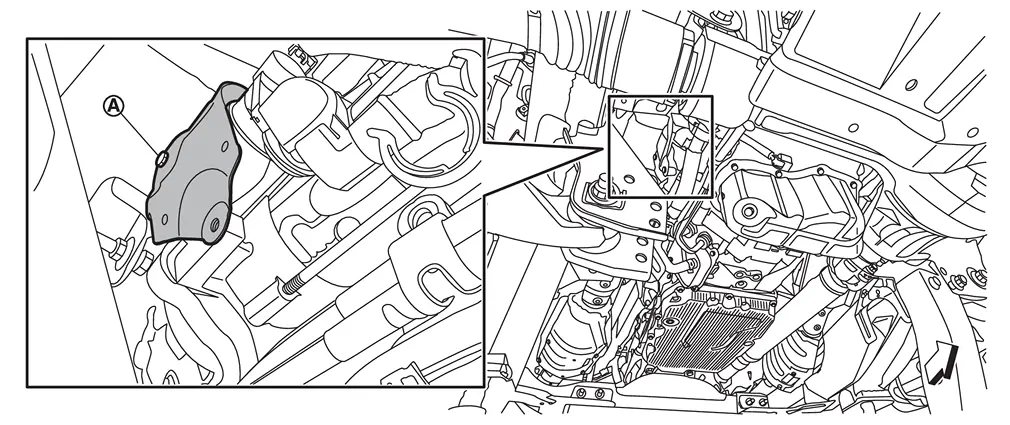
Remove starter motor cover 1 mounting bolt , and then remove starter motor cover 1.
| : vehicle front |
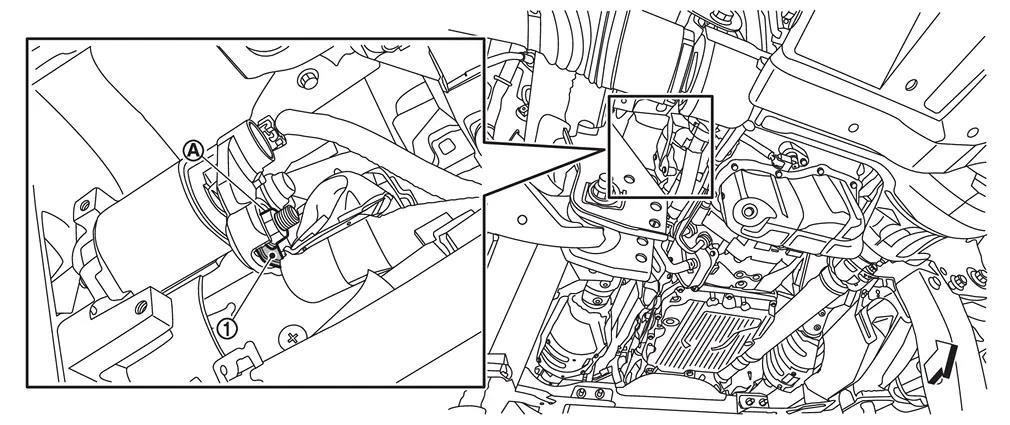
Remove "B" terminal harness mounting nut , and then disconnect "B" terminal harness .
| : vehicle front |
Disconnect starter motor harness connector .
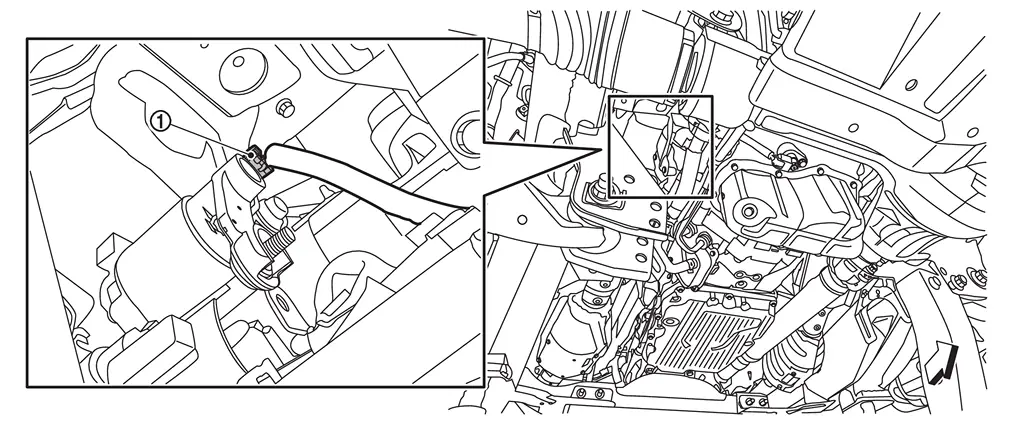
| : vehicle front |
Remove starter motor upper side mounting bolt .
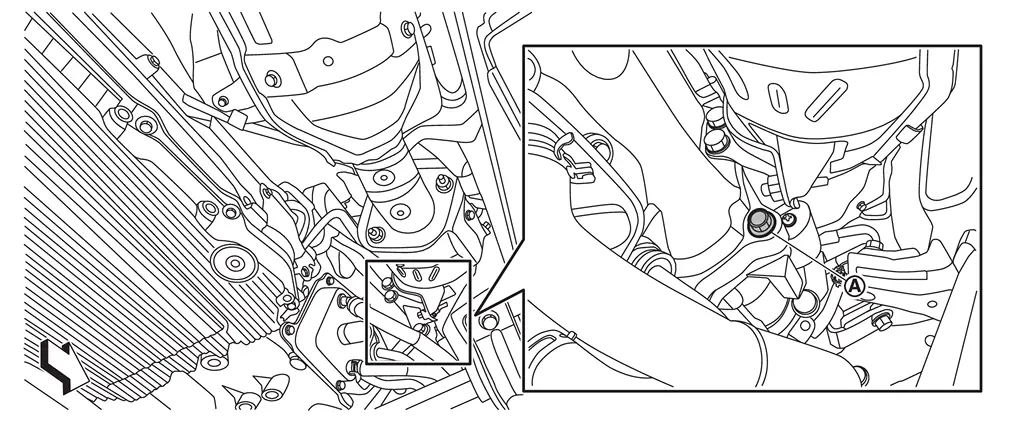
| : vehicle front |
Remove starter motor lower side mounting bolt .
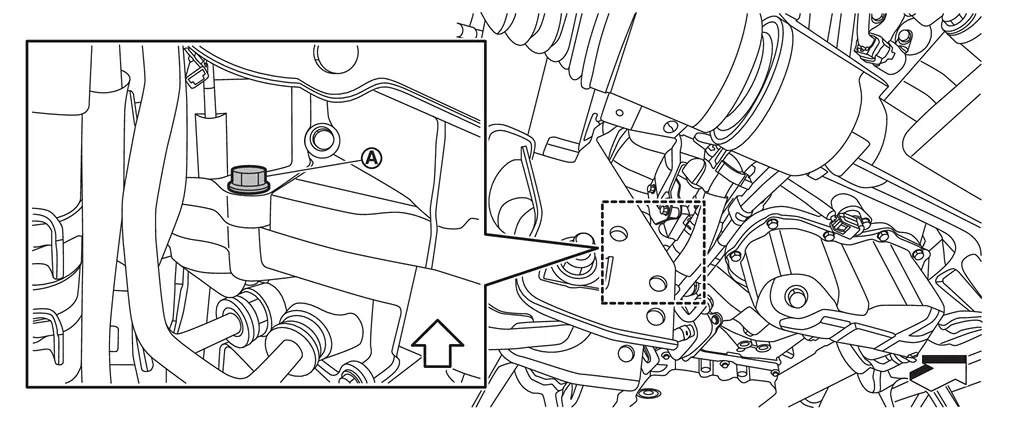
| : vehicle front |
Remove starter motor from vehicle.
CAUTION:
Never damage around the parts.
INSTALLATION
Note the following item, and then install in the reverse order of removal.
CAUTION:
Be careful to tighten “B� terminal harness mounting nut to the specified torque. Refer to Exploded View.
Inspection
MAGNETIC SWITCH
Remove starter motor from vehicle. Refer to Removal and Installation.
Connect 12V battery to starter motor as shown in the figure. Check that pinion gear is driven out by magnetic switch.
-
Replace starter motor if pinion gear is not driven out.
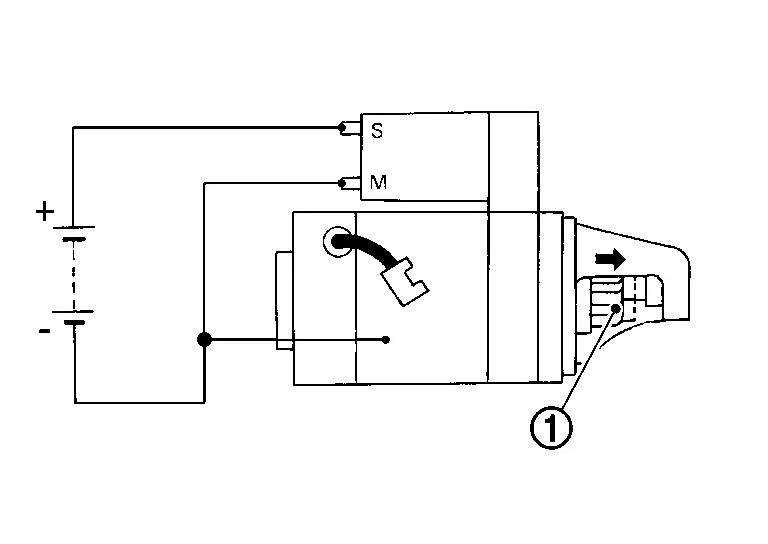
Disconnect “M� terminal as shown in the figure. Check that pinion gear does not return to original position.
-
Replace starter motor if pinion gear returns.
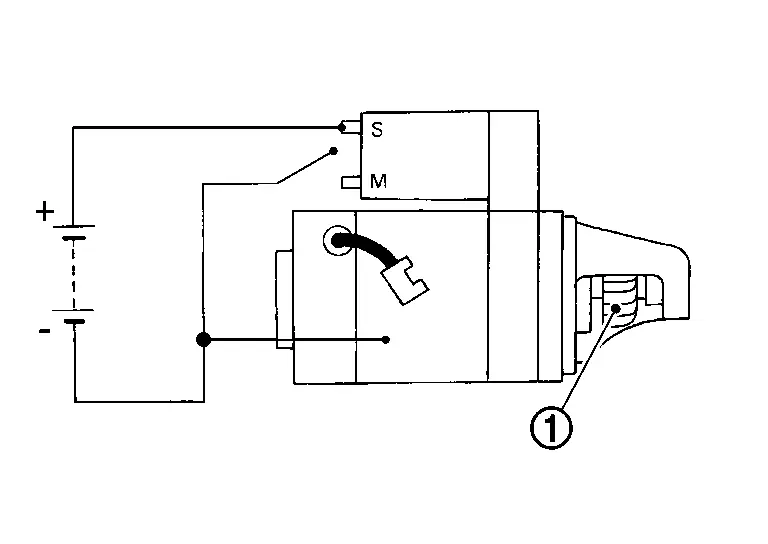
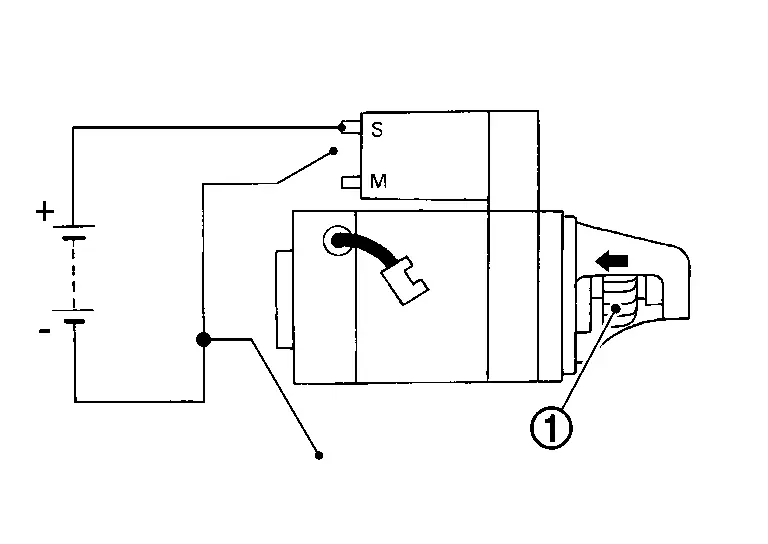
Disconnect (-) wire from starter motor body as shown in the figure. Check that pinion gear returns to original position.
-
Replace starter motor if pinion gear does not return.
PINION PROTRUSION LENGTH
With pinion gear driven out by magnetic switch, push pinion gear back to remove slack and measure the clearance “L� between the front edge of the pinion gear and the pinion stopper .
-
Replace starter motor if the measurement value is not within specifications.
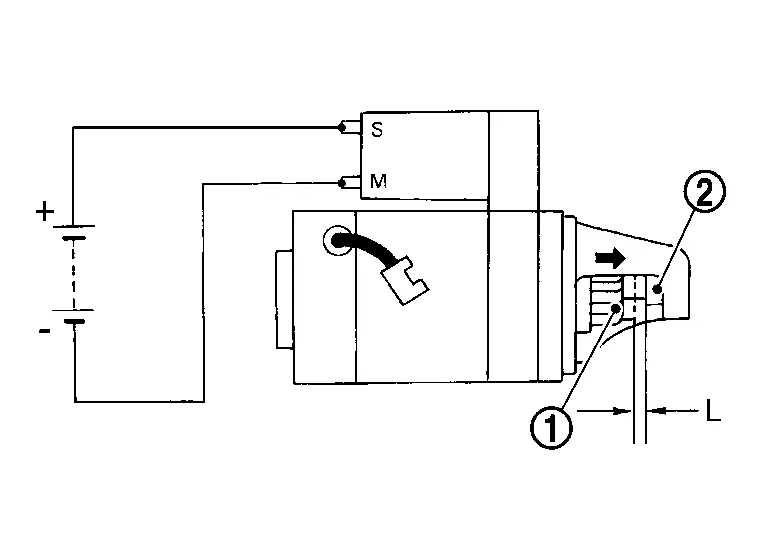
| Clearance “L� | : Refer to Starter Motor. |
PINION CLUTCH
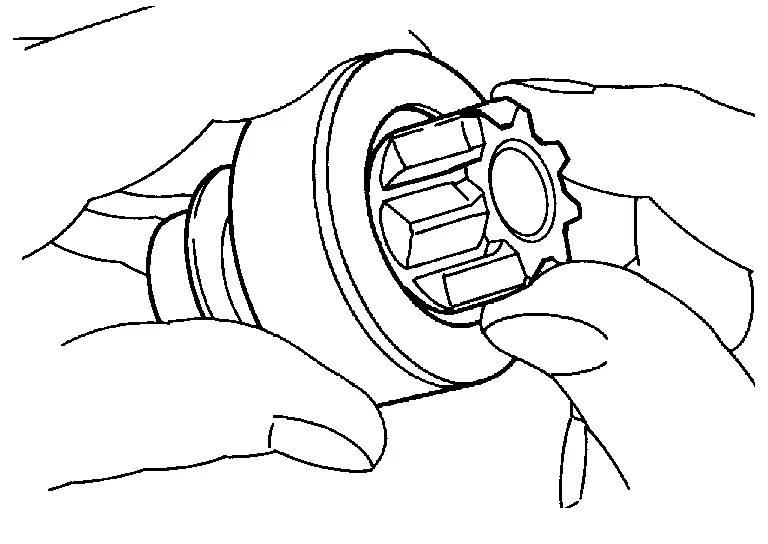
Check pinion gear teeth.
-
Replace starter motor if teeth are worn or damaged. (Also check condition of ring gear teeth.)
Check to see if pinion locks in one direction and rotates smoothly in the opposite direction.
-
Replace starter motor if pinion is locked, rotates in both directions or unusual resistance is evident.
NO-LOAD TEST
Remove starter motor from vehicle. Refer to Removal and Installation.
Connect 12V battery and ammeter to starter motor as shown in the figure. Check no load current with pinion gear driven out and starter motor operating.
-
Replace starter motor if the measurement value is not within specifications
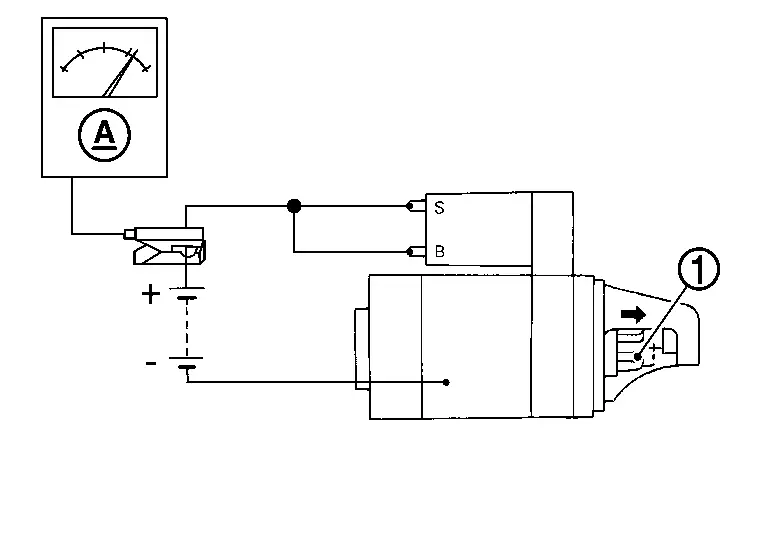
| No-load current | : Refer to Starter Motor. |
Other materials
Drive Belt
Exploded View
Idler pulley
Alternator
Drive belt auto-tensioner
Crankshaft pulley
A/C compressor
Water pump
Drive belt
A/C compressor belt
View
Indicator
Range when new drive belt is installed
Possible use range
Always replace after every ...
Rear Oil Seal
Exploded View
Transfer assembly
Rear oil seal
: vehicle front
: Always replace after every disassembly.
: Apply transfer fluid.
Removal and Installation
WARNING:
Jacking up or lift up the vehicle may the vehicle height to go down which cause a personal injury and/ ...
Steering Wheel
Exploded View
Steering wheel
: N·m (kg-m, ft-lb)
: Always replace after every disassembly.
Removal and Installation
REMOVALNOTE:
When reconnecting spiral cable, fix cable with a tape so that fixing case and rotating part keep ali ...