Disassembly and Assembly
DISASSEMBLY
Disengage seat cushion trim fixing retainers  .
.
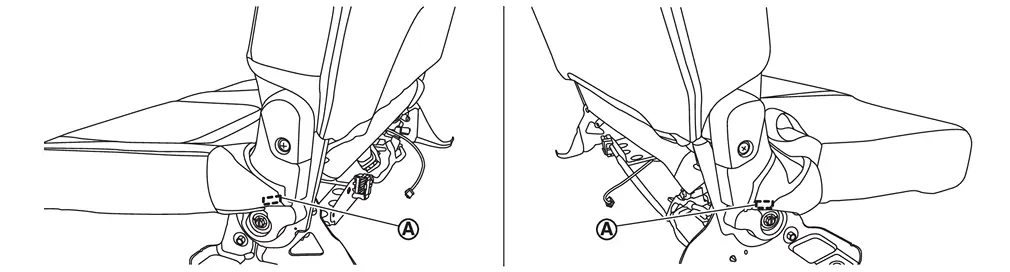
Remove hinge cover (LH and RH).Remove fixing screw .
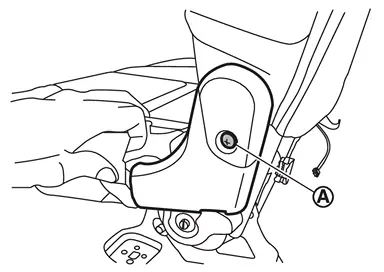
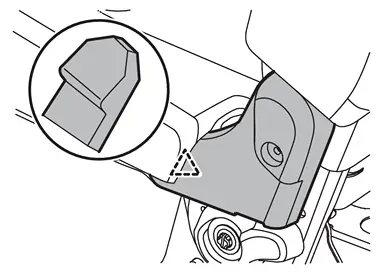
 |
: Pawl |
Remove seat cushion frame assembly mounting bolts .
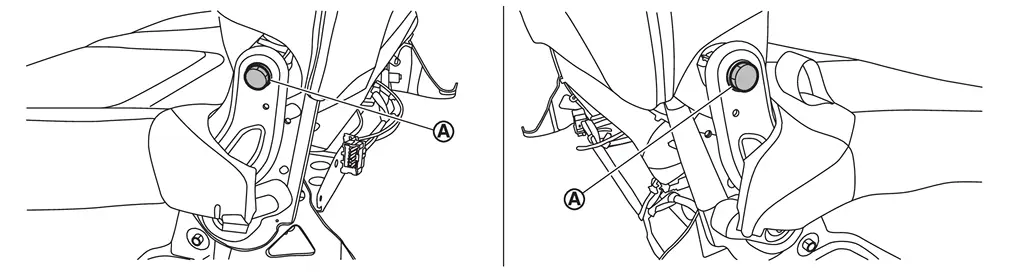
Remove bushes from seat cushion frame assembly.
Disengage harness fixing clips, and then disconnect harness connectors.
CAUTION:
Before performing removal operation, check the installation position of harness connectors and harness fixing clips.
Remove seat cushion frame assembly.
Disengage seat cushion trim fixing retainers .
-
LH seat
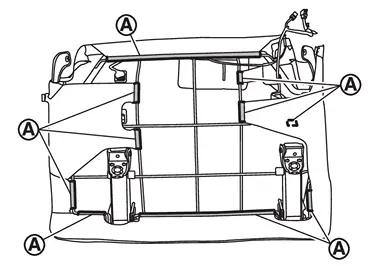
-
RH seat
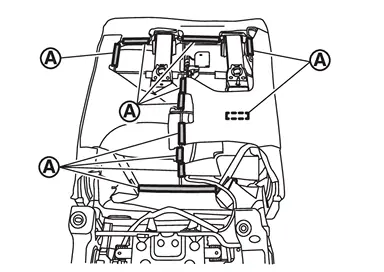
Remove seat cushion trim and pad as a set from seat cushion frame assembly.
Remove hog rings, and then separate seat cushion trim and pad.
CAUTION:
Before removing hog rings, check its position because it should be installation in position.
Remove seat buzzer from seat cushion frame assembly (power RH seat). Refer to Removal and Installation.
ASSEMBLY
Note the following items, and then assemble in the reverse order of disassembly.
CAUTION:
-
Always install hog ring in position.
-
Never reuse hog ring after disassembly, using new hog ring.
-
Use new hog ring if removed or crimped unsuccessfully.
-
Never reuse seatback frame assembly mounting bolts after disassembly, replace with new bolts.
-
Be installed harnesses and harness fixing clips in position.
-
If harnesses clip be broken, replace with new clip and it install in position where marked before removing clip.
Other materials
How to activate/deactivate the automatic brake hold function
To enable the automatic brake hold feature in your Nissan Armada, ensure the
ignition switch is in the ON position, then press the automatic brake hold switch
1. Once activated, the indicator light on the switch 2 will illuminate, confirming
that the system is ready for operation.
When ...
Front Oil Seal
Exploded View
Front output shaft
Front oil seal
Front case
Snap ring
Sprockets with chain
Snap ring
Rear case
: Always replace after every disassembly.
: N·m (kg-m, ft-lb)
: Apply transfer fluid.
: Apply Genuine Liquid Gasket, Lo ...
Tcu
Exploded View
Steering member
Bracket
TCU
: Pawl
Removal & Installation
REMOVALCAUTION:
Before replacing TCU, perform “ADDITIONAL SERVICE WHEN REPLACING TCU". For details, refer to Work Procedure.Remove the glove box assembly. Refer to Removal and I ...