Exploded View
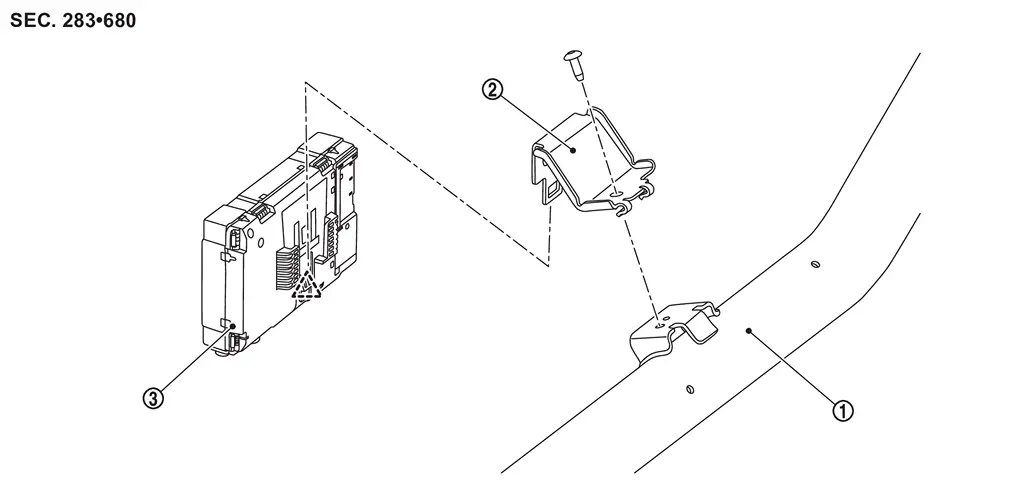
 |
Steering member |  |
Bracket |  |
TCU |
 |
: Pawl |
Removal & Installation
REMOVAL
CAUTION:
Before replacing TCU, perform “ADDITIONAL SERVICE WHEN REPLACING TCU". For details, refer to Work Procedure.
Remove the glove box assembly. Refer to Removal and Installation.
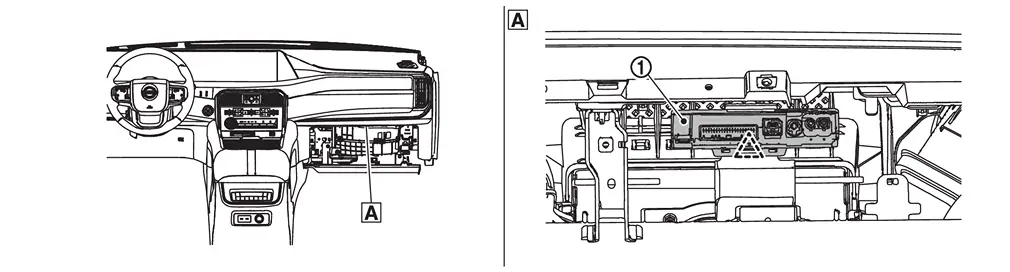
 |
Behind of glove box (View from below) |
|
TCU |
|
: Pawl |
Disconnect the TCU harness connectors.
Press the pawl  to release the lock.
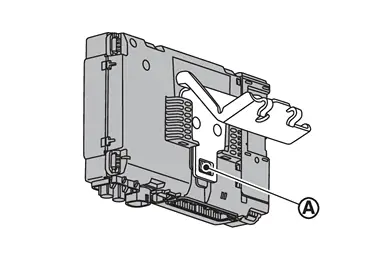
Press the pawl and slide the TCU in the arrow direction shown to remove the TCU from the bracket.
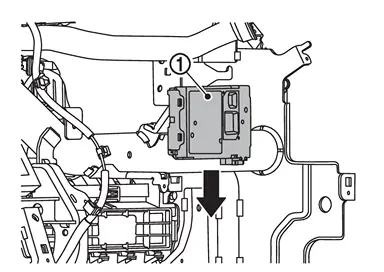
 NOTE:
NOTE:
To remove the bracket, remove the instrument panel assembly.
INSTALLATION
Installation is in the reverse order of removal.
CAUTION:
After replacing TCU, perform “ADDITIONAL SERVICE WHEN REPLACING TCU". For details, refer to Work Procedure.
Other materials
Types of tires
Basic information
WARNING
When replacing tires on your Nissan Armada, always ensure that all four
tires are identical in type (for example: Summer, All Season, or Snow) as well
as in construction.
Using mismatched tires can negatively impact vehicle stability, handling,
and safety ...
Rear Washer Nozzle and Tube
Exploded View
Rear washer nozzle
Rear washer nozzle tube
Connector
Rear washer tube C
Grommet
Connector
Rear washer tube B assembly*1
Rear washer tube A
Tube protector
Washer tank assembly
Intelligent rear view mirror harness B assembly*2
: Clip
...
Diagnosis and Repair Work Flow
Work Flow
OVERALL SEQUENCEDETAILED FLOWINTERVIEW FOR MALFUNCTION
Interview the symptom to the customer.
>>
GO TO 2.
SYMPTOM CHECK
Check the symptom from the customer's information.
>>
GO TO 3.
FAIL-SAFE ACTIVATION CHECK
Check that the symptom is applied to the fail-safe activation.
D ...