Exploded View
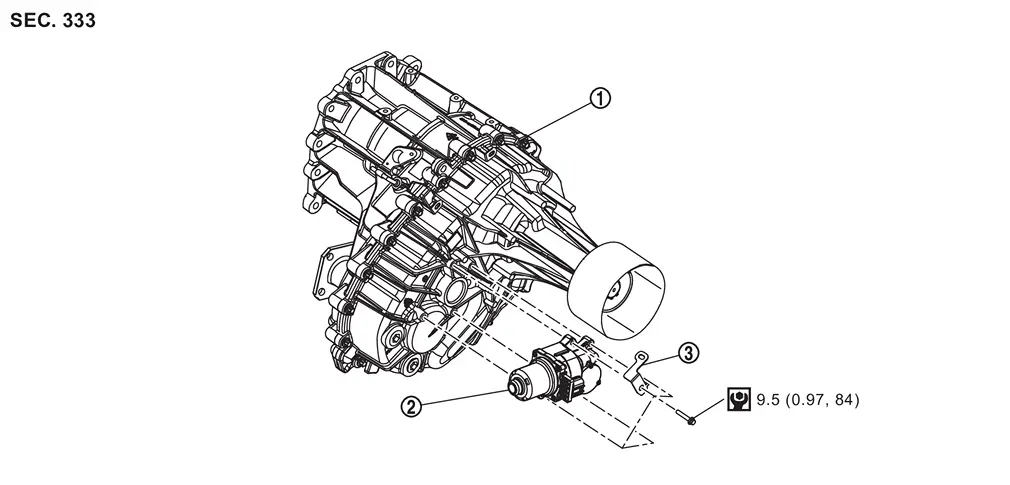
 |
Transfer assembly |  |
Transfer control actuator |  |
bracket |
 |
: N·m (kg-m, in-lb) |
Removal and Installation
WARNING:
-
Jacking up or lift up the vehicle may the vehicle height to go down which cause a personal injury and/or damage to the air suspension component parts. Refer to Precaution for when Jacking and Lifting Up the vehicle with Electronic Air Suspension System.
REMOVAL
The ignition switch OFF.
CAUTION:
Wait for 60 seconds after the ignition switch OFF.
Disconnect negative battery terminal. Refer to Removal and Installation
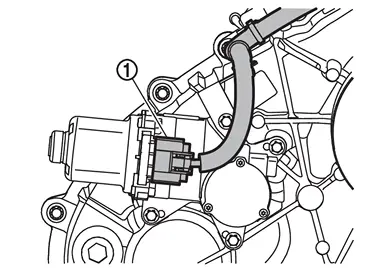
Disconnect the transfer control actuator connector .
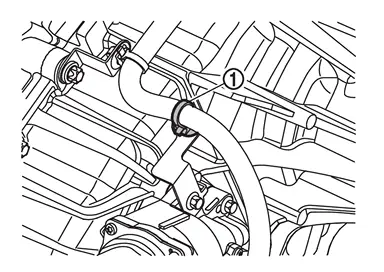
Remove harness clip .
Remove transfer control actuator mounting bolt ( ) and remove bracket .
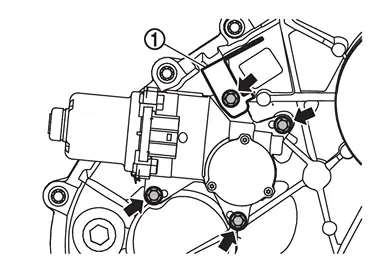
Remove transfer control actuator .
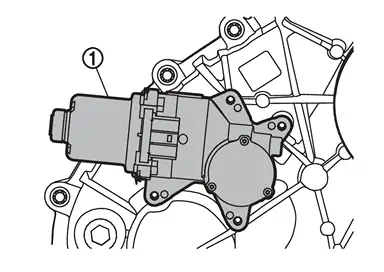
INSTALLATION
Note the following, and install in the reverse order of removal.
-
Never damage oil seal of transfer control actuator.
-
Never contaminate or damage the oil seal mounting surface.
-
Perform inspection after installation. Refer to Inspection.
Inspection
INSPECTION AFTER REMOVAL
Check the oil seal assembled transfer control actuator for wear, crack and damage. Replace if there is malfunction.
Check the transfer assembly as follows.Install the suitable tool (A) to transfer assembly as shown in the figure.
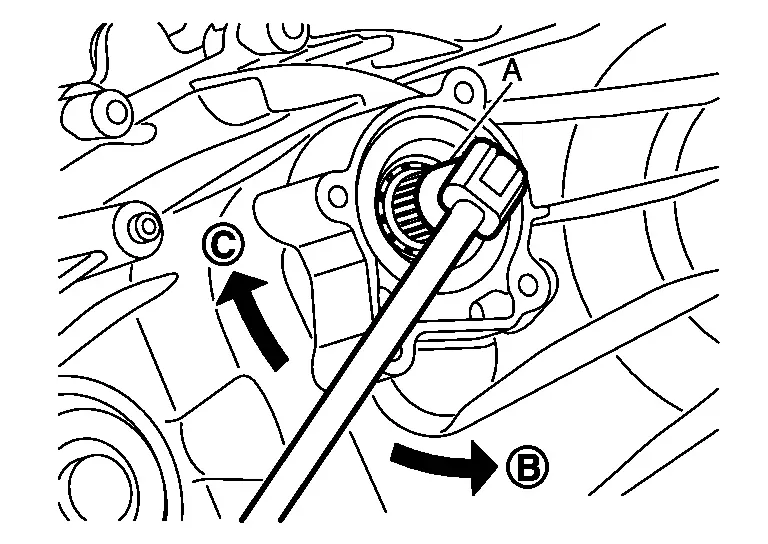
 , check returning to direction
  by spring power.
CAUTION:
The maximum turning force shall be 5 N·m (0.51 kg-m, 44 in-lb).
When turn the shaft in direction, check locking the shaft. INSPECTION AFTER INSTALLATION
After driving, check the surface fitting transfer control actuator to transfer assembly for fluid leakage.
ADJUSTMENT AFTER INSTALLATION
When replacing transfer control actuator, performe writing unit parameter. Refer to Description.
Other materials
Warning/indicator lights (yellow)
Anti-lock Braking System (ABS) warning light
or
In the Nissan Armada, the Anti-lock Braking System (ABS) warning light is an
essential diagnostic indicator that confirms the proper operation of the braking
assistance system. When the ignition switch is turned to the ON position, this li ...
Engine Assembly
Exploded View
Engine mounting bracket (RH)
Engine mounting insulator (RH)
Stopper bracket (RH)
Engine mounting bracket (LH)
Engine mounting insulator (LH)
Stopper bracket (LH)
Engine mounting insulator (rear)
Comply with the assembly procedure wh ...
Front Tweeter
Removal & Installation
REMOVALRemove the front door sash inner cover. Refer to Removal and Installation.
Remove the front tweeter mounting screws , and then remove front tweeter .
INSTALLATIONInstallation is the reverse order of removal. ...