Exploded View
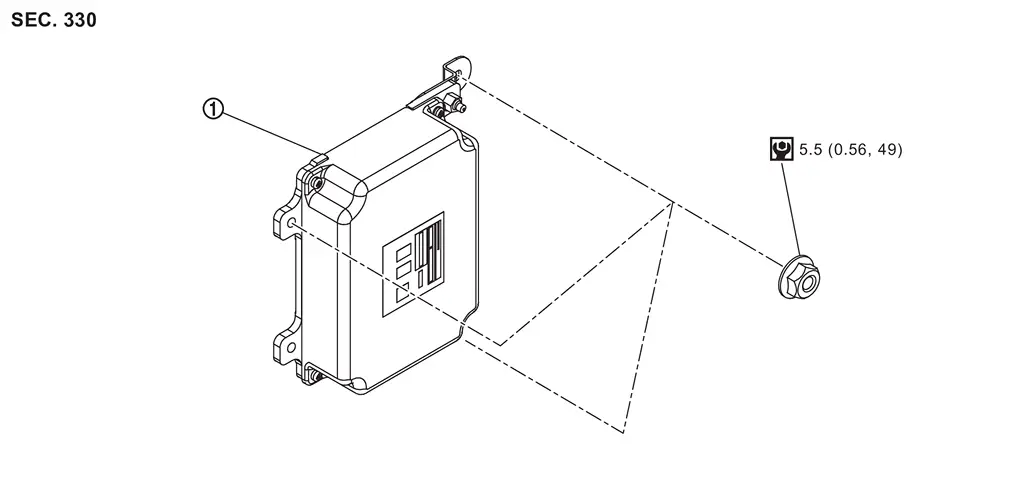
 |
Transfer control unit | ||||
 |
: N·m (kg-m, in-lb) |
Removal and Installation
WARNING:
-
Jacking up or lift up the vehicle may the vehicle height to go down which cause a personal injury and/or damage to the air suspension component parts. Refer to Precaution for when Jacking and Lifting Up the vehicle with Electronic Air Suspension System.
REMOVAL
The ignition switch OFF.
CAUTION:
Wait for 60 seconds after the ignition switch OFF.
Disconnect negative battery terminal. Refer to Removal and Installation.
Remove glove box cover. Refer to Removal and Installation.
Disconnect transfer control unit harness connector.
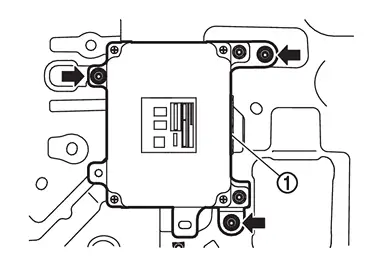
Remove transfer control unit bracket mounting nuts ( ) and remove transfer control unit with bracket.
INSTALLATION
Note the following, and install in the reverse order of removal.
-
When replacing transfer control unit, performe writing unit parameter and intial calibration. Refer to Description.
Other materials
Basic information
Drive Mode Selector (example)
Vehicle information display (example)
The Nissan Armada features a versatile Drive Mode Selector system that allows
the driver to tailor vehicle performance to different driving conditions. By rotating
the selector dial to the left or right, you can quickl ...
Third Power Seat System
Symptom Table
Symptom Possible causeInspection item
All function does not operate
Fusible link
Fuse
Third seat control unit power supply/ground circuit
Check power supply and ground circuit (third seat control unit)
Third seat control unit RH: Refer to Diagnosis Procedure.
Third seat control u ...
Automatic Back Door Close Switch Assembly
Removal and Installation
REMOVALRemove automatic back door switch finisher. Refer to Removal and Installation.
Disengage automatic back door close switch assembly fixing pawls using a remover tool (A), and then remove automatic back door close switch assembly from automatic back door switch finishe ...